
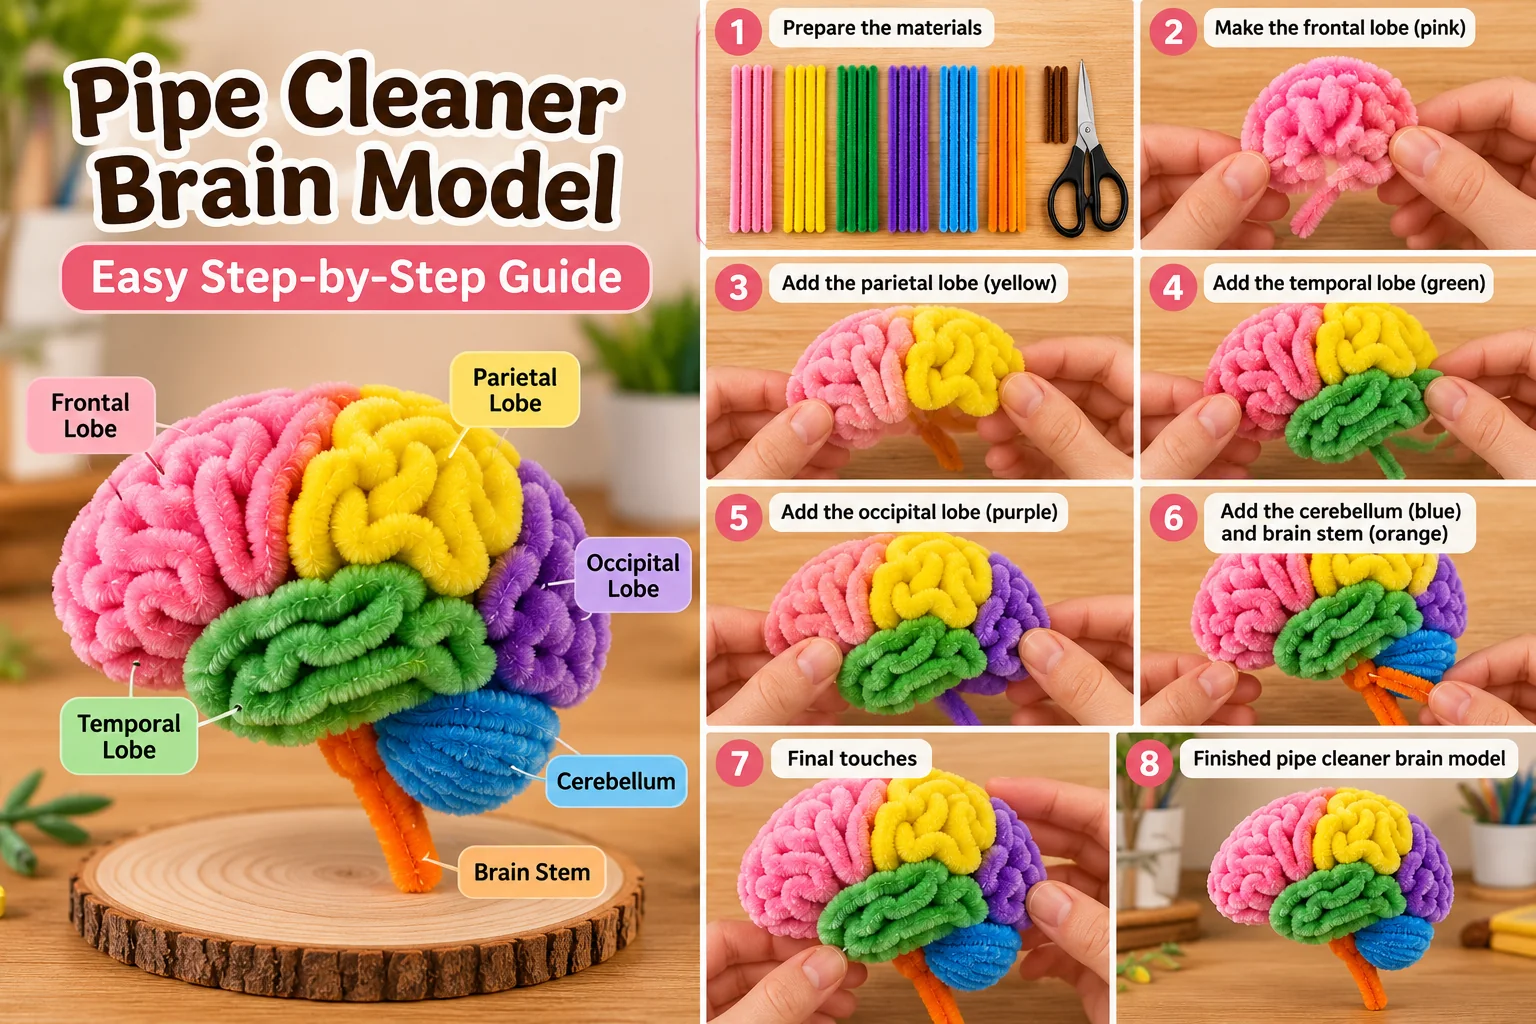
A pipe cleaner brain model is a hands-on anatomy craft made by coiling and shaping different colors of chenille stems to represent major visible regions of the brain. For a simple school project, build the left and right cerebral halves first, use different colors to distinguish the frontal, parietal, temporal and occipital areas, then add a smaller cerebellum and a short brainstem underneath.
Pipe Cleaner Brain Model: Quick Project Overview
This project is designed as a simplified craft model rather than a medically exact replica. Its main advantage is that the colored sections are easy to see, reshape and label. If you are new to bending chenille stems, practice a few coils and curves first with our pipe cleaner shapes guide.
Materials for a Pipe Cleaner Brain Model
- 20 to 30 standard chenille stems in several colors
- Extra stems for connecting the sections
- Small paper labels or index-card pieces
- Marker or pen for labels
- Scissors only if trimming is necessary, with adult supervision for children
Choose one color for each region before you begin. Keeping the color key consistent makes the finished school model much easier to explain.
How to Make a Brain Model With Pipe Cleaners
Step 1: Build the basic cerebral shape
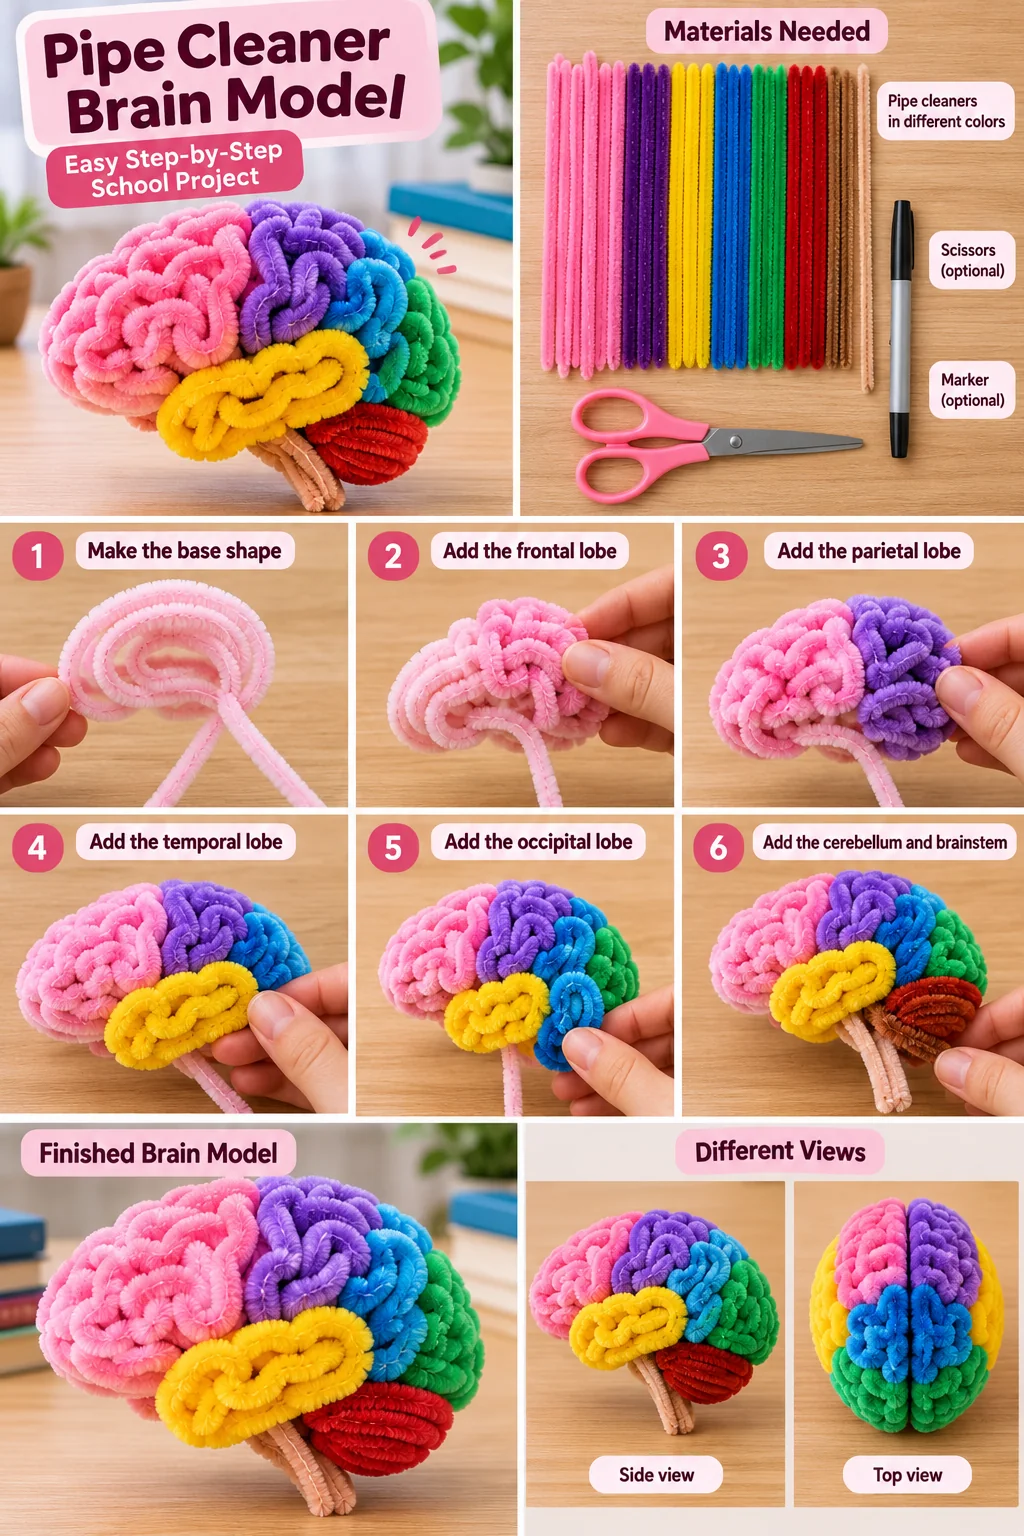
Coil several pipe cleaners into loose, irregular curves rather than perfect circles. Connect the curves with short twists so they form a rounded half-brain shape. Repeat for the opposite side. Keep both halves similar in overall size.
Step 2: Shape the frontal area
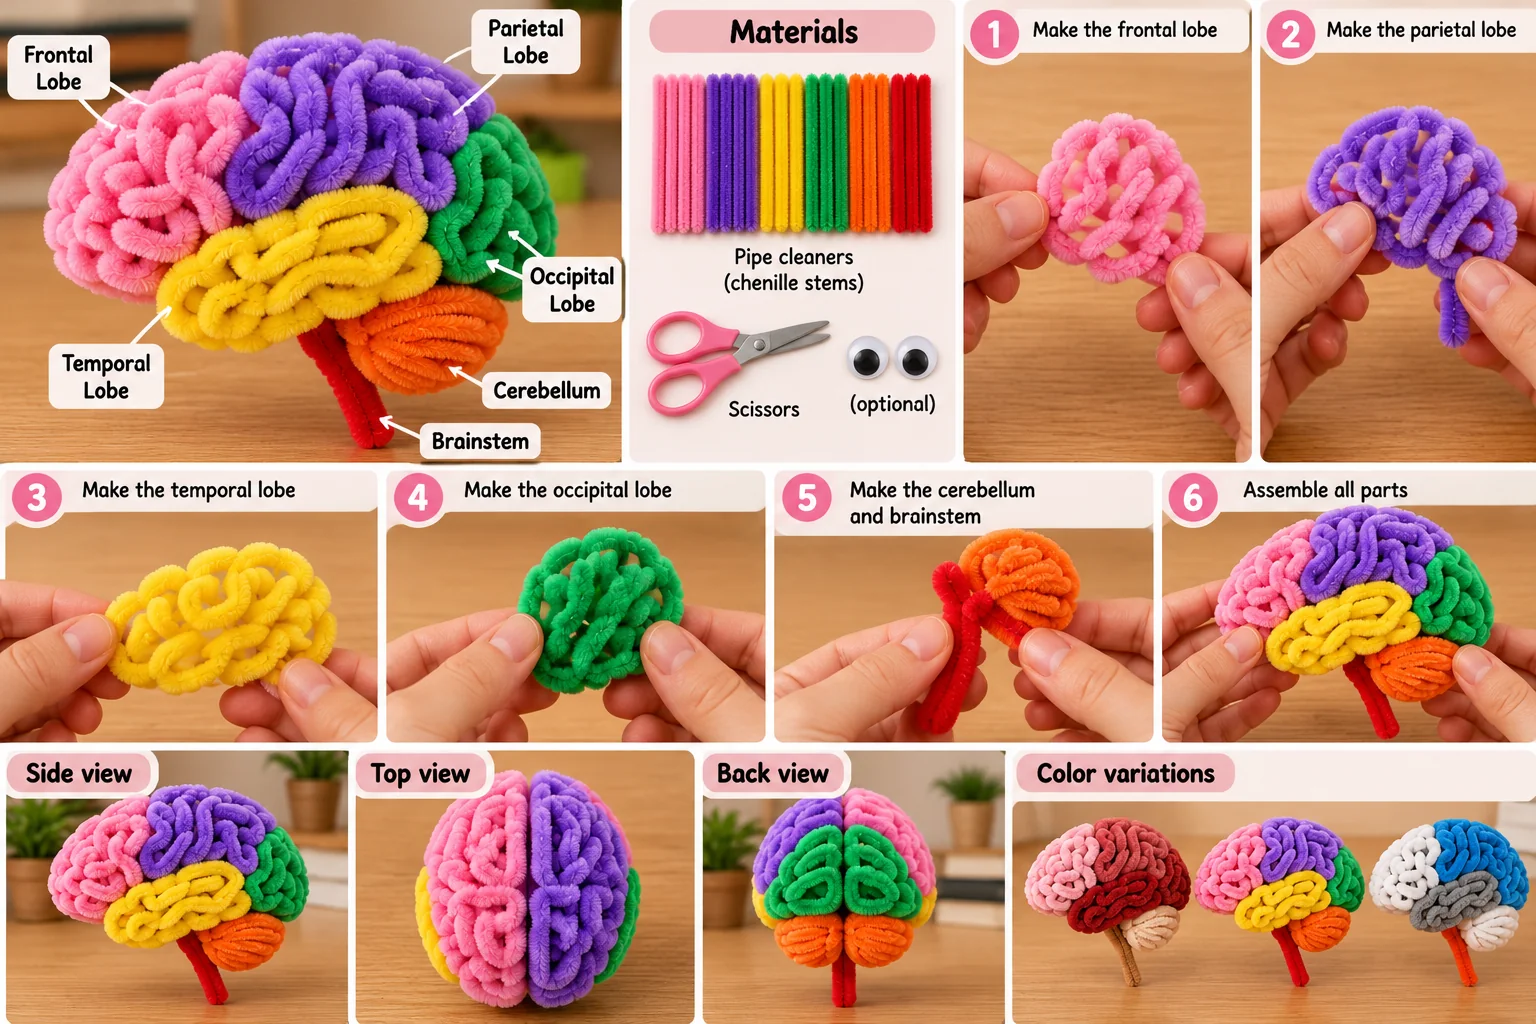
Use your first color at the front of each cerebral half. Bend the stems into compact loops and gentle waves, then twist their ends into the supporting structure. Keep the surface textured rather than flat.
Step 3: Add the parietal area
Place a second color behind and above the frontal section. Build more curved loops and attach them closely enough that the sections read as one continuous model while remaining visually distinct.
Step 4: Add the temporal area
Use a third color along the lower side of each cerebral half. Make elongated coils that follow the lower contour. Secure the ends underneath so the attachment points are less visible.
Step 5: Add the occipital area
Fill the back of the cerebral shape with a fourth color. Curve the stems around the rear edge and tuck their ends inward. Check the model from the side and top to make sure the overall outline stays rounded.
Step 6: Make the cerebellum
Create a smaller rounded bundle of tightly folded or coiled stems. Position it below the back of the larger cerebral portion. A contrasting color helps students identify it quickly.
Step 7: Add the brainstem
Fold one or two stems into a short, narrow structure extending downward beneath the model. Twist the upper end securely into the underside of the main structure and fold any sharp wire tip inward.
Step 8: Join, shape and label the model
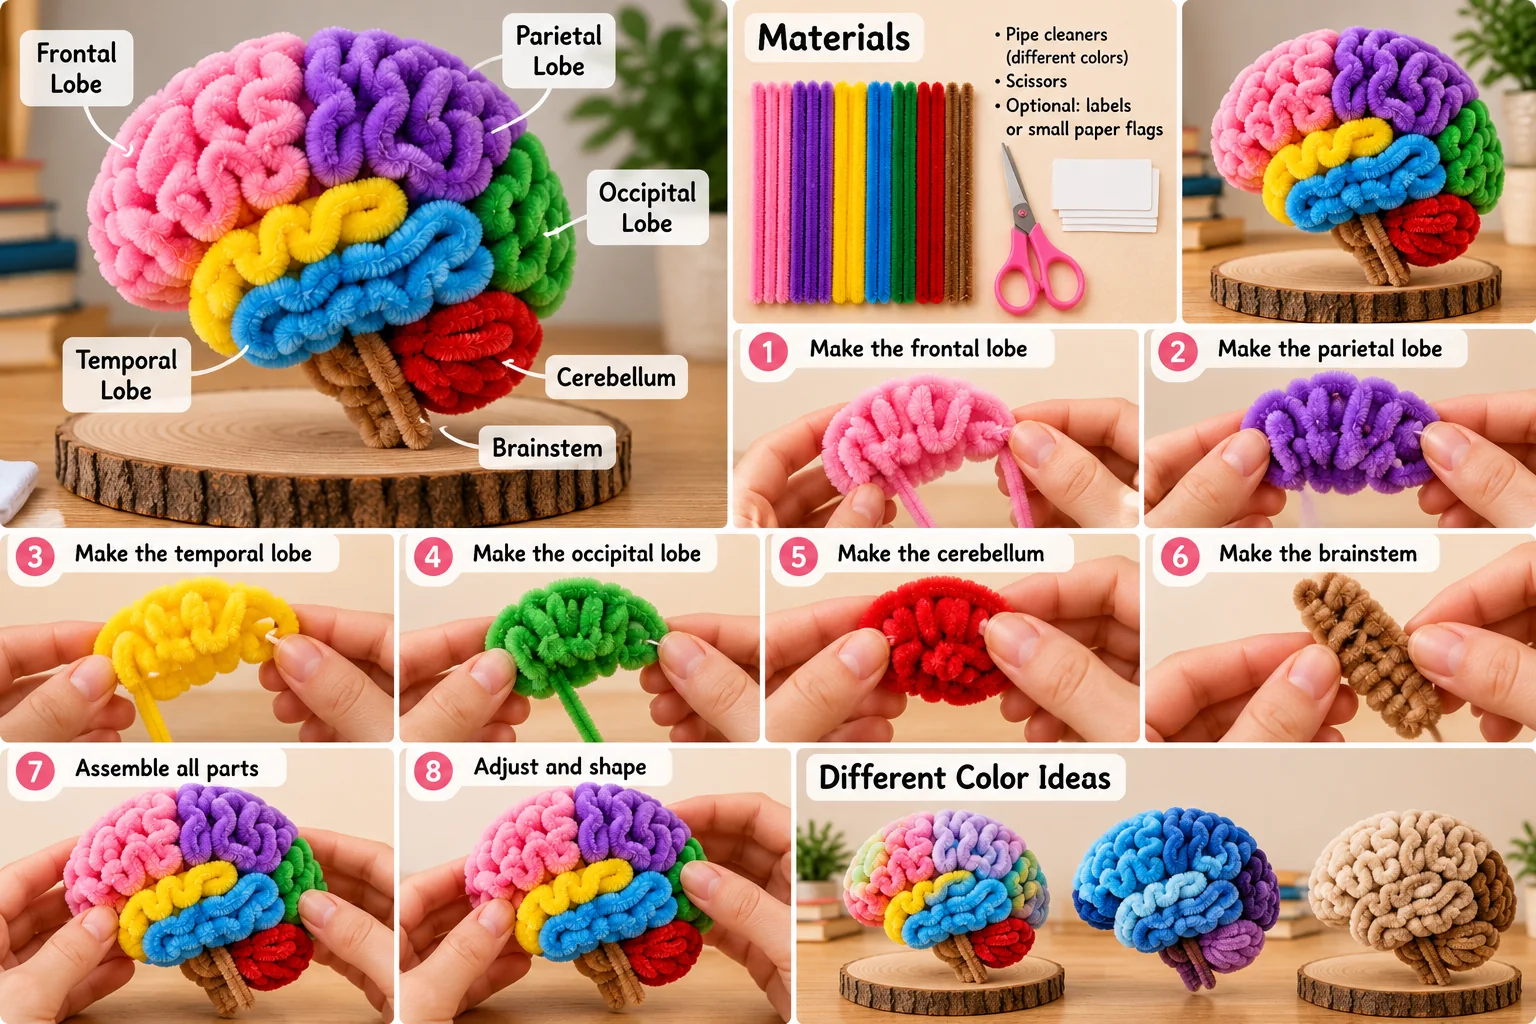
Bring the two cerebral halves together with small hidden twists. Gently reshape the outside until it looks balanced from the front, side and top. Add simple paper labels for the regions your assignment requires.
What to Label on a Simple Brain Model
For a basic classroom display, labels may include the frontal lobe, parietal lobe, temporal lobe, occipital lobe, cerebellum and brainstem. Follow the terminology and level of detail required by your teacher or course materials. This craft is a simplified visual aid, so it should not replace an anatomical diagram when precise boundaries are required.
Tips for a Stronger, Cleaner Model
- Use short hidden twists. Long connectors can make the model look messy.
- Keep a color key. Write down what each color represents before assembly.
- Check multiple views. Look at the model from the top, side and back as you shape it.
- Tuck wire ends inward. Chenille stems contain wire, so exposed ends should not point outward.
- Do not over-tighten. Slightly loose coils create the textured surface more effectively than compressed bundles.
Easy Variations for a School Project
Color-Coded Brain Model
Assign a different color to every region and create a matching legend on a small card beside the model.
Two-Hemisphere Model
Make the left and right cerebral halves separately before joining them. This makes the center division easier to see from above.
Display-Board Version
Place the finished craft on a school display board with a title, color key and short descriptions. Attach it only in ways permitted by your assignment and classroom rules.
More Pipe Cleaner Projects to Practice With
If you want to practice shaping before building the model, try our pipe cleaner art ideas or start with easy pipe cleaner shapes. The same skills of looping, coiling, twisting and joining are useful for more decorative projects too.
FAQS
How do you make a brain model with pipe cleaners?
Coil and curve colored chenille stems into two rounded cerebral halves, use separate colors to distinguish major regions, then add a smaller cerebellum and a short brainstem. Join the sections with tight hidden twists and add labels required for your school project.
How many pipe cleaners do you need for a brain model?
A small model can start with roughly 20 to 30 standard chenille stems, but the exact number depends on the size, density and number of colors you choose. Keep extra stems available for connectors and adjustments.
What colors should I use for a pipe cleaner brain model?
There is no required craft color scheme unless your assignment specifies one. Choose clearly different colors and make a color key so each region is easy to identify.
What parts can I label on a simple brain model?
A basic school model may label the frontal, parietal, temporal and occipital lobes, plus the cerebellum and brainstem. Use your teacher’s instructions or course materials when more precise anatomy is required.
Is a pipe cleaner brain model anatomically accurate?
It is a simplified craft model useful for visualizing and distinguishing major regions. It does not reproduce precise anatomical boundaries or internal structures, so use an anatomy reference when accuracy is required.