
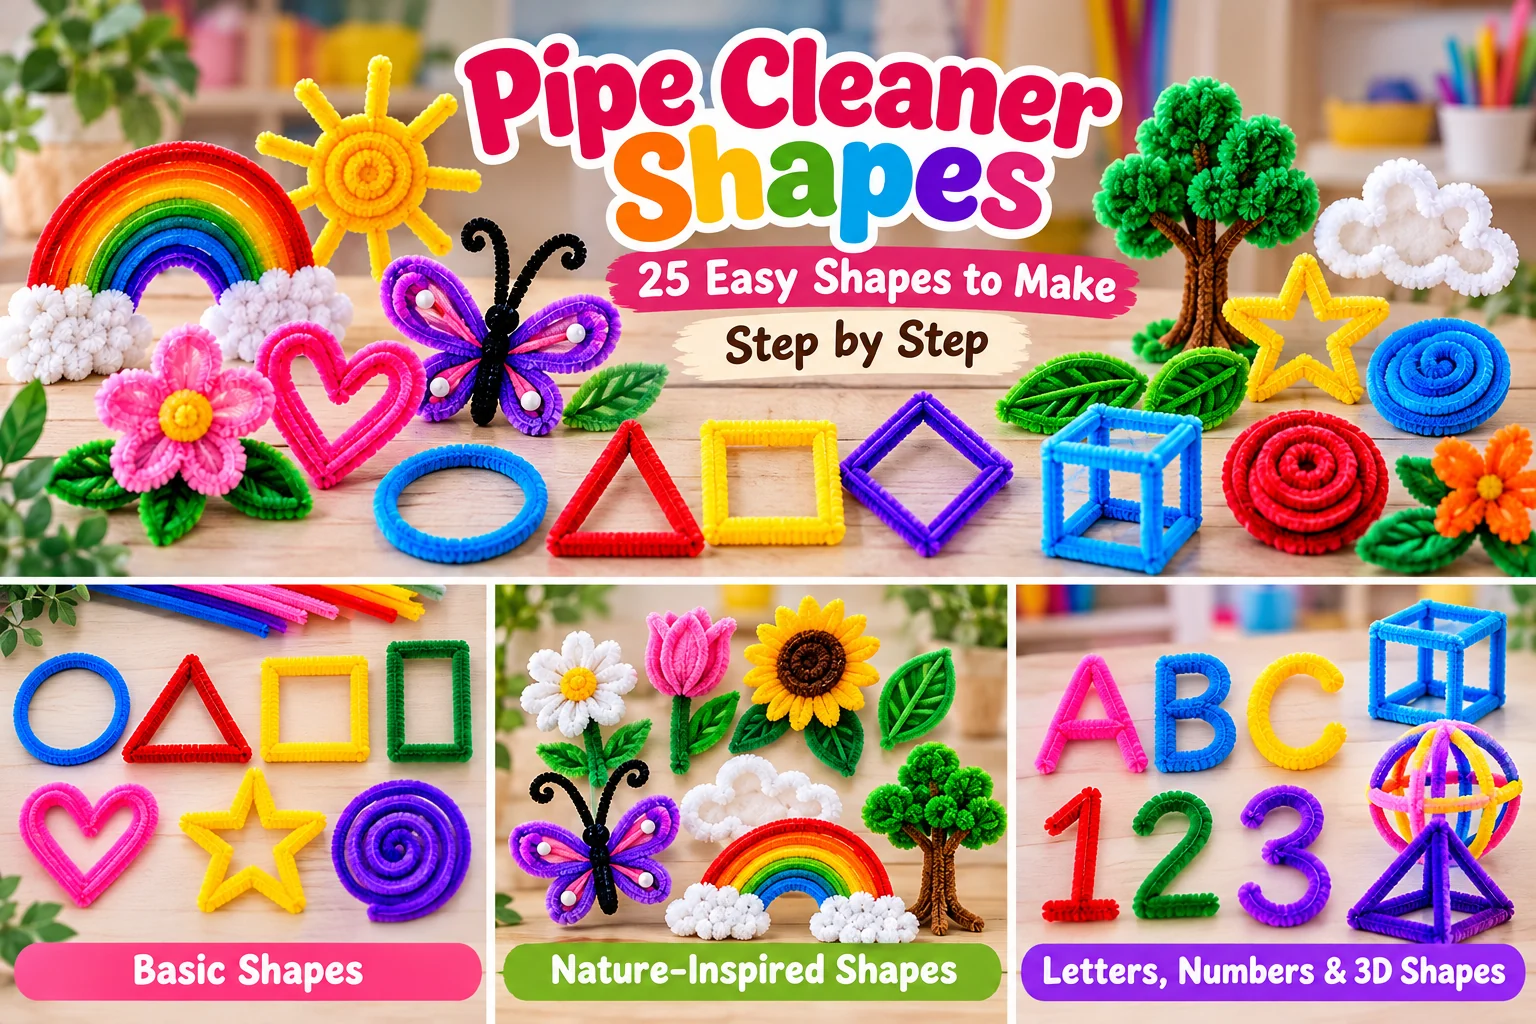
Pipe cleaner shapes are an easy way to practice bending, twisting, looping, and connecting chenille stems. With just a few colorful pipe cleaners, you can create everything from basic circles and triangles to hearts, stars, flowers, letters, and simple 3D forms.
The key is learning how to control the wire inside the pipe cleaner. Sharp bends create corners, smooth curves create circles and hearts, and small twists can connect two ends without requiring glue.
In this guide, you’ll learn how to make 25 pipe cleaner shapes step by step, starting with basic geometric forms and gradually moving toward nature-inspired, personalized, and three-dimensional designs.
If you’d rather explore complete creative projects instead of individual shapes, our pipe cleaner art ideas guide is the better place to start.
What You Need to Make Pipe Cleaner Shapes
Most of the shapes in this guide require very few materials.
- Colorful pipe cleaners or chenille stems
- Scissors for designs that require shorter pieces
- A pencil or marker for making even coils and circles
- A ruler for more precise geometric shapes
- Optional beads for decoration
For many of these designs, you don’t need glue. The ends of the pipe cleaners can usually be secured by twisting them together.
When children are making these shapes, adult supervision is recommended when scissors are used and when exposed wire ends need to be handled.
Basic Techniques for Making Shapes With Pipe Cleaners
Bend
Hold the pipe cleaner where you want a corner and bend it firmly. A sharper bend creates geometric corners for triangles, squares, diamonds, and letters.
Curve
Instead of pinching the pipe cleaner, guide it gradually with your fingers. This creates smoother shapes such as circles, hearts, rainbows, and flower petals.
Twist
Cross two sections and rotate them around each other a few times. Twisting is useful for closing shapes or joining multiple pipe cleaners.
Coil
Wrap a pipe cleaner around a pencil or your finger and slide it off carefully. The result can be used as a spiral, spring, decorative center, or part of a three-dimensional shape.
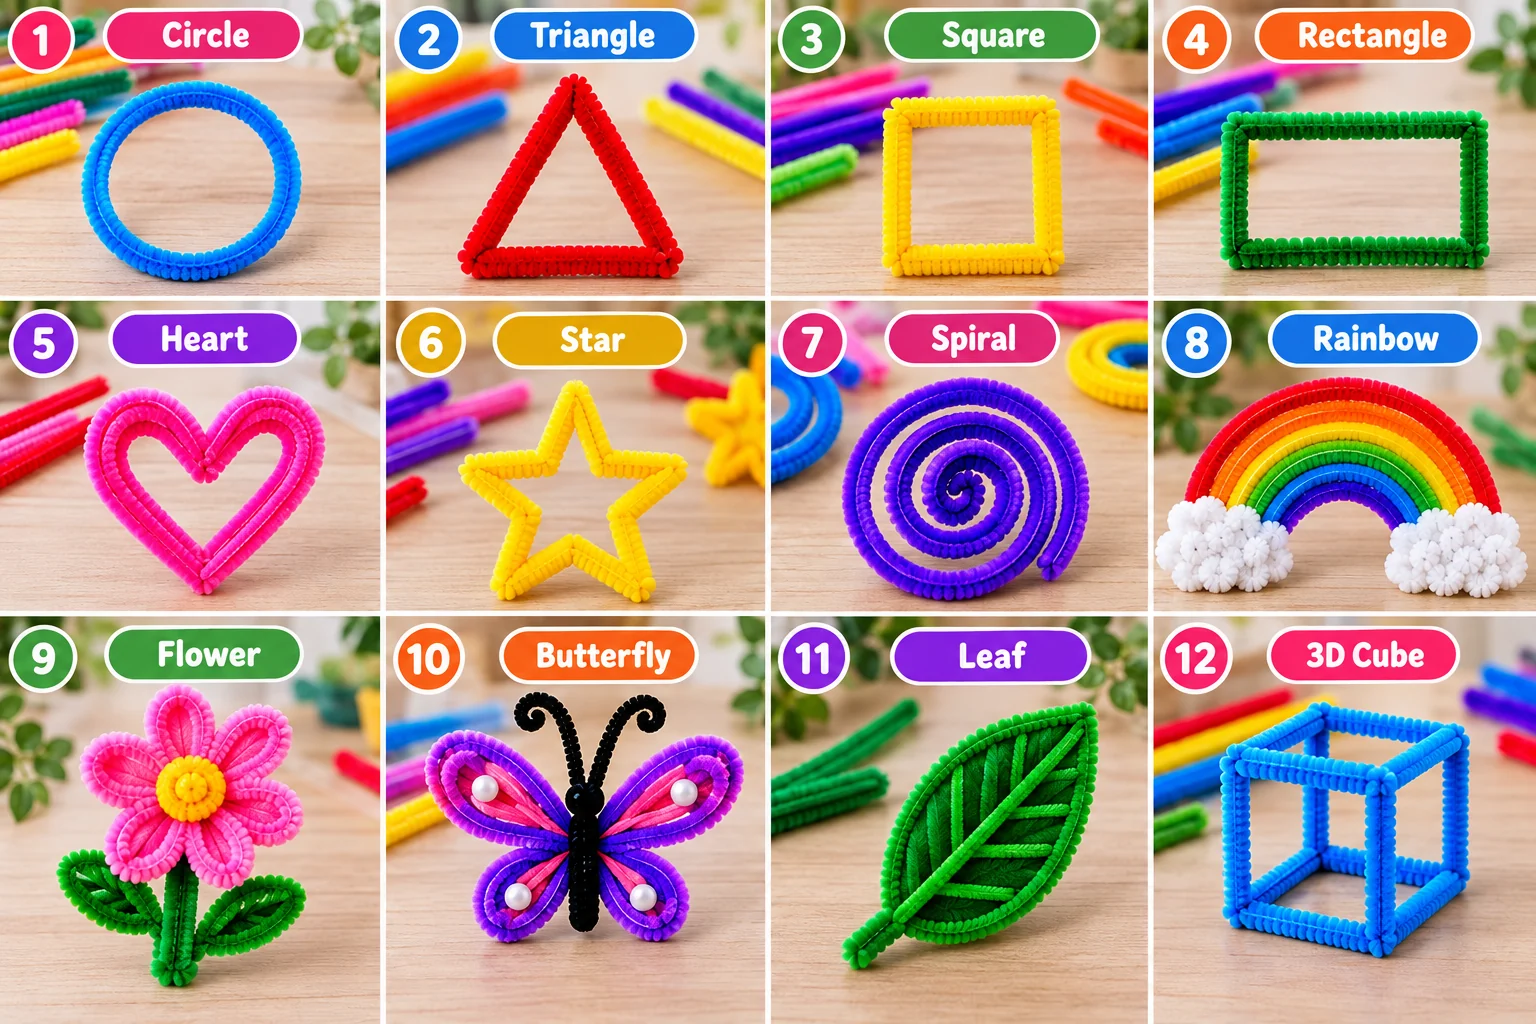
1. Pipe Cleaner Circle
A circle is one of the easiest pipe cleaner shapes and a useful place to begin.
How to make it
- Curve one pipe cleaner gradually into a round shape.
- Bring the two ends together.
- Overlap them slightly.
- Twist the ends around each other once or twice.
- Use your fingers to reshape the circle until it looks even.
For a more uniform circle, wrap the pipe cleaner around a round object such as a small jar or marker.
2. Pipe Cleaner Triangle
A triangle introduces sharp corners.
How to make it
- Divide the pipe cleaner visually into three sections.
- Make a firm bend at the first corner.
- Create another bend for the second corner.
- Bring both ends together to form the third corner.
- Twist the ends to close the triangle.
Try making several triangles in different sizes.
3. Pipe Cleaner Square
A square requires four approximately equal sides.
How to make it
- Fold the pipe cleaner into four similar sections.
- Open it again slightly so you can see the fold marks.
- Bend each mark to approximately 90 degrees.
- Bring the ends together.
- Twist them gently to close the square.
A ruler can help if you want more even sides.
4. Pipe Cleaner Rectangle
The rectangle uses the same technique as the square, but two sides are longer. Create two long sections and two shorter sections, then make four sharp corners and connect the ends.
Once you’ve learned squares and rectangles, you can combine several pieces to create more complex geometric structures.
5. Pipe Cleaner Diamond
Start with a square, then rotate it so one corner points upward. Pinch the top and bottom corners slightly to emphasize the diamond shape. You can also create a longer diamond by making the two side points wider apart.
6. Pipe Cleaner Heart
A heart combines curves with a sharp central bend.
How to make it
- Fold one pipe cleaner in half.
- Use the fold as the bottom point of the heart.
- Curve both sides upward.
- Bend each side inward to form the rounded lobes.
- Bring the ends toward the center.
- Twist them together.
Adjust both sides until the heart looks balanced.
7. Pipe Cleaner Star
Stars require more bends, but the technique is still simple.
How to make it
- Start near one end of the pipe cleaner.
- Create alternating inward and outward bends.
- Continue until you have five outer points.
- Bring the ends together.
- Twist them gently to close the star.
Pinch each point after finishing to make the star more defined.
8. Pipe Cleaner Spiral
A spiral is useful by itself and as part of many other designs.
How to make it
- Start at one end.
- Roll the pipe cleaner tightly around itself.
- Continue wrapping outward.
- Stop when the entire stem forms a flat coil.
For a looser spiral, leave a small amount of space between each layer. This same coiling technique is also useful when making the centers of simple pipe cleaner flowers.
9. Pipe Cleaner Rainbow
Choose several pipe cleaners in different colors.
How to make it
- Bend the first pipe cleaner into a wide arch.
- Create another slightly smaller arch.
- Repeat with several colors.
- Position the arches side by side.
- Twist or connect their ends if you want the rainbow to remain together.
Using five or six colors creates a fuller rainbow, but fewer colors work too.
10. Pipe Cleaner Cloud
A cloud is made from a series of soft curves.
How to make it
- Create several rounded bumps along one pipe cleaner.
- Make the lower section flatter.
- Bring the two ends together.
- Twist them to close the outline.
Combine a cloud with a rainbow to create a larger decorative shape.
Fun and Nature-Inspired Pipe Cleaner Shapes
Once you’re comfortable with basic shapes, you can start combining curves, loops, and twists into recognizable objects from nature.
11. Pipe Cleaner Sun
Start with a circle for the center. Use shorter yellow or orange pieces around the outside to create rays. Twist each ray around the central circle, then spread them evenly. You can alternate short and long rays for a more varied design.
12. Pipe Cleaner Leaf
How to make it
- Fold a green pipe cleaner in half.
- Keep the fold pointed.
- Curve both sides outward.
- Bring the ends together.
- Twist them at the base.
For a longer leaf, make the curves narrow. For a rounder leaf, widen them. Leaves can also be combined with the flower designs in our types of pipe cleaner flowers guide.
13. Pipe Cleaner Flower
A basic flower introduces repeated loops.
How to make it
- Make a small loop.
- Twist the base once.
- Create another loop of approximately the same size.
- Repeat until you have five or six petals.
- Arrange the petals around the center.
- Add a green stem if desired.
If you want to progress from basic shapes to complete flowers, our flower pipe cleaner guide covers more designs.
14. Pipe Cleaner Butterfly
A butterfly combines symmetrical loops.
How to make it
- Make one large loop for an upper wing.
- Create a smaller loop beneath it.
- Repeat on the opposite side.
- Twist the center to hold the four wings together.
- Add a short pipe cleaner for the body and antennae.
For the complete project, follow our pipe cleaner butterfly tutorial.
15. Pipe Cleaner Tree
Use a brown pipe cleaner for the trunk and green pieces for the branches or canopy.
How to make it
- Fold or twist two brown pipe cleaners together for the trunk.
- Separate the upper ends into branches.
- Add small green loops or curved pieces.
- Shape the lower end into a small base if you want the tree to stand.
You can change the colors to create spring, autumn, or winter versions.
16. Pipe Cleaner Flower Stem With Leaves
This shape combines several techniques from earlier sections. Create a flower at the top, extend a green stem downward, then attach one or two leaves. The result can be used alone or combined with other stems.
If you want to turn several stems into a complete arrangement, see our pipe cleaner flower bouquet ideas.
Letters and Numbers With Pipe Cleaners
Pipe cleaners are also useful for practicing letter and number shapes because you can straighten and reshape them repeatedly.
17. Pipe Cleaner Letters
Start with letters made primarily from straight lines, such as A, E, F, H, L, M, or T.
How to make them
- Decide where each corner should be.
- Bend the pipe cleaner at those points.
- Add a shorter piece when a letter needs a crossbar.
- Twist the pieces together where necessary.
Curved letters such as C, O, S, and U can be shaped gradually with your fingers.
18. Pipe Cleaner Numbers
Numbers use the same combination of bends and curves. Try starting with 1 for straight-line practice, 4 for corners, 7 for angled bends, 0 for curves, and 2, 3, 5, 6, 8, and 9 for combinations of curves and bends.
19. Pipe Cleaner Name Shapes
Once you can form individual letters, connect them to spell a short name or word. You can make each letter separately or use several long pipe cleaners connected together to create continuous lettering. Add small flowers, hearts, stars, or spirals around the name for decoration.
Easy 3D Pipe Cleaner Shapes
Three-dimensional shapes require connections between several individual pieces. Start with simple geometric structures before attempting freeform sculptures.
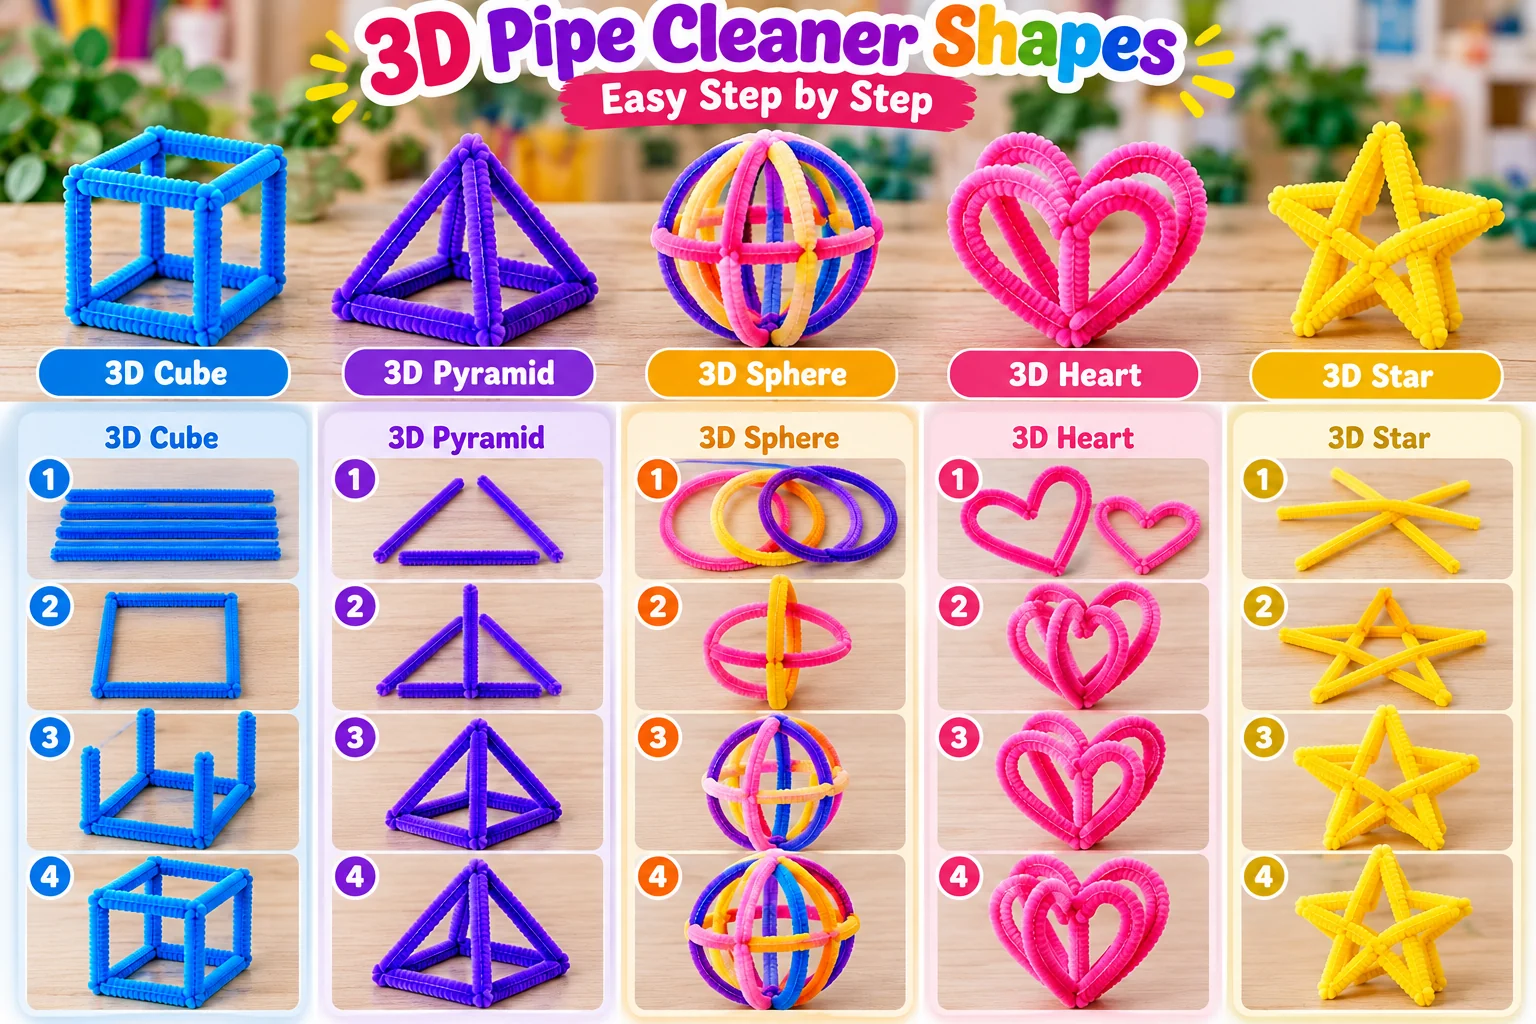
20. Pipe Cleaner Cube
How to make it
- Create two squares of similar size.
- Place one above the other.
- Connect corresponding corners with four short pipe cleaners.
- Twist each connection firmly.
- Adjust the corners until the cube holds its shape.
21. Pipe Cleaner Pyramid
Start with a square base. Then attach four pipe cleaners, one at each corner. Bring their upper ends together above the center and twist them. Adjust the four sides until the top sits approximately above the middle of the base.
22. Pipe Cleaner Sphere
How to make it
- Make three or four circles of similar size.
- Place one horizontally.
- Position the others vertically through the center.
- Twist them together where they intersect.
- Adjust the circles until the structure looks rounded.
23. 3D Pipe Cleaner Heart
Create two similar heart outlines. Place one in front of the other and connect them at several points using short pipe cleaner pieces. Gently separate the two outlines so the heart gains depth while keeping the connecting pieces secure.
24. 3D Pipe Cleaner Star
Make two five-point star outlines of approximately the same size. Place one slightly in front of the other and connect corresponding points with short pieces. Carefully adjust the structure to maintain the star shape.
25. Freeform Geometric Sculpture
For the final project, combine everything you’ve practiced. Use circles, triangles, squares, spirals, curves, and straight sections to build an original three-dimensional structure.
Try connecting circles inside a cube, combining triangles into a larger structure, adding spirals to geometric frames, mixing several colors, or creating an asymmetrical sculpture.
This is where pipe cleaner shapes become pipe cleaner art. For more complete creative projects using these techniques, continue with our pipe cleaner art ideas guide.
Easy Pipe Cleaner Shapes for Beginners
If 25 options feel overwhelming, begin with these five: Circle → Heart → Triangle → Star → Spiral. These shapes teach smooth curving, sharp bending, twisting, symmetry, and coiling.
For beginners who specifically want to create flowers, our easy pipe cleaner flowers for kids guide provides simple flower-focused projects.
How to Make Pipe Cleaner Shapes Hold Their Form
Twist Connections Firmly
Where two ends meet, overlap them slightly and twist them around each other. Avoid leaving long exposed wire ends.
Make Corners Deliberately
For squares, triangles, stars, and letters, pinch the pipe cleaner firmly where you want the corner.
Use a Form for Smooth Curves
Wrap pipe cleaners around round household objects to create more even circles and curves.
Add Support to Larger Shapes
Large or three-dimensional structures may need additional pipe cleaners at connection points. Rather than relying on glue, a short pipe cleaner can often be used as a tie to reinforce the joint.
For flower projects specifically designed around twisting rather than adhesives, see our pipe cleaner flowers no glue tutorial.
Ways to Use Your Finished Pipe Cleaner Shapes
Individual shapes can become building blocks for larger projects. Hearts and stars can be turned into hanging decorations. Flowers and leaves can become bouquets. Butterflies can be incorporated into spring displays, while letters can be used for personalized decorations.
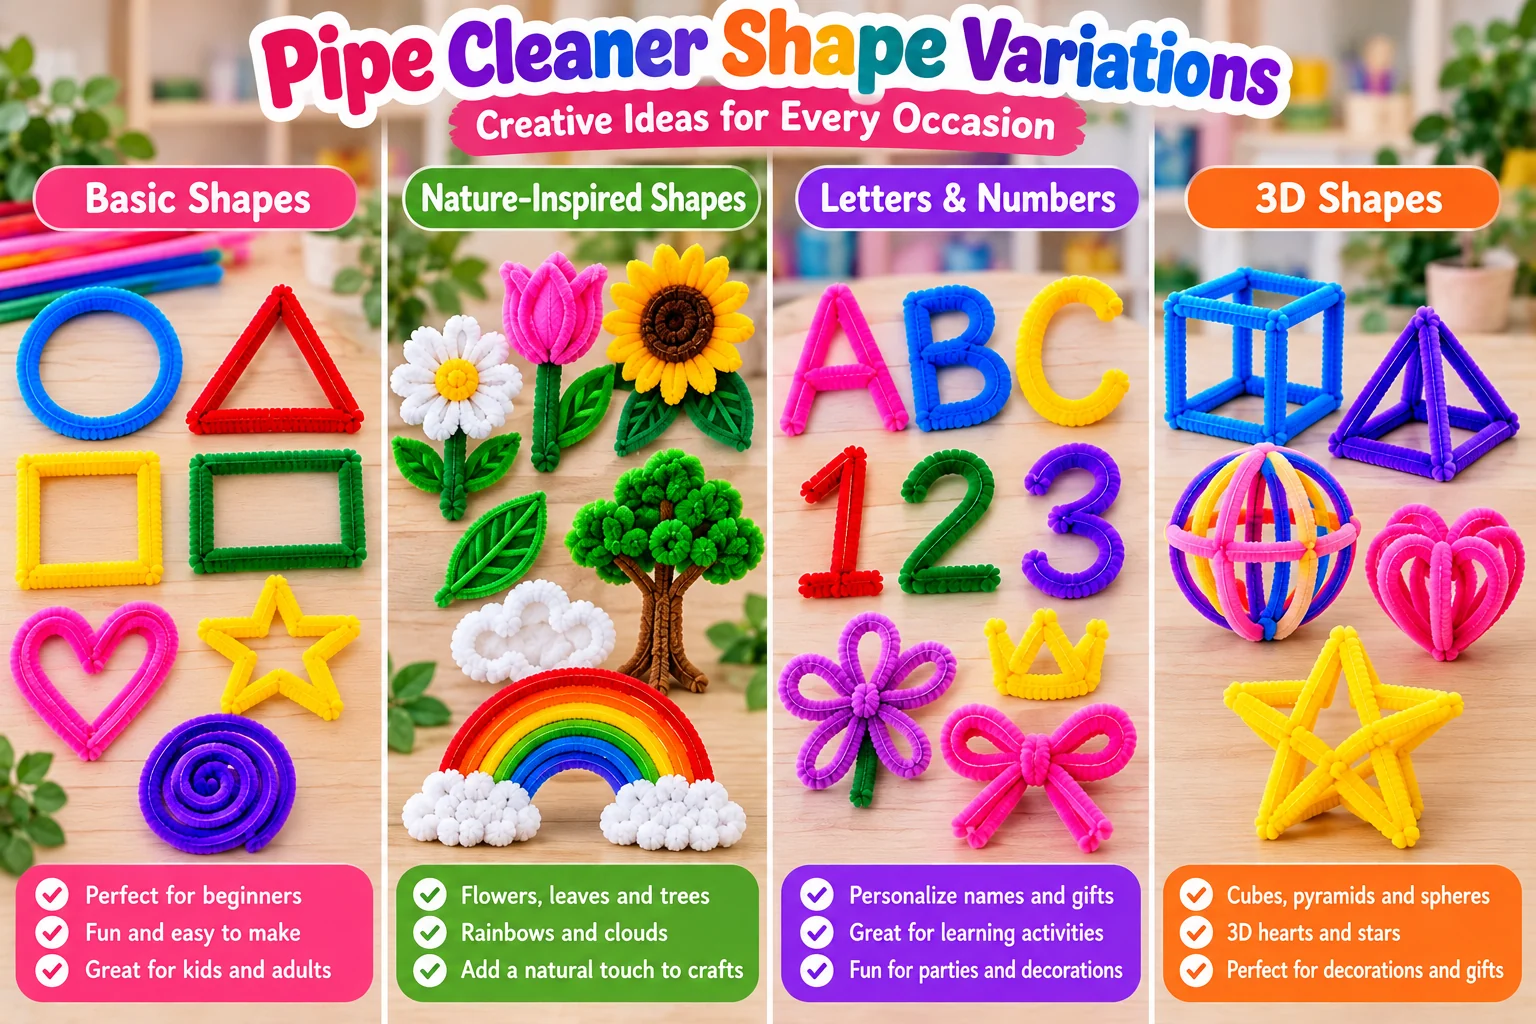
Several shapes can also be arranged together as lightweight wall art. For inspiration on using flowers and shapes vertically, explore our pipe cleaner wall hanging ideas.
Frequently Asked Questions
What shapes can you make with pipe cleaners?
You can make circles, triangles, squares, rectangles, diamonds, hearts, stars, spirals, rainbows, clouds, flowers, leaves, butterflies, letters, numbers, and many other shapes. Multiple pieces can also be connected to create 3D forms such as cubes, pyramids, spheres, and sculptures.
What are the easiest pipe cleaner shapes to make?
Circles, hearts, triangles, spirals, and simple stars are good starting shapes. They teach basic curving, bending, twisting, and coiling techniques.
How do you make shapes with pipe cleaners?
Use smooth curves for rounded shapes, firm bends for corners, and twists to connect the ends. You can also wrap pipe cleaners around objects such as pencils or small containers for consistent coils and circles.
Can you make 3D shapes with pipe cleaners?
Yes. Flat shapes can be connected with additional pipe cleaners to create simple 3D structures such as cubes, pyramids, spheres, hearts, and stars.
How do you connect pipe cleaner shapes without glue?
Overlap the ends and twist them around each other, or use a short separate piece of pipe cleaner as a tie around the connection.
Can children make shapes with pipe cleaners?
Many simple pipe cleaner shapes use basic bending, curving, and twisting techniques. Children should be appropriately supervised when scissors are required and when exposed wire ends are present.
How do you make a pipe cleaner circle more even?
Wrap the pipe cleaner around a round object such as a marker, small jar, or cylindrical container. Remove it carefully, connect the ends, and adjust the circle with your fingers.
What can I make after learning basic pipe cleaner shapes?
Once you’re comfortable making basic shapes, you can combine them into flowers, butterflies, bouquets, wall decorations, crowns, wreaths, mobiles, and other creative projects.
Final Thoughts
Learning to make pipe cleaner shapes starts with a few simple movements: bend for corners, curve for rounded forms, twist to connect pieces, and coil to create spirals.
Begin with circles, triangles, hearts, stars, and spirals. Once those shapes become easy, try flowers, butterflies, letters, numbers, and simple 3D structures.
The goal isn’t to make every shape perfectly symmetrical. Pipe cleaners are flexible, so you can reshape and adjust your design as you work.
When you’re ready to turn those individual shapes into larger decorative projects, explore our pipe cleaner art ideas or use your flower shapes in one of our pipe cleaner flower wall decoration projects.
Happy crafting — from My Flower Decor! 🌸
1 thought on “Pipe Cleaner Shapes – 25 Easy Shapes to Make Step by Step”