
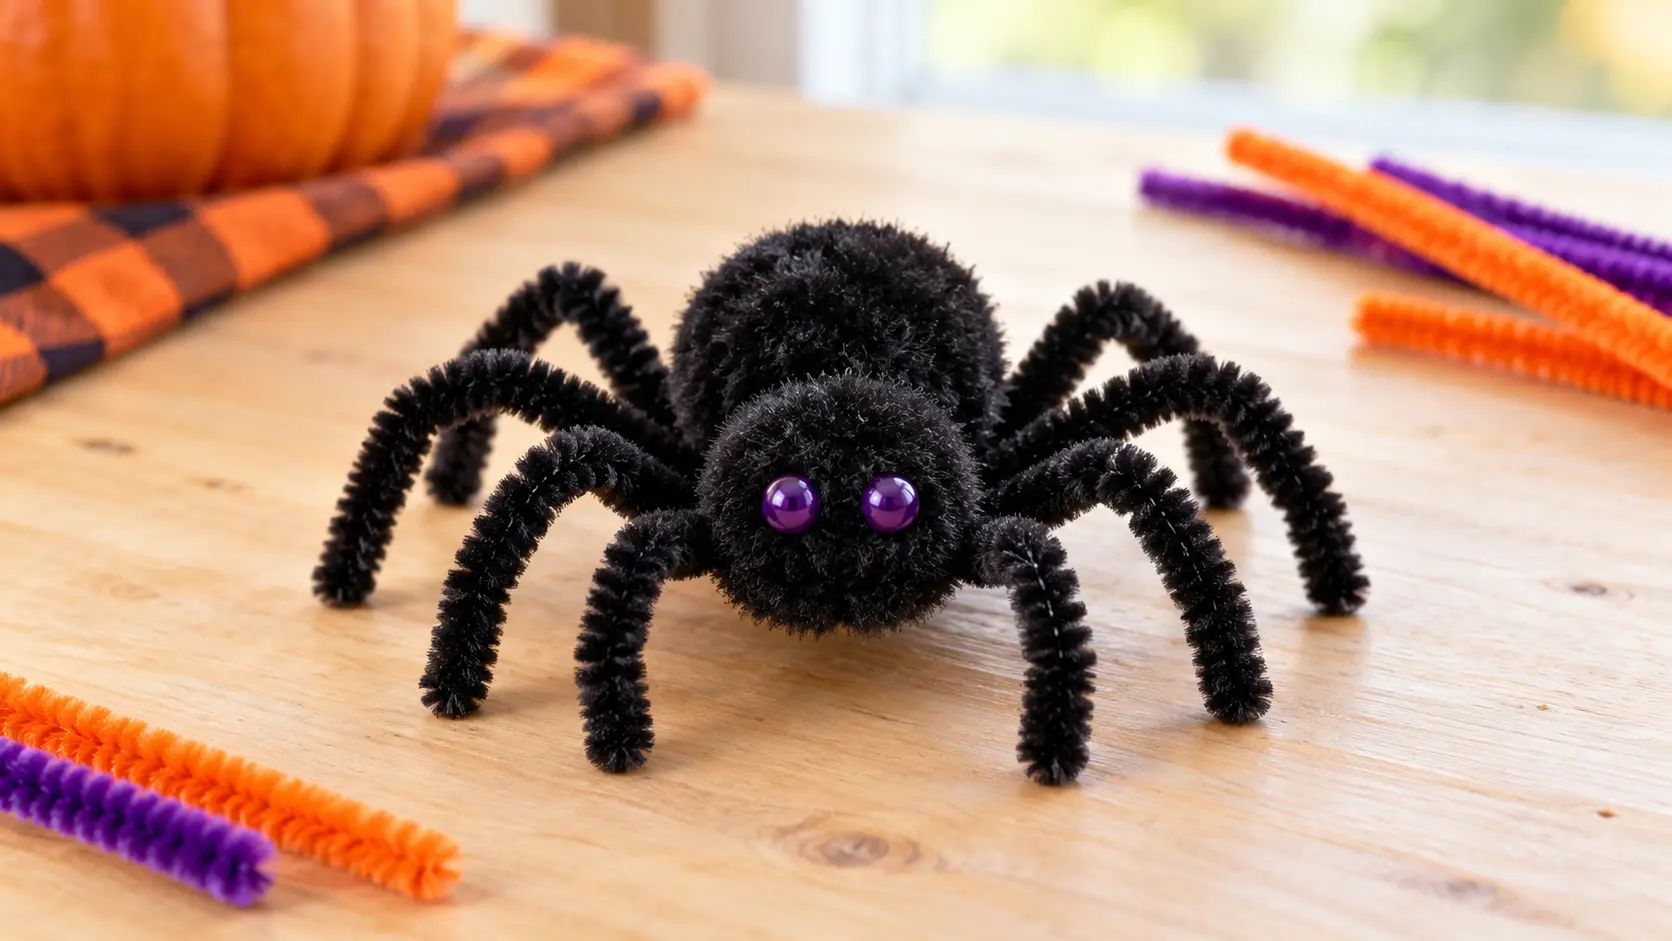
You can make a pipe cleaner spider by crossing four chenille stems, twisting them together at the center, wrapping a fifth stem around the twist to form the body, and bending the eight ends into legs. The basic version needs no glue and takes about 10 to 15 minutes. Add bead eyes only if they can be threaded or securely twisted into place.
This tutorial makes one sturdy spider with eight separate legs, a wrapped fuzzy body, and a shape that can stand on a table or hook onto a web. It also includes easier options for children, color variations, hanging ideas, and fixes for legs that slip or a body that feels loose.
What Is a Pipe Cleaner Spider?
A pipe cleaner spider is a small craft made by twisting chenille stems into a central body and eight bendable legs. Unlike a flat paper spider, it can be posed: the knees can be raised, the feet can grip a shelf edge, and the body can sit on a table, wreath, garland, or handmade web.
The most reliable construction uses four full-length pipe cleaners for the legs and one extra pipe cleaner for the body. Each leg stem passes through the center, so both ends remain available. Four stems therefore create eight legs without cutting tiny pieces that can pull loose.
This is a complete spider tutorial rather than another collection of floral Halloween decorations. If you want black roses, orange daisies, or a flower arrangement with web accents, use the separate pipe cleaner Halloween crafts guide. The two projects can be combined in one display without competing for the same purpose.
Pipe Cleaner Spider Materials
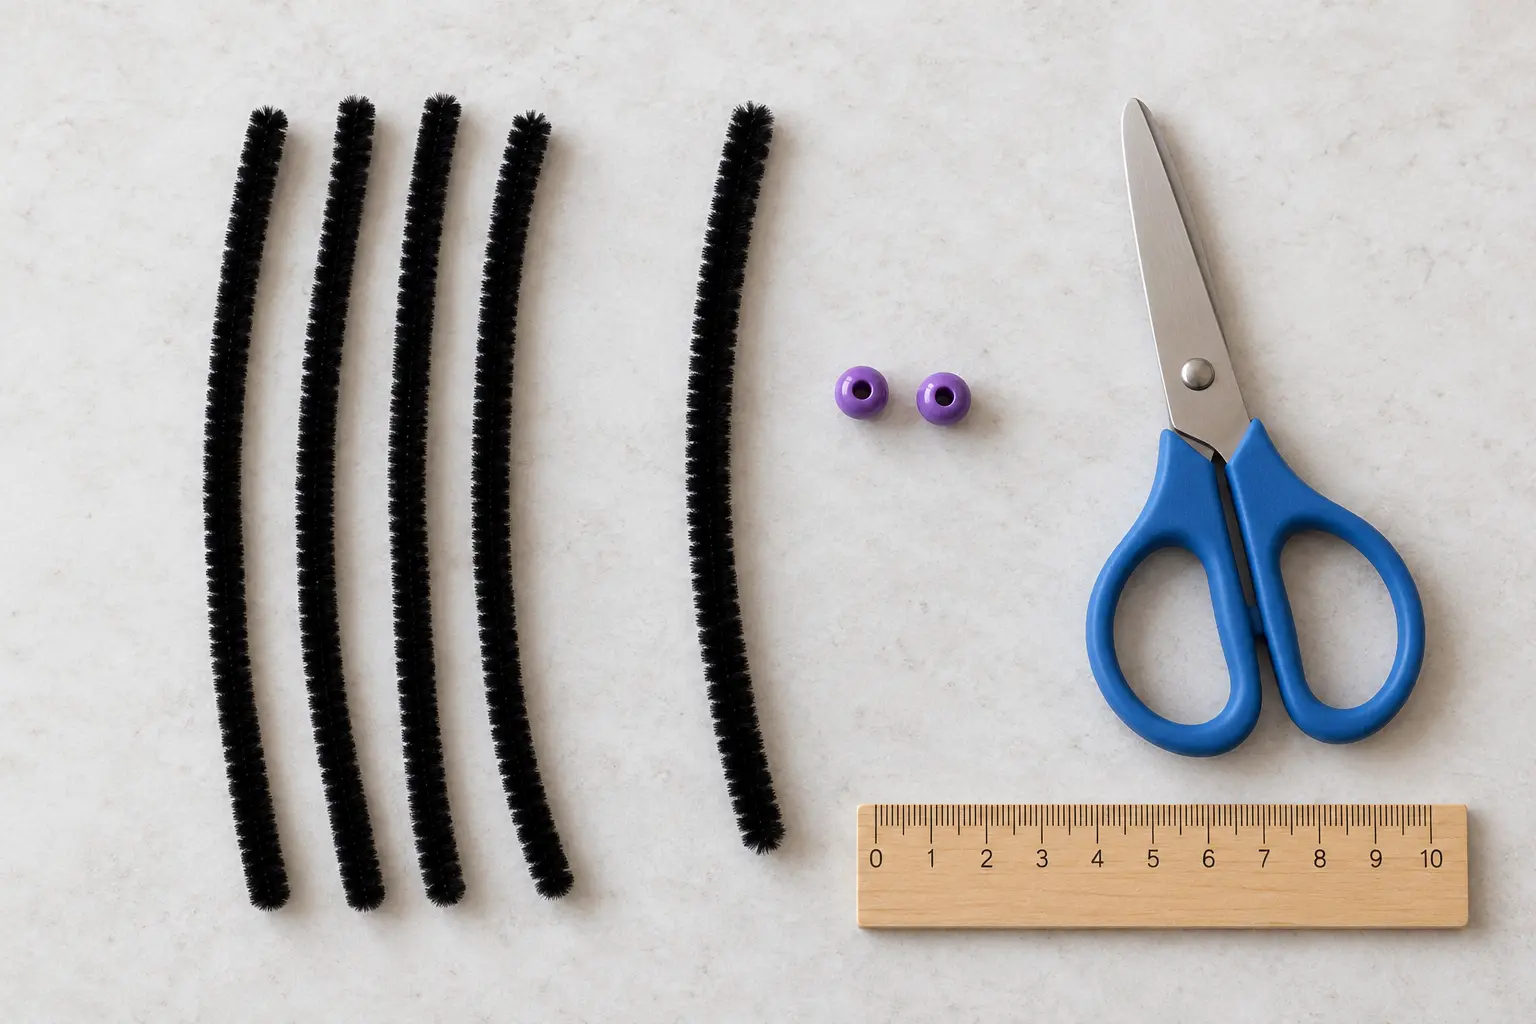
- 4 full-length black pipe cleaners for the eight legs
- 1 full-length black pipe cleaner for the wrapped body
- 2 small beads for eyes, optional
- Blunt-tip scissors if you want a smaller spider
- A ruler, optional, for keeping the legs even
- A short piece of thread, clear line, or ribbon if you want to hang the spider
Standard craft pipe cleaners are usually about 12 inches or 30 centimeters long. You can use them at full length for a large spider, or cut them to approximately 8 inches or 20 centimeters for a compact version. Keep all four leg pieces the same length so the finished spider stands evenly.
Beads are decorative, not required. Select beads with openings large enough for a pipe cleaner to pass through. For young children, skip loose beads and make eyes by curling two tiny chenille-stem ends instead. Small beads can be a choking hazard and should stay away from children under three.
How to Make a Pipe Cleaner Spider Step by Step
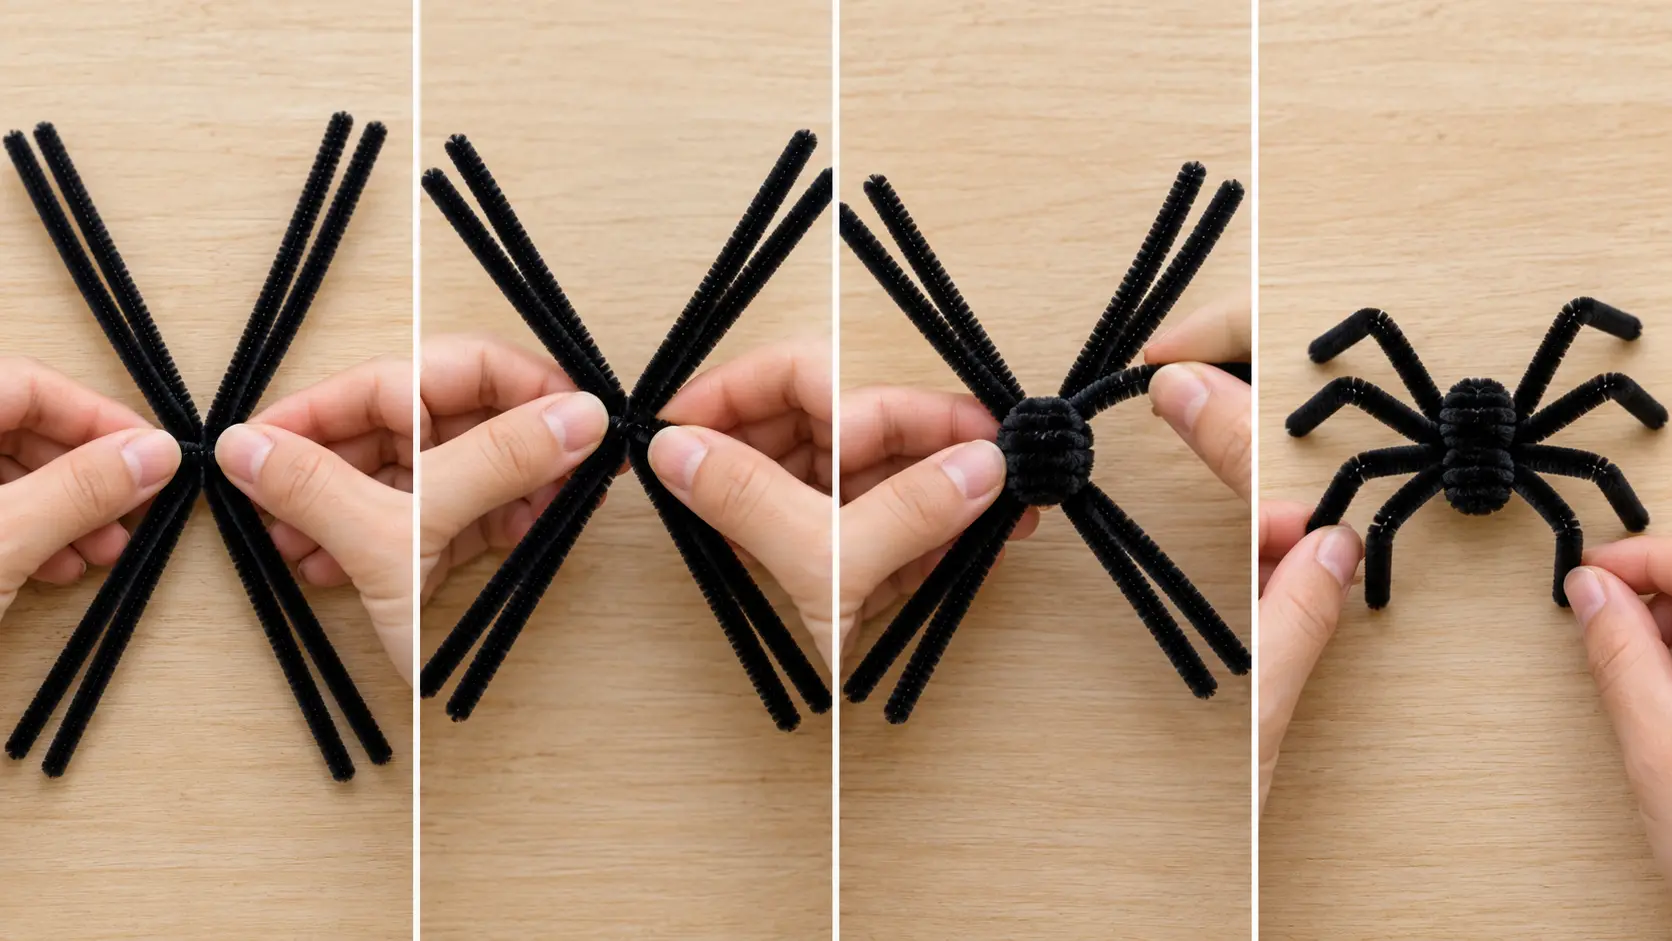
Step 1: Align the four leg stems
Place four black pipe cleaners in a neat stack. Match their ends as closely as possible. Hold the bundle at its midpoint and check that the material extends the same distance on both sides. If one stem is shorter, adjust it before twisting.
Step 2: Twist the center
Pinch the stack at the middle and rotate one half of the bundle around the other two or three times. The twist should be tight enough to hold the stems together, but it does not need to be long. A compact central twist leaves more length for shaping the legs.
Separate the ends and count them before continuing: there should be four on the left and four on the right. That gives the spider eight legs. If two stems are still stuck together, fan them apart gently rather than pulling on the center.
Step 3: Wrap the body
Take the fifth black pipe cleaner and place one end against the central twist. Wrap it around the middle five or six times, overlapping the coils slightly. This covers the joint and creates a fuzzy oval body. Tuck the final end under one of the coils or twist it around the center so it cannot unwind.
For a larger abdomen, continue wrapping toward the back of the spider and then return toward the center. For a smaller, rounder body, keep each wrap directly over the middle. Do not make the body so bulky that the leg stems cannot move independently.
Step 4: Space the eight legs
Fan the legs into four pairs, with two pairs pointing slightly forward and two pairs pointing slightly backward. Avoid arranging them like eight straight rays. Realistic spacing is easier to achieve when the front legs angle toward the front and the rear legs angle toward the back.
Step 5: Bend the knees
About halfway along each leg, make a sharp downward bend with your fingers. Repeat on all eight legs at approximately the same distance from the body. The raised inner section becomes the upper leg, while the outer section reaches the table.
Then bend the final half inch of each leg slightly outward or downward to form a foot. These small foot bends help the spider stand. Set it down and adjust one leg at a time until the body is level.
Step 6: Add optional eyes
Thread two beads onto a short piece of matching pipe cleaner. Center the beads with a small gap between them, then twist the ends around the front of the body. Turn the cut ends inward so they do not protrude. If the bead holes are too small, use curled chenille-stem eyes instead of forcing the wire through.
Step 7: Shape the body and pose
Gently press the body into an oval. Tilt the front slightly upward if you want the eyes to face forward. For a crawling pose, stretch the front pair ahead and the rear pair behind. For a compact spider, bring the legs closer to the body and deepen each knee bend.
Step 8: Check every connection
Lift the spider by the body, not by one leg. Confirm that the center wrap does not slide and that every end is folded inward. If the body rotates around the leg bundle, unwrap the final coil, tighten the first wraps, and secure the end under a crossed leg stem.
Why This No-Glue Construction Works
The crossed leg bundle acts as the spider’s internal frame. Because every leg runs through the center, the legs cannot detach individually during normal handling. The fifth pipe cleaner compresses the frame and covers the rough joint. This makes glue unnecessary for the main structure.
No-glue does not mean indestructible. Repeated pulling can loosen the center, and very thin chenille stems may flex more than standard stems. If the craft will be handled often, add an extra half twist to the leg bundle before wrapping the body. You can find more twist-only techniques in pipe cleaner flowers without glue.
Easy Pipe Cleaner Spider Variations
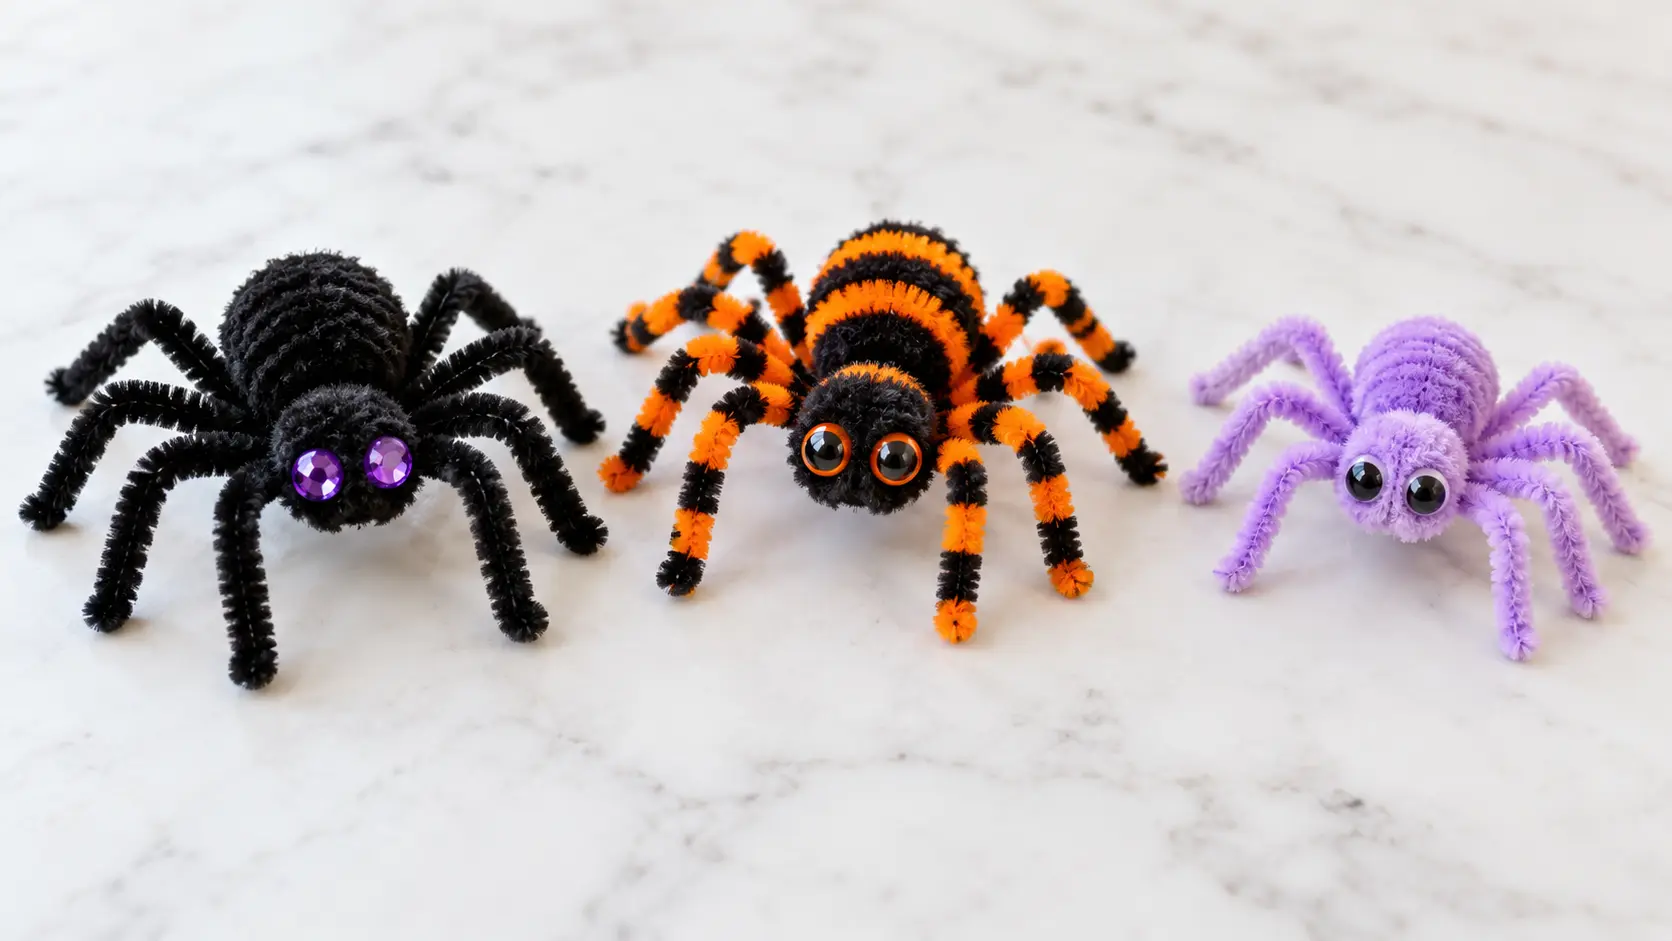
Classic black spider
Use five black stems and purple, green, or orange eyes. This version works well on a white web, an orange garland, or beside a handmade pumpkin. Its dark color also makes the leg silhouette easy to see while you learn the technique.
Orange-and-black striped spider
Alternate orange and black stems in the four-stem leg bundle, then wrap the body with both colors. You can wind one orange stem over a black base to create bands. Keep the eight legs separate even when two colors overlap near the center.
Pastel spider for younger crafters
Choose lavender, pale pink, mint, or light blue. Skip beads and coil two short contrasting ends into soft eyes. The construction is the same, but the gentle palette feels playful rather than spooky. This version can join other easy pipe cleaner crafts for kids.
Mini spider
Cut four leg stems to 6 inches and use half a pipe cleaner for the body. A mini spider is useful for a pencil topper, wreath accent, gift tag, or tabletop place card. An adult should handle the cutting and fold every wire end inward.
Long-legged display spider
Keep the stems at full length and place the knee bends closer to the body. This creates longer lower legs and a wider stance. Use the larger version on a shelf, mantel, or wall hanging where the silhouette has room to spread.
How to Make the Spider Stand Evenly
Start on a flat surface and treat the legs as four pairs. Adjust the front pair first, then the rear pair, followed by the two middle pairs. The feet should touch the surface before the body does. If the abdomen rests on the table, make the knee bends slightly sharper.
When the spider leans to one side, do not shorten every leg. Identify the leg that is holding the body too high and open its knee angle slightly. If one foot does not reach the surface, deepen that knee bend or curve the foot downward. Small changes are more effective than reshaping the whole craft.
How to Hang a Pipe Cleaner Spider
Slide a piece of thread or clear line beneath the body wrap, then tie a secure double knot above the spider. The thread should pass around the central frame rather than around one outer coil. Hang the spider from a lightweight garland, branch, wreath, or paper web.
For a web display, cross three or four long white pipe cleaners at the center and twist them together. Connect the spokes with curved white pieces, twisting each connection once. Hook the spider’s bent feet around two web strands. For a broader collection of non-floral projects, browse these pipe cleaner art ideas.
Halloween Decorating Ideas
- Wreath: twist the feet around a grapevine or lightweight craft ring.
- Table setting: place one mini spider beside each napkin or name card.
- Garland: alternate spiders with orange pipe cleaner pumpkins and purple shapes.
- Flower arrangement: perch one spider on a black rose or the rim of a vase.
- Classroom board: attach spiders to a large paper web with removable adhesive placed beneath the body.
- Treat-bag decoration: twist the front legs around the handle instead of gluing the spider to the bag.
Keep the spider’s intention clear when combining it with other content on the site. The dedicated pipe cleaner Halloween flower guide focuses on floral decorations, while this tutorial teaches the freestanding spider itself. For an autumn pairing, display it alongside a handmade pumpkin rather than repeating another flower tutorial.
Kid-Friendly and Classroom Tips
Prepare equal-length stems before the activity if children are not ready to use scissors. Demonstrate the center twist slowly, then ask everyone to count the legs before wrapping the body. Counting to eight is a useful quality check and prevents a hidden pair from being mistaken for one thick leg.
For younger groups, make the central leg bundle in advance and let children wrap the body and bend the knees. Avoid loose beads for children who may put small objects in their mouths. Pipe cleaner wires can scratch, so fold exposed ends inward and supervise the final check.
Set out trays by color to reduce tangling. A finished sample is helpful, but allow different poses and palettes. The goal is a secure eight-legged construction, not eight perfectly identical legs. Teachers planning a larger display may also use the ideas in pipe cleaner classroom decorations.
Troubleshooting Common Problems
The legs keep sliding
The central twist is probably too loose. Hold the bundle firmly and add one more rotation before wrapping the body. Make sure the body stem crosses over all four leg stems, not only the top two.
The spider has fewer than eight visible legs
Two legs may be pressed together. Start at the center and trace each stem outward. Fan the ends into four pairs, then bend them separately. Do not add random short pieces until you have counted every original end.
The body looks too small
Wrap a second pipe cleaner around the center, concentrating the coils behind the eyes. Keep the new end tucked beneath the existing wrap. A larger body may need slightly wider leg spacing to remain balanced.
The spider will not stand
Check the feet on a hard, level surface. Create a knee and a short foot on every leg. If the body touches the surface, increase the height of the knees. If it rocks, adjust the longest supporting leg rather than bending all eight again.
A wire end feels sharp
Fold the last quarter inch back onto the leg and squeeze it gently into the fuzzy material. Replace any damaged stem with exposed wire. Do not leave sharp ends on crafts intended for children, wearables, or treat bags.
How to Store and Reuse the Spider
Store the spider dry in a shallow box so the legs are not crushed. If you need to flatten it for storage, open the knee bends gently instead of pressing the body. Reshape the knees and feet when you display it again.
Dust can be removed with a soft, dry brush. Avoid soaking chenille stems, especially when the craft includes beads, metallic finishes, paper decorations, or an attached hanging thread. A carefully stored spider can be reused for future Halloween displays, classroom activities, or craft demonstrations.
Frequently Asked Questions
How many pipe cleaners do you need to make a spider?
Use four full-length pipe cleaners for the eight legs and one additional pipe cleaner to wrap the body. That is five pipe cleaners for the basic spider.
How do you make eight spider legs from pipe cleaners?
Stack four pipe cleaners and twist them together at the center. Each pipe cleaner has two ends, so four stems create eight separate legs.
Can you make a pipe cleaner spider without glue?
Yes. Twist the four leg stems at the center and wrap a fifth stem tightly around the joint. Eyes can be made from curled chenille stems or threaded beads.
How long does the craft take?
A basic spider usually takes about 10 to 15 minutes. The first one may take longer while you adjust the eight legs and balance the feet.
How do you make a pipe cleaner spider stand up?
Bend a knee halfway along each leg and create a small foot near every end. Set the spider on a flat surface and adjust one leg at a time until the body is level.
Is this pipe cleaner spider safe for kids?
It can be suitable with adult supervision. Use blunt-tip scissors, fold wire ends inward, and avoid small beads for children under three or anyone likely to place them in their mouth.
Can I hang the spider from a web?
Yes. Tie thread or clear line around the central frame beneath the body wrap, or hook the bent feet directly around sturdy pipe cleaner web strands.
What colors can I use?
Black is classic, but orange, purple, green, pastel colors, or mixed stripes also work. Keep the four leg pieces equal in length regardless of color.
Make Your First Spider
Start with five standard pipe cleaners and skip the optional decorations until the basic frame stands correctly. Stack four stems, twist the center, wrap the fifth stem into a body, then count and bend all eight legs. Once that structure works, change the colors, add safe eyes, or attach the spider to a web, wreath, garland, or seasonal arrangement.