
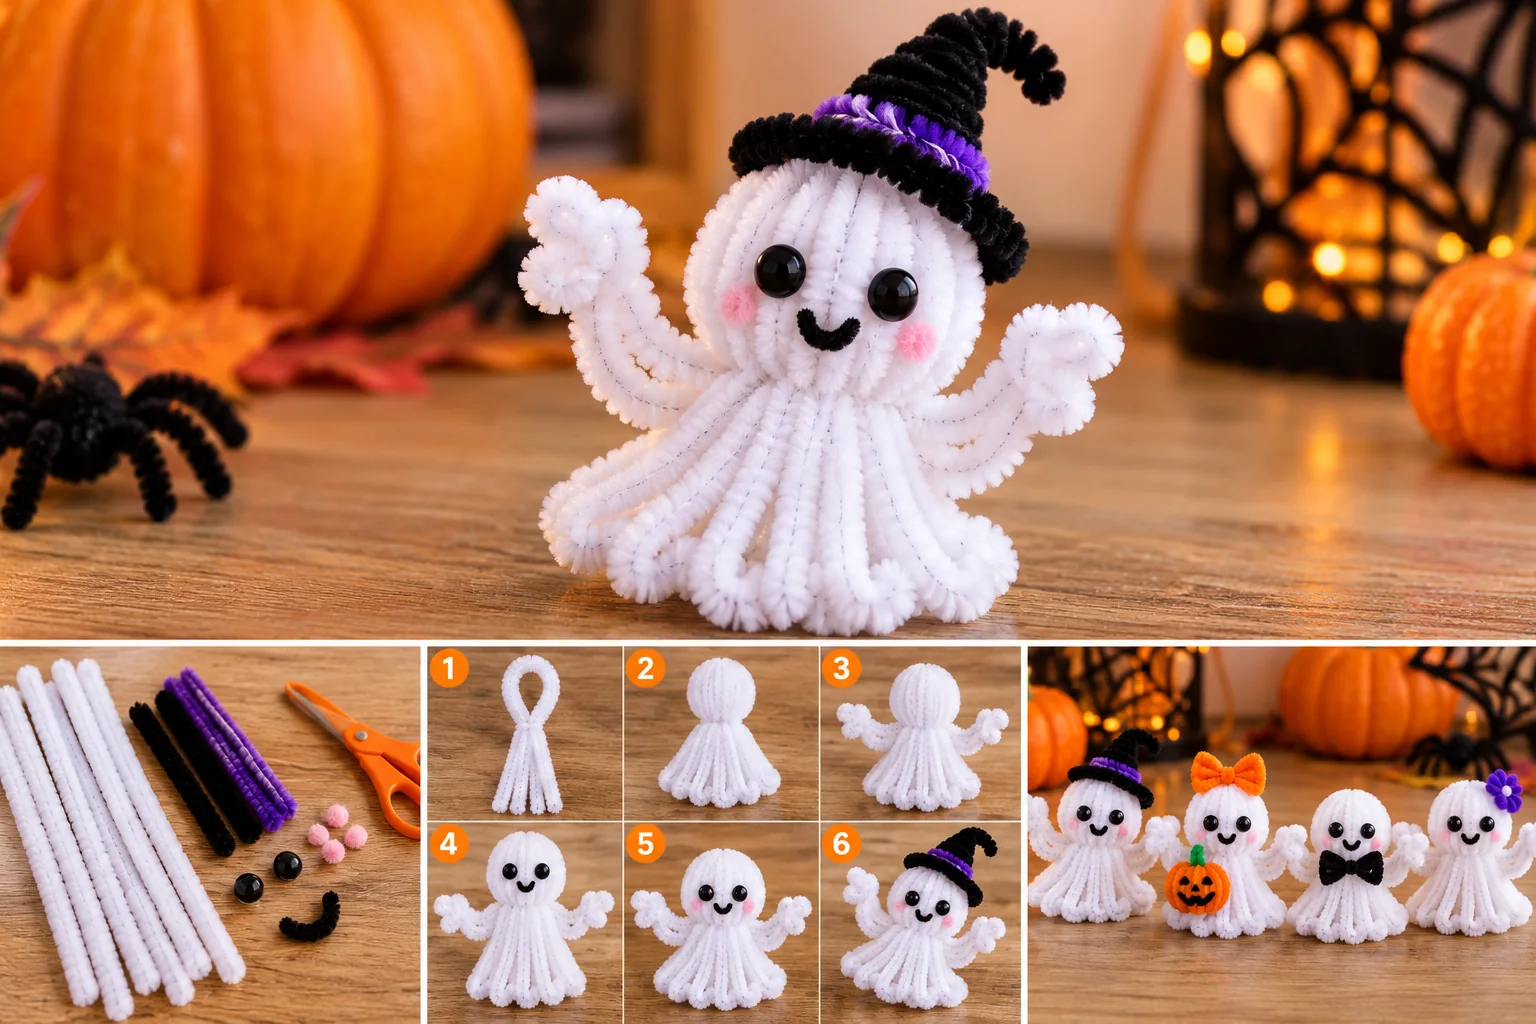
A pipe cleaner ghost is an easy Halloween craft made by bending white chenille stems into a rounded head and a flowing, wavy body. You can make a simple hanging ghost without glue, or build a fuller standing version with extra stems. This step-by-step tutorial explains both options, plus faces, decorations and common fixes.
What Is a Pipe Cleaner Ghost?
A pipe cleaner ghost is a small Halloween decoration made by bending and twisting white chenille stems into a rounded head and a flowing, wavy lower body. The design can be a flat outline for a garland or a fuller standing figure. This tutorial starts with a simple no-glue hanging ghost, then explains how to build a fuller tabletop version. Both use the same basic skills: folding, looping, twisting and shaping. Unlike our pipe cleaner spider tutorial, this project is focused on soft curves rather than eight individually bent legs.Quick Project Overview
- Main project: a friendly hanging ghost with a rounded head and wavy bottom.
- Skill level: beginner.
- Estimated time: 10–20 minutes for a basic ghost; allow longer for a full 3D version.
- Glue: not required for the main structure.
- Best uses: Halloween garlands, window displays, wreath accents and classroom crafts.
Times are planning estimates; your first attempt may take longer while you adjust the outline.
Materials for a Pipe Cleaner Ghost
- 3–4 white pipe cleaners for a simple ghost outline
- 1 short black pipe cleaner for eyes and mouth, or black paper and craft glue for optional facial features
- Scissors or wire cutters, used by an adult where needed
- A pencil or marker to form smooth rounded curves
- String or ribbon for hanging, optional
- Extra white pipe cleaners for the fuller 3D version
Choose chenille stems with a soft, dense covering for a fluffy appearance. Avoid tiny beads for young children; they can be a choking hazard. Fold cut wire ends inward and supervise children using scissors.
How to Make a Pipe Cleaner Ghost Step by Step
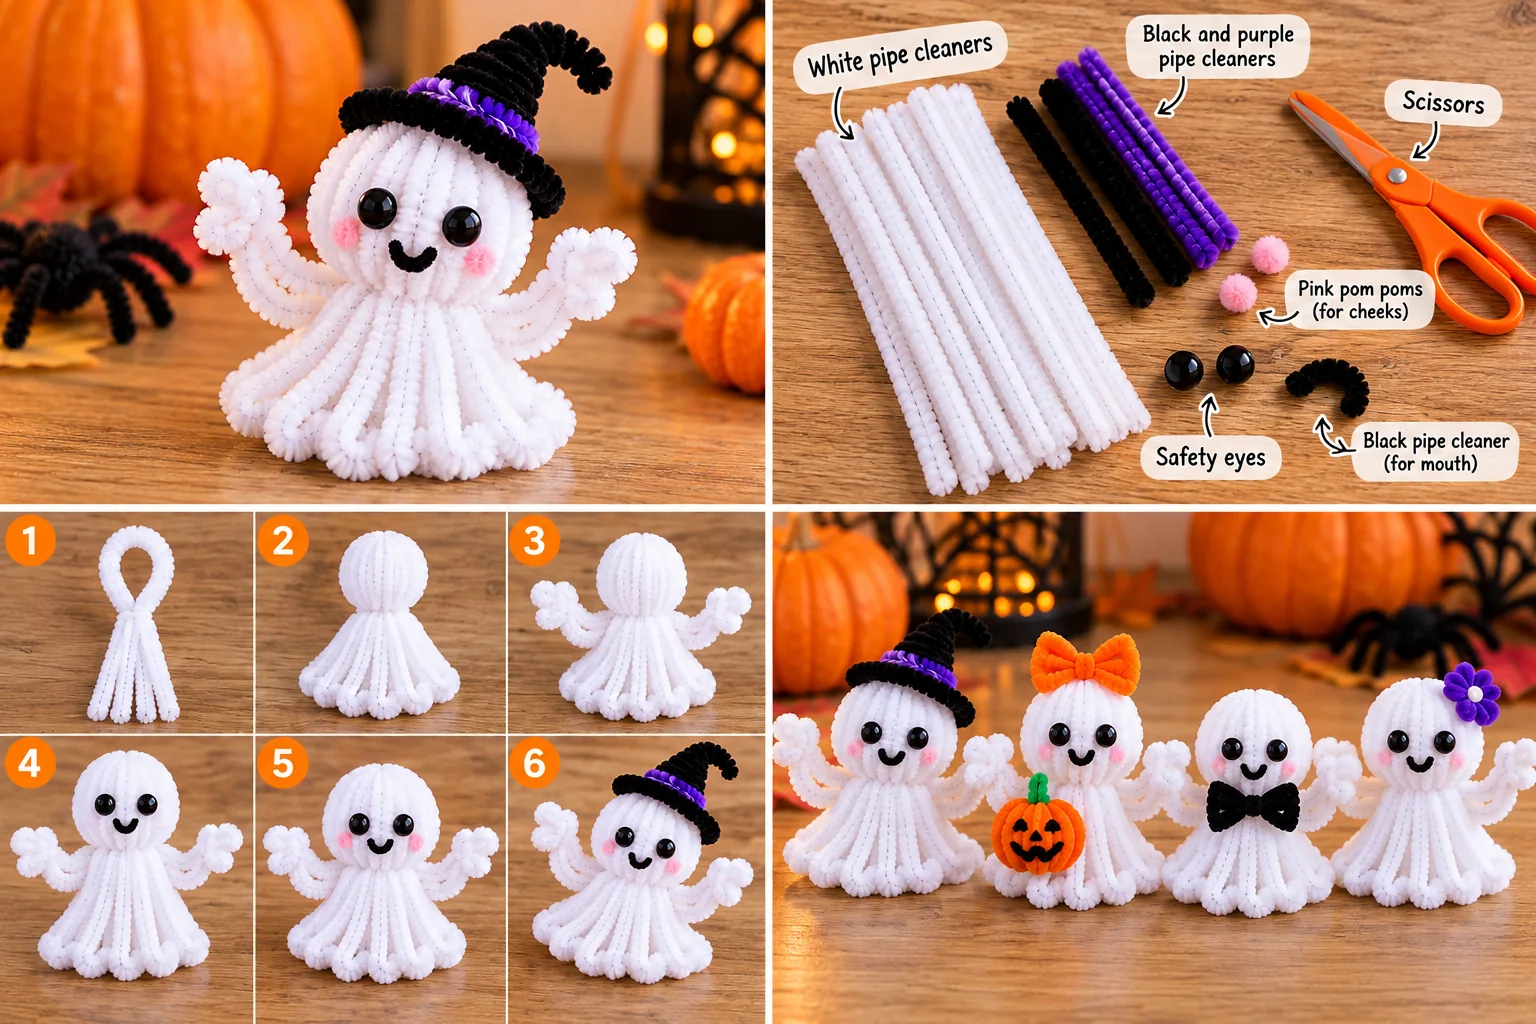
Step 1: Make the rounded head
Take one white pipe cleaner and bend its middle around a thick marker to create a smooth arch. Remove the marker carefully. Bring the two ends downward so the top looks like a rounded ghost head rather than a sharp triangle. Keep both sides approximately the same length.
Step 2: Form the shoulders
At about one-third of the way down the two sides, gently bend each stem outward. These soft shoulder curves make the ghost wider than a simple oval. Avoid pinching sharp corners; a ghost silhouette looks best with flowing edges.
Step 3: Create the wavy lower edge
Use a second white pipe cleaner to make two or three rounded waves. Shape it into a shallow zigzag with curved rather than pointed peaks. This will become the bottom edge of the ghost. Hold it against the two side stems to check the width before attaching it.
Step 4: Join the outline without glue
Overlap one end of the wavy lower edge with the bottom of the left side and twist them together two or three times. Repeat on the right. Tuck any extra wire inward. If the outline looks uneven, bend the shoulders and lower waves until both sides balance.
Step 5: Reinforce the shape
Use a third white pipe cleaner as a curved crosspiece behind the upper body. Twist its ends around the two sides, just below the head. This helps the ghost keep its width and provides a point where a hanging string can be attached. Keep the support behind the outline so it is less visible from the front.
Step 6: Add a simple face
Cut two short black pipe cleaner pieces and curl them into tiny flat circles for eyes. Secure them by twisting their short tails around the white support behind the head. A small black curved piece can become a smiling mouth. For very small ghosts, skip facial details or use paper shapes attached by an adult.
Step 7: Make the ghost hang straight
Loop string around the upper center of the head and tie a secure knot. Lift the ghost and check whether it tilts. If one side hangs lower, move the knot slightly or reshape the lower waves. The string should hold the main frame, not a loose decorative curl.
Step 8: Finish the silhouette
Round the top again, widen or narrow the shoulders, and give the bottom two or three soft scallops. Bend every exposed wire tip inward. Your basic pipe cleaner ghost is ready for a Halloween garland, doorway or wreath.
How to Make a Fuller 3D Pipe Cleaner Ghost
A three-dimensional version needs more stems and more shaping than the flat outline. It is best for a tabletop decoration rather than a lightweight garland. Start with six to eight white pipe cleaners of equal length. Fold each one into a U shape, gather the upper ends, and twist them together firmly to make a central join. Fan the folded loops outward to form a bell-shaped skirt, keeping the rounded folds at the bottom. Shape the top of the bundle into a soft dome, then tuck the twisted join toward the back. Add a white horizontal ring around the middle if the body collapses inward, fastening it with small twists. Adjust the loops until the ghost stands evenly. The resulting body will be airy rather than solid; for a denser plush-like finish, add more loops instead of pulling the existing ones too far apart. Use a small black curled stem for each eye, secured around the frame, and keep decorative additions lightweight. A 3D ghost is a display craft, not a toy for unsupervised toddlers.Five Cute Pipe Cleaner Ghost Variations
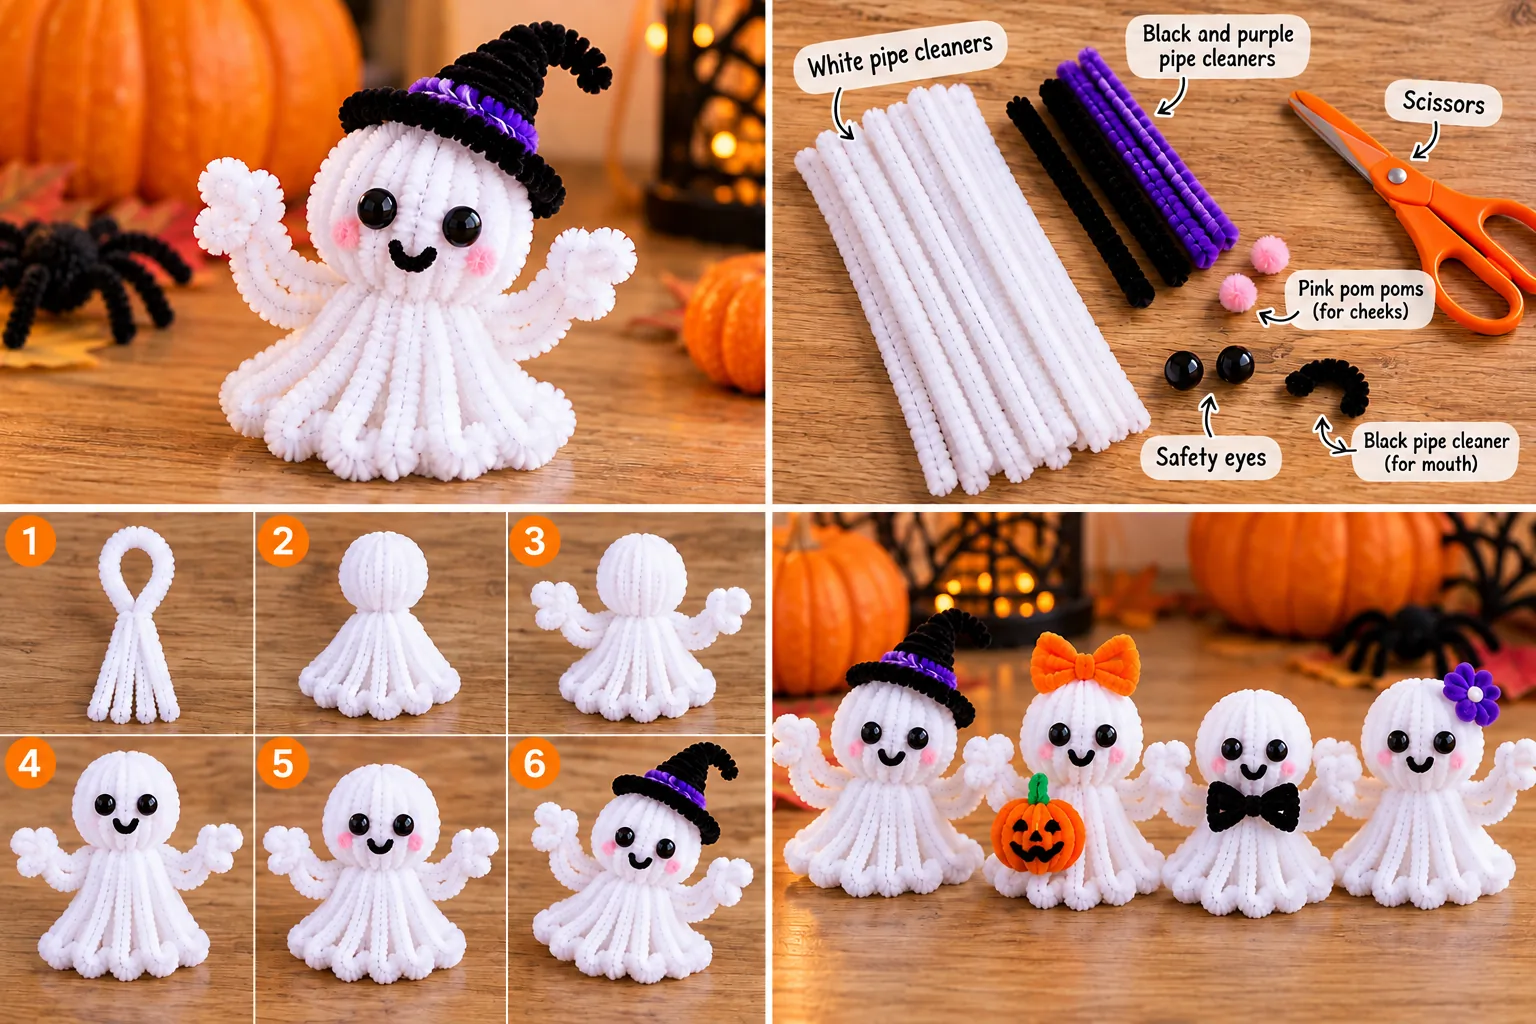
1. Classic white ghost
Use white stems, two black eyes and a small curved mouth. The simple contrast is easy to recognize against dark Halloween decorations.
2. Pastel ghost
Replace white with pale lavender, blush pink or mint green. Add a tiny matching bow by twisting a short colored pipe cleaner into two loops.
3. Mini ghost ornament
Use half-length stems and make a smaller head and fewer bottom waves. Hang several from a branch or lightweight hoop. An adult should trim and secure the ends.
4. Floating ghost garland
Make three to five flat ghosts and tie them at intervals along a length of ribbon. Vary the face expressions, but keep each knot above the center so the shapes face forward.
5. Ghost with a tiny flower
Twist a colored stem into three small petal loops and fasten it near one shoulder. For additional floral ideas, see our simple pipe cleaner flower ideas. Keep the flower smaller than the ghost’s head so it does not pull the hanging ornament sideways.
How to Make the Ghost Look Neat
Keep the head rounded
Shape the first bend around a marker or similar cylindrical object. A gradual curve makes a softer silhouette than a tight folded point.
Match the left and right sides
Check the shoulders before fastening the bottom. If one side is longer, slide the join or shorten the visible curve instead of cutting immediately.
Hide wire ends
Fold the final few millimeters back into the fuzzy stem covering. A neat finish improves appearance and reduces scratching.
Choose a clear background
White ghosts are easier to see against black, orange or dark purple paper. For a pale wall, hang them in front of a darker ribbon or wreath base.
Pipe Cleaner Ghost Decorations for Halloween
A group of small ghosts can decorate a mantel, classroom board or window without taking much space. Combine them with stars and moons made using the techniques in our pipe cleaner shapes guide. For a wall display, space the ghosts among handmade leaves or flowers and follow the hanging principles in our pipe cleaner wall hanging tutorial. A seasonal arrangement can also combine one ghost with dark flowers from our Halloween pipe cleaner flower crafts. Keep each project distinct: the ghost is the character, while the flowers and hanging pieces provide the setting.Pipe Cleaner Ghost Craft for Kids and Classrooms
For group activities, prepare the materials in advance and demonstrate one technique at a time. Younger children can shape a preassembled outline while an adult makes the tighter joins. Invite participants to count the waves along the bottom and compare wide versus narrow curves. Avoid beads and sharp wire tips. Give each finished ghost a name or a facial expression, then hang them at child-safe heights where they will not be pulled down. For other age-appropriate chenille-stem projects, see our easy pipe cleaner flowers for kids. This activity is intended for supervised crafting; check your materials and age group before starting.Troubleshooting Your Pipe Cleaner Ghost
The ghost looks too narrow
Open the shoulder curves and widen the lower wavy edge. Add a crosspiece behind the body if it keeps folding inward.
The head looks pointed
Unbend the top and shape it around a marker. Avoid a sharp central crease.
The bottom edge is uneven
Lay the outline on a flat table and adjust one wave at a time. The waves do not have to be identical, but both outer ends should reach the side stems.
The eyes will not stay attached
Use longer tails on the black curls and twist them around the white support behind the face. For a child-friendly alternative, omit the face or use adult-attached paper shapes.
The hanging ghost tilts
Move the string toward the true center of the frame. Check whether a flower or other decoration adds weight to one side.
More Pipe Cleaner Crafts to Try
Once you have made a ghost, practice stronger twists and geometric outlines with our pipe cleaner art ideas. The same bending techniques can create hearts, stars and spirals. If you prefer flower-based Halloween decorations, our pipe cleaner Halloween crafts article covers a different set of projects. Mixing the two types of decoration creates a more varied seasonal display.Frequently Asked Questions
How do you make a ghost out of pipe cleaners?
Bend a white pipe cleaner into a rounded head with two downward sides. Shape another white stem into a wavy lower edge and twist the ends together. Add a support stem and optional face details.
Can you make a pipe cleaner ghost without glue?
Yes. The main outline and support can be secured by twisting the chenille stems together. Small decorative features can also be attached using short twisted tails.
How many pipe cleaners do you need for a ghost?
A simple hanging outline uses about three or four white pipe cleaners, plus a little black stem for a face. A fuller 3D ghost needs more stems, often six to eight or more.
What is the easiest pipe cleaner ghost for beginners?
A flat ghost outline with a rounded head and wavy bottom is easier than a dense 3D ghost. It teaches curving and twisting without complicated assembly.
How do you make a pipe cleaner ghost stand up?
For a tabletop ghost, fold several white stems into U-shaped loops, join the upper ends and spread the rounded lower loops into a balanced bell-shaped base.
Can kids make pipe cleaner ghosts?
Many children can help with simple bending and shaping under supervision. Adults should manage sharp wire ends, cutting tools and small decorative pieces.
How do you hang a pipe cleaner ghost?
Tie a lightweight thread or ribbon securely around the upper center of the frame. Lift the ghost and adjust the knot until it hangs straight.
What can you decorate with pipe cleaner ghosts?
Use them on garlands, wreaths, windows, classroom displays, mantel decorations and Halloween wall hangings.
Final Thoughts
Start with the flat no-glue ghost and practice smooth curves before attempting a fuller standing version. A rounded head, secure twists and a gently wavy bottom are more important than perfect symmetry. Once your ghost is finished, pair it with handmade stars, flowers or other Halloween decorations for a personalized display.
1 thought on “How to Make a Pipe Cleaner Ghost – Easy Halloween Craft Step by Step”