
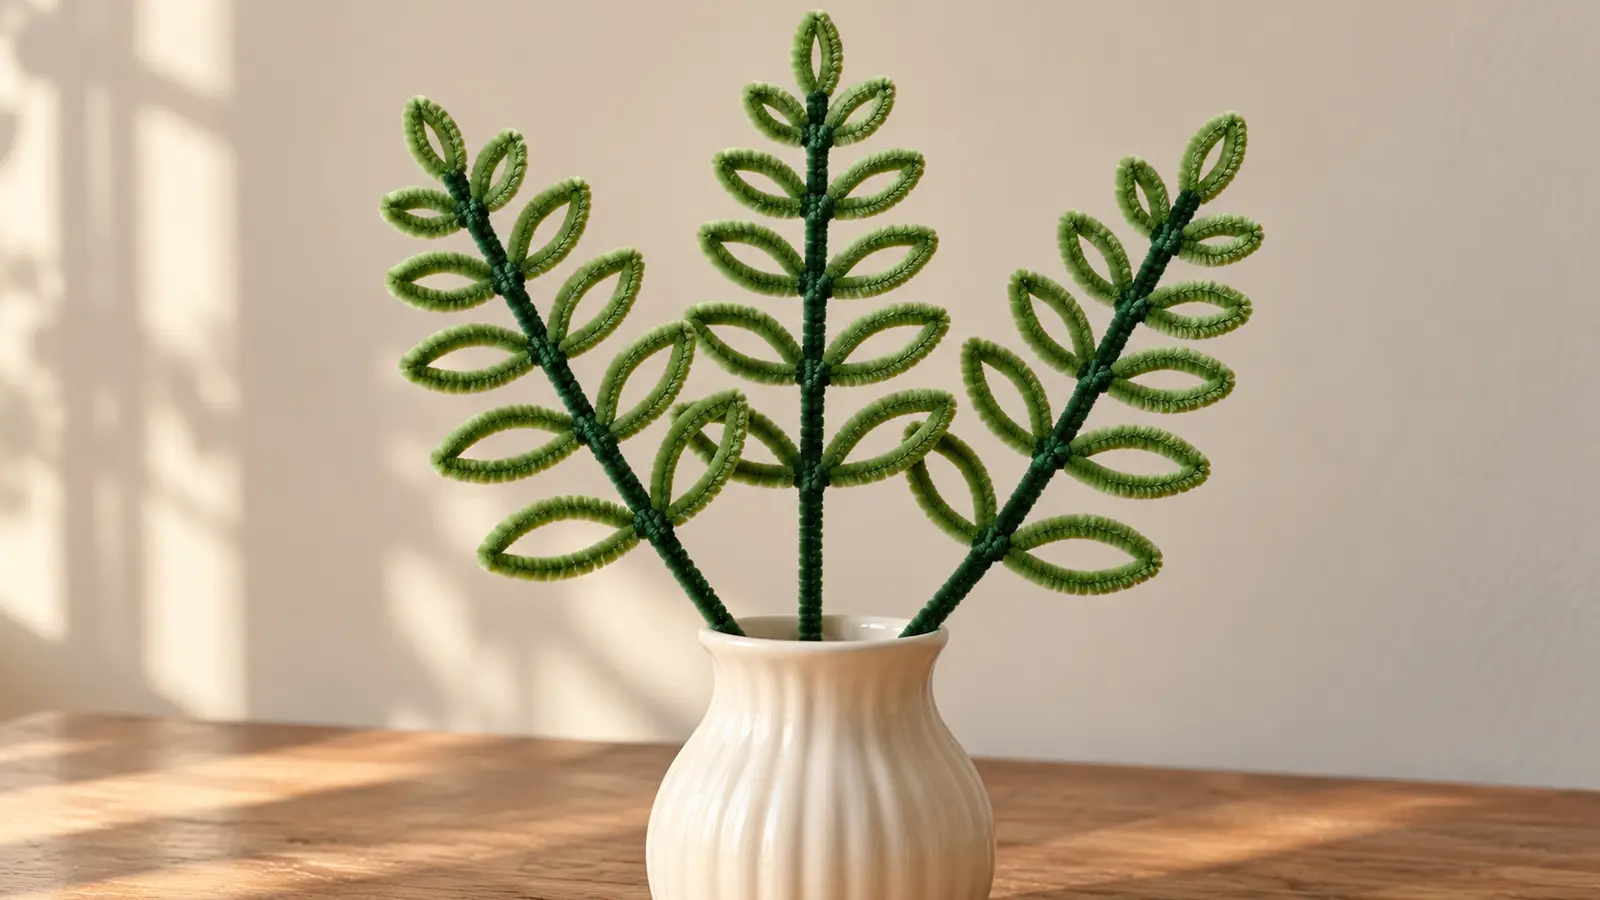
To make a pipe cleaner fern, twist two green chenille stems into a central stalk, attach six pairs of pointed loop leaflets, and decrease the leaflet size toward the tip. Each pair wraps around the stalk at its midpoint, so the basic frond needs no glue.
This is a stylized fern-like foliage craft for handmade flower arrangements. The leaflets have open centers and a deliberately simple outline. It is not a botanical model of a particular fern species. The AI-generated images illustrate the loop-and-wrap construction, not a full-size cutting template. The tapered silhouette is what makes the finished piece read as fern foliage rather than a row of identical leaves.
Unlike a single pipe cleaner leaf, this project builds an entire frond around one stalk. Use it behind flower heads to add height and texture, or display two or three fronds together in a small dry vase.
Project at a Glance
- Skill level: beginner with adult help for cutting and tight connections.
- Basic supplies: five 30 cm green chenille stems per frond.
- Construction: a doubled stalk, six paired leaflets and one folded tip.
- Finished height: approximately 25–28 cm, depending on how tightly you twist and curve the stalk.
- Allow about 20–30 minutes for a first attempt; this is a planning estimate, not a timed test.
- Display only: keep dry and out of reach of babies, toddlers and pets.
Materials and Cutting Plan
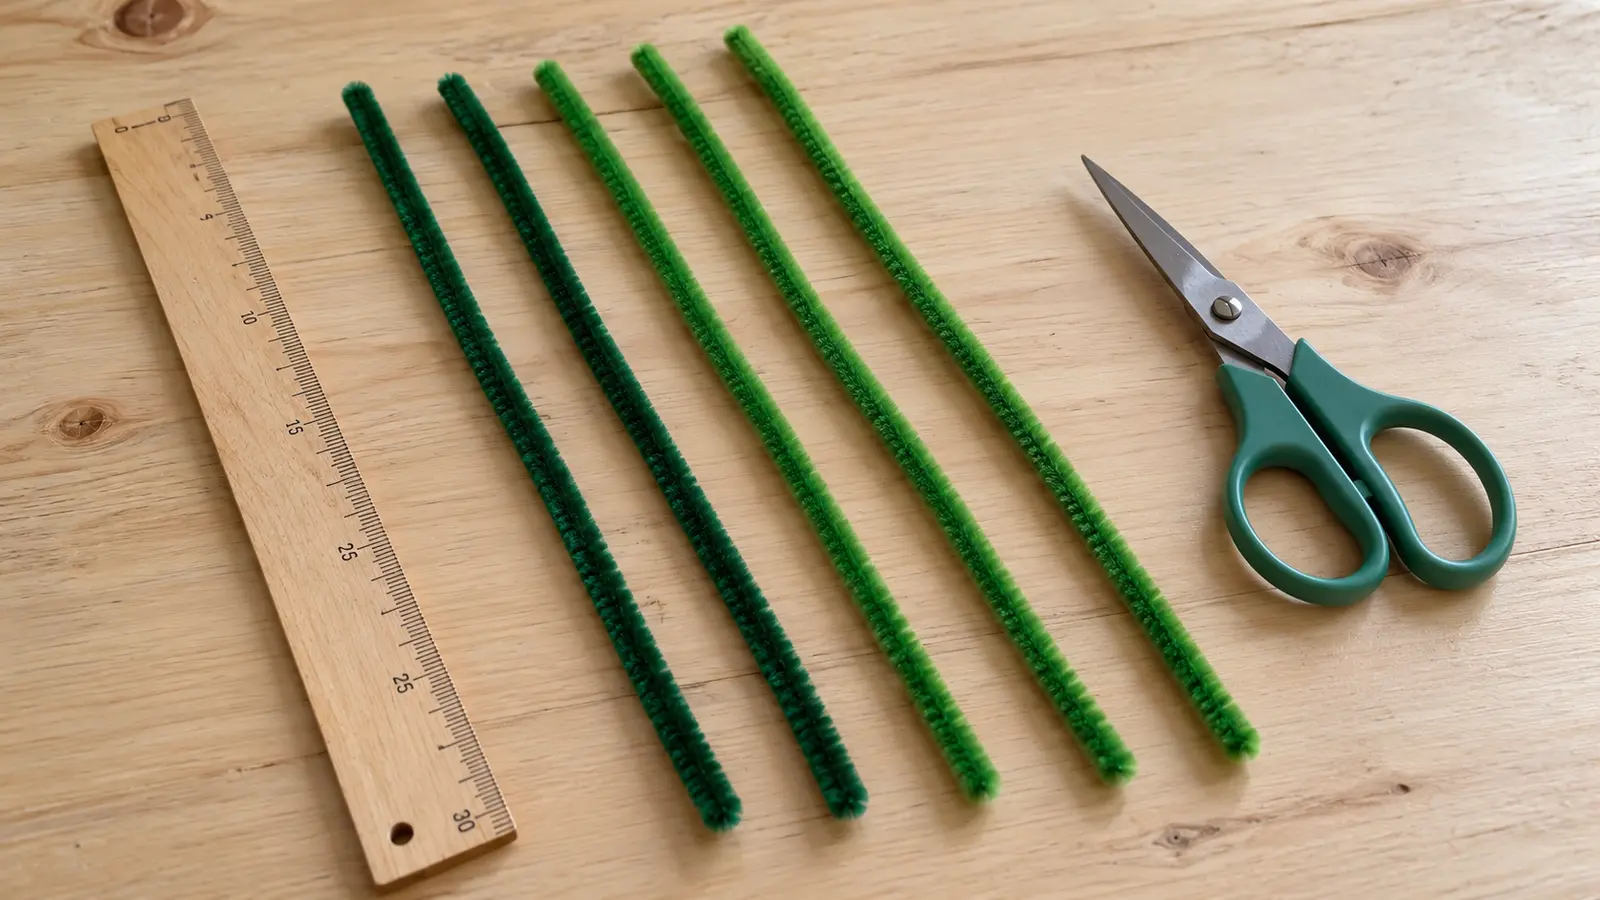
Choose standard fuzzy craft stems about 30 cm long and 6 mm thick. Softer stems make easy curves, while firmer internal wire supports the leaflets better. Start with matching thicknesses; mixing a very thin stalk with heavy plush leaflets can make the frond droop.
- Two dark green pipe cleaners for the central stalk.
- Three medium green pipe cleaners for the leaflet pairs.
- A ruler and suitable craft scissors or wire cutters.
- Optional small pliers to fold sharp cut tips inward.
- One extra green stem for practice or reinforcement, not included in the basic five-stem count.
Keep the two dark green stems full-length. Cut the three medium green stems as follows: from the first, cut an 18 cm piece and a 12 cm piece; from the second, cut 16 cm and 14 cm pieces; from the third, cut 10 cm and 8 cm pieces. The last stem leaves a 12 cm offcut. Put that offcut aside rather than adding it automatically.
You should now have six leaflet pieces measuring 18, 16, 14, 12, 10 and 8 cm. Each piece makes a complete left-and-right pair, not one individual leaflet. This distinction is important: cutting twelve pieces of these lengths would double the intended materials and make the frond much heavier.
An adult should cut stems and collect every offcut. Chenille stems contain wire; fold all cut tips inward before handling or display. Do not describe this as safe for unsupervised toddlers, and do not use finished fronds as toys or food decorations.
How to Make a Pipe Cleaner Fern Step by Step
1. Make the Reinforced Stalk
Align the two dark green stems with their bottom ends together. Twist them gently around each other from the bottom upward. Use even turns instead of winding one stem into a tight spring around the other. Both wires should contribute to the stalk.
Leave roughly 3 cm at the upper end free. Bend these two ends together into one narrow pointed loop, then twist the tips down against the stalk. This makes the small terminal tip and hides the exposed ends. The finished stalk will be a little shorter than the original stems because twisting uses some length.
Lay it on the table and straighten the lower section. Keep the final curve until after you attach the leaflets. A straight stalk is easier to measure, and it lets you see whether the pairs are becoming crowded.
2. Mark Out Six Attachment Levels
Leave the lower 8–10 cm of the stalk bare as a handle or vase stem. Above that, plan six attachment levels spaced about 2–2.5 cm apart. You do not need a pen: place the six cut pieces beside the stalk as temporary position markers.
Put the longest piece at the lowest level and the shortest near the folded tip. If your twisted stalk is shorter than expected, reduce the spacing slightly. Keep some clear space between the uppermost pair and the terminal loop rather than squeezing them together.
3. Form the Largest Paired Leaflets
Take the 18 cm piece and locate its midpoint. Reserve approximately the middle 2 cm for the attachment. Bend one side outward and back toward this central area to form a narrow oval loop. Fold its cut end back on itself by a few millimeters, then twist that tucked end around the wire at the loop base.
Repeat on the other side so you have two open loops facing in opposite directions with a short connecting section between them. Pinch the outer fold of each loop to suggest a pointed leaflet. Keep the base narrow and the two loops roughly equal, but do not pull the attachment section tight yet.
The exact finished leaflet length depends on your wrapping allowance. Aim for a pair that is clearly wider than the next pair, rather than forcing an exact outline measurement. If you need more wire for a safe folded end, shorten the loop slightly.
4. Wrap the Pair Onto the Stalk
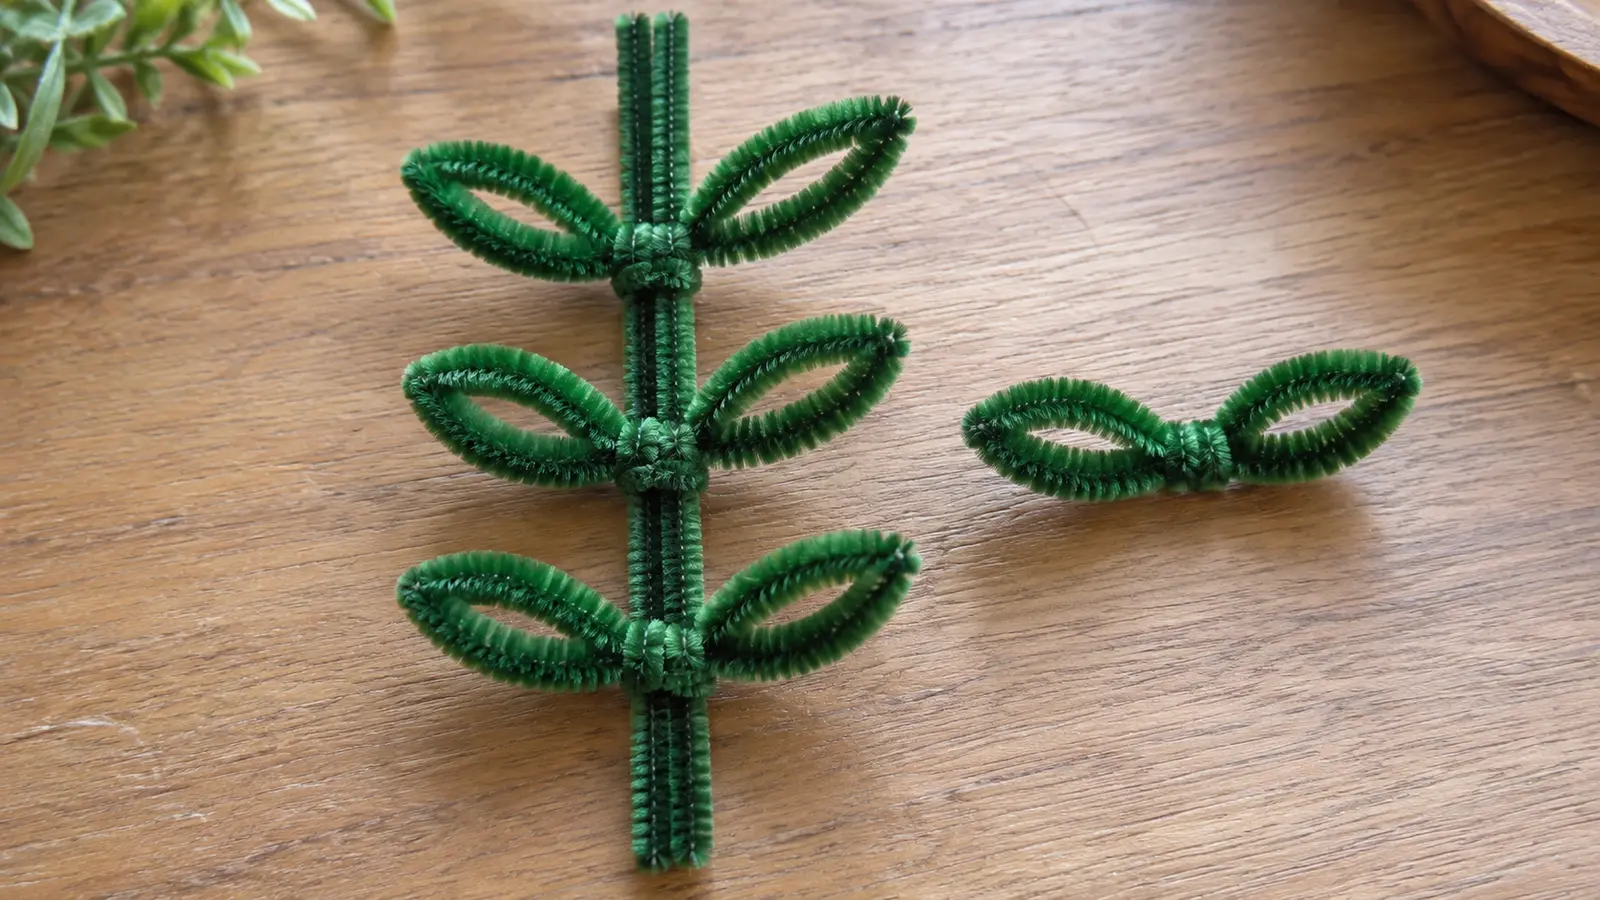
Place the middle section of your paired piece against the lowest attachment level. Bring the left loop around one side of the stalk and the right loop around the other, crossing them behind it. Turn the pair once more if the remaining middle section allows, then press the connection snugly against the doubled stalk.
Hold the stalk still while you tighten the join. Do not twist the outer leaflet tips as handles; this distorts the loops and can work the cut ends loose. Instead, grip close to the center with your fingertips or small pliers.
Gently push the pair upward with a finger. It should resist sliding. If it moves freely, unwind the connection and reserve a little more middle wire by making the loops smaller. Avoid adding glue to compensate for a loose mechanical join.
5. Add Five Progressively Smaller Pairs
Repeat the same method with the 16, 14, 12, 10 and 8 cm pieces, moving upward along the stalk. Keep the attachment method consistent. Each new pair should look shorter than the pair below it, creating a tapered triangle when you look at the frond from the front.
For the shortest piece, make very small loops and prioritize folded cut ends and a secure center wrap. It is better to have a tiny top pair than a larger pair with an exposed wire point. If a piece will not allow both, replace it with a slightly longer spare and keep its loops small.
Alternate the leaflet angles slightly. One pair can lean upward; the next can open a little farther sideways. Keep the overall frond shallow enough to fit behind a flower, but avoid bending every loop into exactly the same flat position.
6. Shape the Frond and Check the Back
Support the middle of the stalk and bend its upper third into a gentle curve. Keep the lower handle relatively straight. The curve should run through several centimeters of stem rather than concentrating all the bending at one attachment point.
Turn the piece over. Fold any exposed tip toward the wrapped center and inspect each join with a fingertip. Lightly shake the lower stalk: leaflets should stay attached without rotating independently. Retighten a moving pair before placing the frond in a vase.
Why the Taper Matters
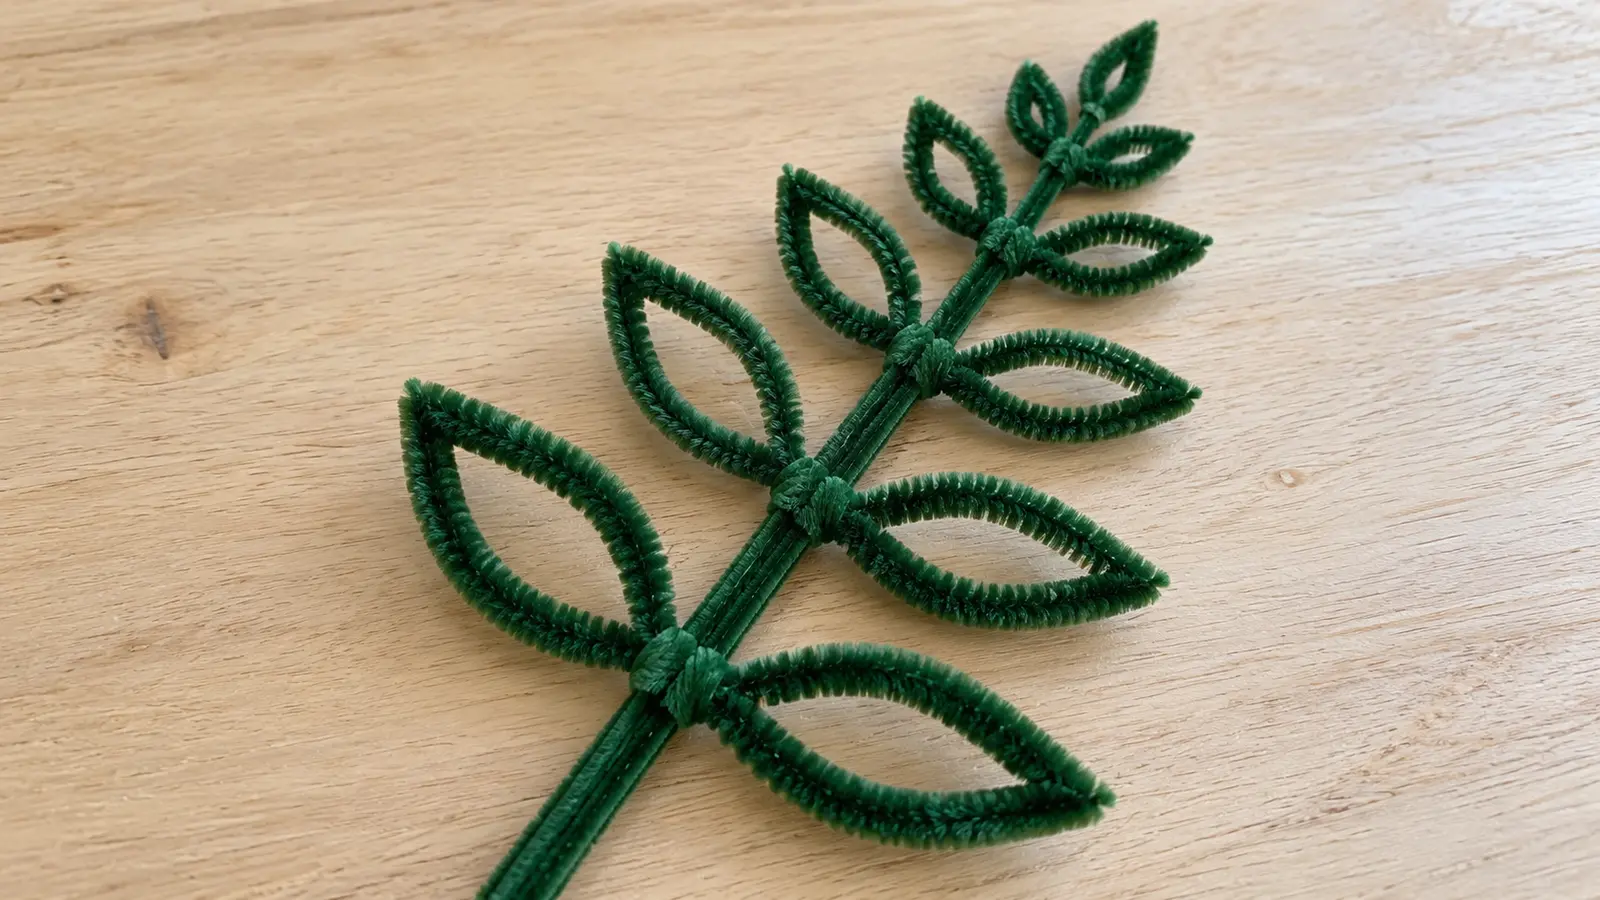
A fern-like silhouette depends more on the progression of leaflet sizes than on tiny decorative details. Six identical pairs produce a ladder shape. A larger bottom pair, medium central pairs and very short top pairs create a clearer, lighter outline.
If the bottom pair dominates, narrow its loops or lift their tips upward. If the top looks blunt, make the last two pairs smaller and keep the terminal loop narrow. These changes improve the outline without adding materials.
This pattern intentionally leaves air between the leaflets. Filling every loop with another chenille stem would create a different, heavier project and require additional supplies. Keep the first frond open while you learn the attachment method.
Troubleshooting
The Leaflets Slide Down
Check the middle connection. A loose single crossing can rotate without gripping the stalk. Re-form slightly smaller loops so you have more wire at the center, wrap snugly and tuck the join against an existing twist in the stalk. The fuzzy surface helps with friction, but it does not replace a wire connection.
The Stalk Bends Under the Leaves
Bring the leaflets closer to the stalk and shorten the widest loops. If the wire remains too soft, add the optional spare stem alongside the lower stalk and twist it into place. Recheck the vase support afterward; a reinforced frond can still tip an unstable container.
The Frond Looks Too Crowded
Spread the attachment levels along the available stalk. You can also reduce the middle leaflet sizes. Do not try to fix crowding by pulling the loops sideways with force, because that can loosen the bases. Untwist and reposition one pair at a time.
Cut Ends Catch on Fabric
Remove the frond from the arrangement and fold the offending point inward with pliers. Check the other joins at the same time. Covering a sharp point with fluff alone is not a reliable fix; the wire itself needs to be bent and tucked.
Using Fern Foliage in Flower Arrangements
Place one frond behind a larger flower head, with the top visible above or beside the bloom. The pipe cleaner rose offers a rounded contrast to the fern’s narrow open loops. For a brighter arrangement, use a fern behind a pipe cleaner sunflower without letting the leaves cover its center.
For a small bouquet, begin with one frond rather than putting foliage on every side. Look at the arrangement from its intended viewing angle. Add a second frond only if the first leaves a clear empty area. Too many similarly sized fronds can hide the flowers instead of supporting them.
Keep the bare lower section inside the vase or below the bouquet binding point. Follow the bouquet assembly guide for arranging and stabilizing finished stems. This page makes the foliage element; it does not replace the full bouquet instructions.
Simple Variations
For a miniature frond, shorten the stalk and make smaller pairs while keeping the same descending size order. Do not simply cut the finished tips off: that exposes wire and destroys the folded leaflet ends. Shape a fresh smaller pair instead.
For a two-tone version, keep the dark stalk and use two close shades of green for the leaflets. Group the shades deliberately, such as darker lower pairs and lighter upper pairs. Randomly changing every leaflet can make the simple structure harder to read.
For a fuller display, make two or three separate fronds. Vary their heights by bending the lower stems or choosing different starting lengths, not by attaching an excessive number of pairs to one stalk. Keep each frond light enough for its own support.
Compact Instructions to Print
This is a print-friendly on-page checklist, not a separate PDF download. Use your browser’s print controls to print the relevant section.
- Gather two full-length stalk stems and three leaflet stems.
- Cut leaflet pieces: 18, 16, 14, 12, 10 and 8 cm.
- Twist the two full-length stems together and fold the upper ends into a small pointed tip.
- Leave 8–10 cm bare at the bottom; plan six spaced attachment levels.
- Shape two pointed loops from each piece, keeping the middle available for wrapping.
- Attach the longest pair lowest, then work upward in decreasing sizes.
- Curve gently, tighten sliding joins and tuck every exposed wire end.
For printable flower projects to accompany this foliage, use the pipe cleaner flower instructions collection. The fern is a separate project and is not claimed to be included in that booklet.
FAQS
How many pipe cleaners do I need for one fern?
The basic frond uses five 30 cm stems: two for the doubled stalk and three cut into six paired-leaflet pieces. Keep an extra stem for practice or reinforcement.
Can I make a pipe cleaner fern without glue?
Yes. Each paired-leaflet piece wraps around the doubled stalk at its middle. Tighten and inspect the wire connections before displaying the frond.
Is each cut piece for one leaf or a pair?
Each cut piece forms both a left and a right loop leaflet, with its middle section used for attachment. Six pieces make six pairs.
Why are the top leaflets smaller?
Progressively smaller pairs create the tapered fern-like silhouette. Equal-sized pairs make the frond look more like a ladder.
Can children make this fern?
Children who can shape loops can participate with adult supervision. An adult should cut stems, assist with tight wraps and check exposed wire tips. Finished fronds are decorations, not toddler toys.
Storage and Final Inspection
Store finished fronds in a shallow box without heavy objects on top. Dust with a soft dry brush and avoid soaking the chenille. If a leaflet becomes flattened, support its wrapped base while reshaping the outer loop. Replace a piece if repeated bending has damaged its wire.
Before display, check three things: the pairs decrease toward the tip, the joins resist sliding and every cut end is tucked inward. Those practical details matter more than making every leaflet perfectly identical.