If you’ve ever tried to follow a pipe cleaner flower tutorial on a phone or laptop while your hands are full of pipe cleaners — you know the problem. You scroll up, lose your place, accidentally close the tab, and the whole session loses its flow.
Printable instructions solve all of that.
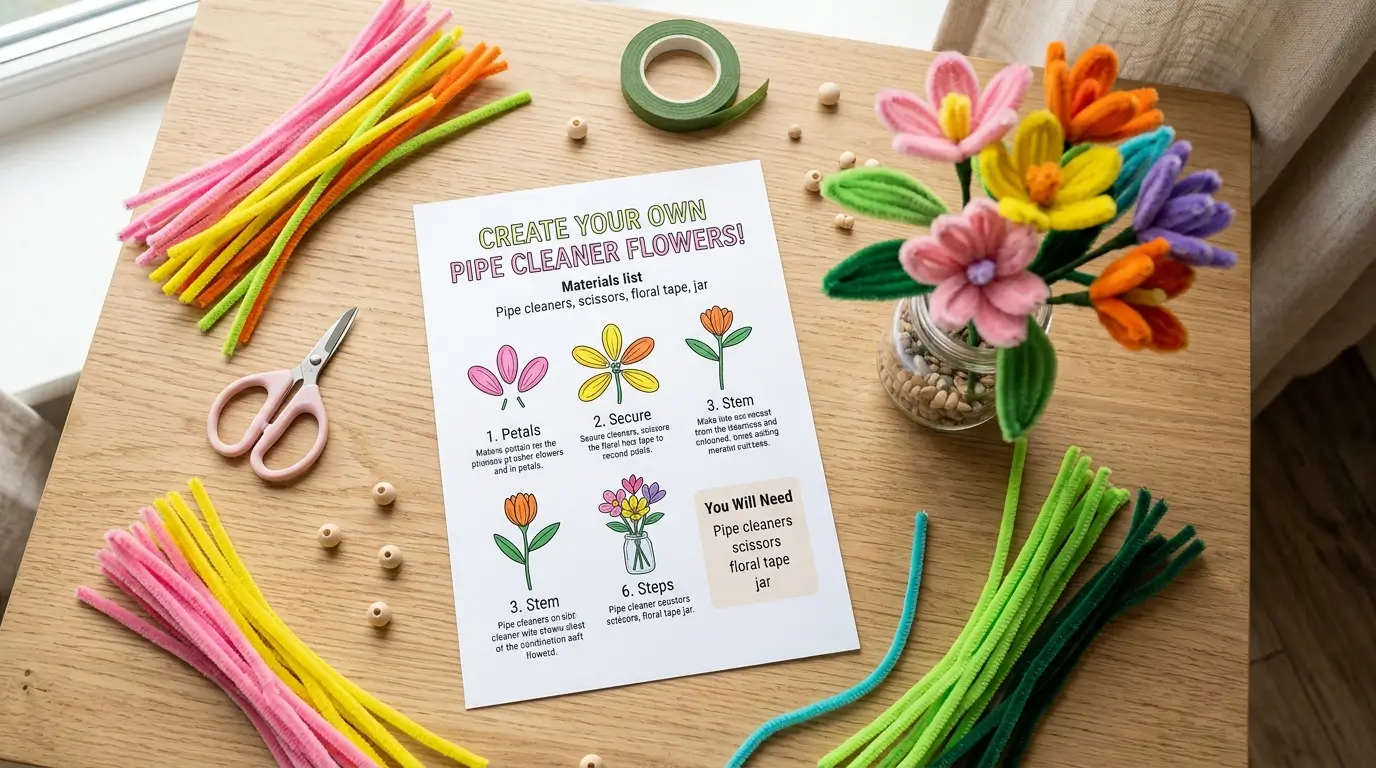
This page gives you free pipe cleaner flower printable instructions for 10 different flowers — from the beginner-friendly daisy and wildflower to the more advanced rose and cherry blossom. Print the ones you need, lay them on your craft table, and never lose your place again.
Every instruction sheet covers: materials list, step-by-step instructions with clear descriptions, tips for beginners, and a difficulty rating.
📄 Instructions are below for each flower — copy, paste into a document and print, or use directly on screen. Each set is formatted to fit on one A4 or Letter page.
Why Printable Instructions Make Better Crafters
There’s a real difference between following a tutorial on screen and working from a printed sheet:
No screen distraction. A printed sheet stays on the table, always visible, while your hands work freely. No accidentally swiping away, no screen timeout, no notifications.
Kids work independently. When children have a physical instruction sheet in front of them, they can work at their own pace without asking for help constantly. This is transformative for classroom settings.
Perfect for groups. Print one sheet per person for a birthday party, classroom session or craft club. Everyone has their own guide and works independently.
Reusable reference. Laminate your favorite sheets and use them again and again for every craft session. Build a personal pipe cleaner flower instruction library.
No internet needed. Once printed, the instructions work anywhere — at a kitchen table, in a classroom, at a summer camp, on a camping trip.
What’s Inside the Free Printable PDF
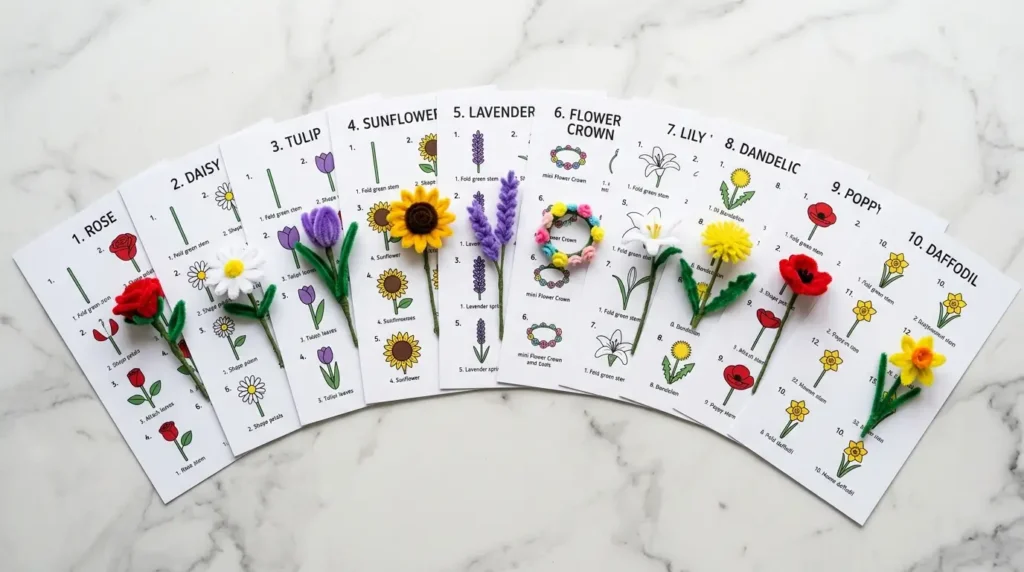
The free printable instruction set covers 10 pipe cleaner flowers:
| Flower | Difficulty | Time | Age |
|---|---|---|---|
| 🌿 Wildflower | ⭐ Easiest | 3 min | 3+ |
| 💜 Lavender Sprig | ⭐ Easiest | 3 min | 4+ |
| 🌼 Daisy | ⭐⭐ Easy | 5 min | 4+ |
| 🌷 Tulip | ⭐⭐ Easy | 5 min | 5+ |
| 🌻 Sunflower | ⭐⭐ Easy | 7 min | 6+ |
| 🌹 Rose | ⭐⭐ Easy | 6 min | 6+ |
| 🌸 Cherry Blossom | ⭐⭐⭐ Intermediate | 8 min | 7+ |
| 🌺 Zinnia | ⭐⭐⭐ Intermediate | 7 min | 7+ |
| 💐 Bouquet Assembly | ⭐⭐ Easy | 15 min | 7+ |
| 👑 Flower Crown | ⭐⭐ Easy | 20 min | 6+ |
Each sheet includes:
- Materials list — exact pipe cleaner colors and quantities
- Step-by-step instructions — clear numbered steps
- Difficulty rating — honest assessment for planning
- Age recommendation — so teachers and parents can choose appropriately
- Pro tip — one technique detail that makes the biggest difference
- Link to full tutorial — for more photos and variations
How to Use the Printable Instructions
For individual crafters at home
Print your chosen instruction sheet, place it flat on your craft table, and gather your pipe cleaners. Work through each numbered step in order. When you reach a step that’s unclear, the full online tutorial (linked on each sheet) has photos for every stage.
For parents with young children
Print the instruction sheet and read through it yourself first. Then sit with your child and read each step aloud as they complete it. For ages 3–5, you’ll do most of the shaping — for ages 6+, they can follow the sheet independently with you nearby.
For classroom use
Print one sheet per student. Sort pipe cleaners into labeled cups by color in the center of each table before the session begins. Students collect what they need, follow their sheet independently and work at their own pace. This format works for groups of 5–30 students.
For craft parties and clubs
Stack printed sheets at a central table with a sorted pipe cleaner station beside it. Guests take a sheet, collect their materials and find a spot to work. The printed format means everyone can start immediately without needing a group demonstration.
For a full classroom craft setup guide, see our pipe cleaner flowers classroom decoration guide.
📋 Printable Instructions — All 10 Flowers
Copy each section below into a Word document, Google Doc or notes app and print.
🌿 SHEET 1 — Wildflower ⭐
Difficulty: Easiest · Time: 3 min · Age: 3+
Materials: 1 pipe cleaner (any color) · 1 green pipe cleaner (stem)
Steps:
- Take your colored pipe cleaner and fold it in half
- Fold it in half again (you now have 4 layers)
- Fold in half one more time (8 layers)
- Hold the center tightly and twist it once
- Fan the loops outward — they naturally form a flower shape
- Twist a green pipe cleaner stem at the center twist point, 3 rotations
- Add a small green leaf loop halfway down the stem
Pro tip: The faster you twist step 4, the more the petals bounce outward naturally.
Full tutorial: simple pipe cleaner flower ideas
💜 SHEET 2 — Lavender Sprig ⭐
Difficulty: Easiest · Time: 3 min · Age: 4+
Materials: 1 green pipe cleaner (stem) · 1 purple pipe cleaner (torn into 8 small pieces of ~3 cm)
Steps:
- Hold the green pipe cleaner — this is your stem
- Take the first purple piece and fold it in half over the top of the green stem
- Twist the two purple ends together once under the green stem
- Move 8–10 mm down and attach the next purple piece the same way
- Continue adding 6–10 purple buds total along the top third of the stem
- Leave the bottom two-thirds of the green stem bare
- Gently pinch each purple bud upward so it points slightly toward the sky
- Curve the stem very slightly at the midpoint for a natural look
Pro tip: Vary the size of your purple pieces slightly — some 2.5 cm, some 3.5 cm. The variation looks more realistic than perfect uniformity.
Full tutorial: lavender pipe cleaner flowers
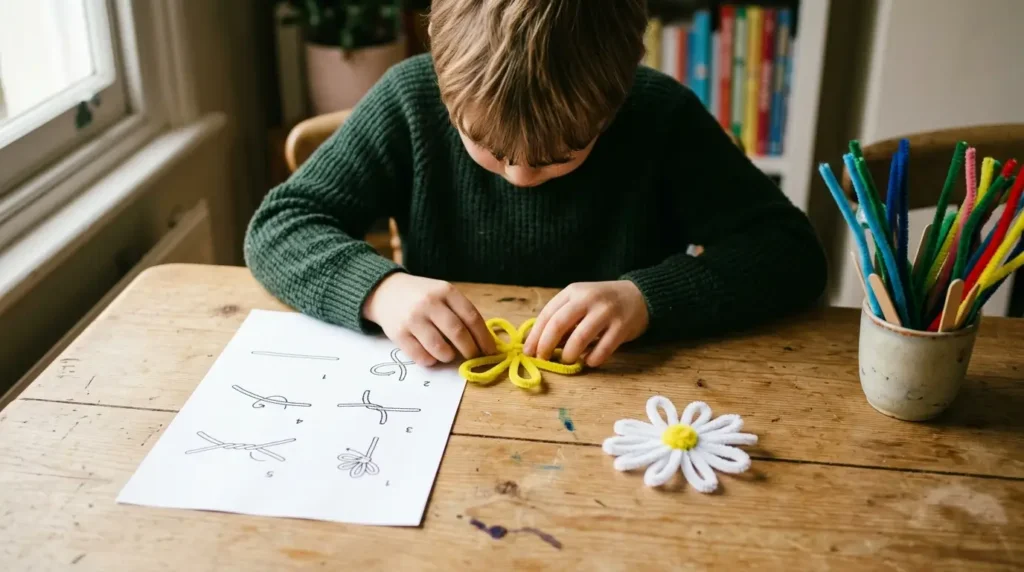
🌼 SHEET 3 — Daisy ⭐⭐
Difficulty: Easy · Time: 5 min · Age: 4+
Materials: 6 short white pieces (~5 cm each) · 1 yellow pipe cleaner (center coil) · 2 green pipe cleaners (stem + leaf)
Steps:
- Coil the yellow pipe cleaner into a small flat circle ~2 cm diameter. Twist the end upward to secure
- Fold each white piece in half to make a small loop. Pinch and twist the ends together at the base
- Arrange all 6 white loops evenly around the yellow center
- Twist all petal bases and the yellow coil tail together firmly at the back — 4 full rotations
- Spread petals outward evenly and fan them flat
- Twist two green pipe cleaners together for a double stem. Attach to the petal-center twist point
- Add one green leaf loop halfway down the stem
Pro tip: The tighter you twist step 4, the more firmly the petals hold their position.
Full tutorial: pipe cleaner daisy flower guide
🌷 SHEET 4 — Tulip ⭐⭐
Difficulty: Easy · Time: 5 min · Age: 5+
Materials: 1 colored pipe cleaner (flower) · 2 green pipe cleaners (stem) · 1 green pipe cleaner (leaf)
Steps:
- Wrap your colored pipe cleaner around your index finger 3 times, each wrap above the previous
- Carefully slide the loops off your finger
- Pinch the sides of the loops inward to form a rounded cup shape — wider at top, narrower at base
- Twist the two pipe cleaner tails at the base together firmly 3–4 times
- Twist two green pipe cleaners together for a double stem
- Attach the stem by wrapping around the base twist 3 times
- Fold a green pipe cleaner into a large curved oval leaf (8–10 cm). Attach halfway down the stem
Pro tip: Pinch from the sides, not from above. Side pressure creates the classic tulip cup shape.
Full tutorial: pipe cleaner tulip guide
🌻 SHEET 5 — Sunflower ⭐⭐
Difficulty: Easy · Time: 7 min · Age: 6+
Materials: 1 yellow pipe cleaner (cut into 8 equal pieces ~6 cm) · 1 dark brown pipe cleaner (center) · 2 green pipe cleaners (stem) · 1 green pipe cleaner (leaves)
Steps:
- Coil the brown pipe cleaner into a flat circle ~2.5 cm diameter. Twist end upward to secure
- Fold each yellow piece in half into a petal loop. Pinch and twist the ends together at the base
- Arrange all 8 yellow petals evenly around the brown center
- Twist all petal bases and the brown coil tail together firmly at the back — 4 full rotations
- Fan petals outward and slightly backward. Curve each tip slightly upward
- Twist two green pipe cleaners together for a double stem
- Attach stem at the back twist point — 3 rotations
- Add two large green oval leaves on opposite sides halfway down the stem
Pro tip: Use exactly 8 petals — Fibonacci numbers look most natural for sunflowers.
Full tutorial: pipe cleaner sunflower guide
🌹 SHEET 6 — Rose ⭐⭐
Difficulty: Easy · Time: 6 min · Age: 6+
Materials: 1 colored pipe cleaner (flower) · 2 green pipe cleaners (stem) · 1 green pipe cleaner (leaves)
Steps:
- Hold one end of the pipe cleaner between thumb and index finger
- Coil the pipe cleaner tightly in a flat spiral from outside in — like a snail shell
- When you reach the center, fold the last centimeter upward to lock the coil
- Gently pull the outer rings slightly upward and outward to open the rose shape
- Twist two green pipe cleaners together for a double stem
- Attach stem by wrapping around the coil base 3 times firmly
- Fold green pipe cleaner into small pointed oval leaves. Attach two leaves halfway down the stem
Pro tip: The tighter your initial coil, the more realistic the rose looks. Don’t rush this step.
Full tutorial: pipe cleaner rose guide
🌸 SHEET 7 — Cherry Blossom ⭐⭐⭐
Difficulty: Intermediate · Time: 8 min · Age: 7+
Materials: 1 pale pink pipe cleaner (petals) · 1 brown pipe cleaner (branch) · 1 yellow pipe cleaner (tiny stamens, optional)
Steps:
- Twist a brown pipe cleaner into a small Y-shaped branch (one main stem, two smaller arms)
- Cut the pink pipe cleaner into 10 small pieces (~2 cm each)
- Fold each piece into a tiny 5-petal flower: fold into a star shape with 5 equal loops
- Twist all 5 loop bases together tightly at the center — this is one blossom
- Make 4–6 blossoms total
- Attach each blossom to a branch tip by wrapping its base around the brown branch wire 3 times
- Cluster 2–3 blossoms at each branch tip for a natural cherry blossom look
Pro tip: The smaller the blossoms, the more elegant the branch looks. Resist making them too large.
🌺 SHEET 8 — Spiral Zinnia ⭐⭐⭐
Difficulty: Intermediate · Time: 7 min · Age: 7+
Materials: 1 bright colored pipe cleaner (flower) · 2 green pipe cleaners (stem) · 1 green pipe cleaner (leaves)
Steps:
- Make a very tight flat spiral with your colored pipe cleaner — tighter than a rose
- Instead of folding the center upward, leave it flat
- Working around the outer ring, gently curl alternating sections upward then downward with your fingertip
- This creates the layered zinnia effect — some petals up, some down, alternating
- Twist two green pipe cleaners for a double stem
- Attach at the back of the coil — 3 rotations
- Add two medium green leaf loops halfway down the stem
Pro tip: The alternating up-down curl is what makes it look like a zinnia and not a rose. Take your time with this step.
💐 SHEET 9 — Bouquet Assembly ⭐⭐
Difficulty: Easy · Time: 15 min · Age: 7+
Materials: 5–8 finished flowers with double-twisted stems · Green floral tape · Small vase or jar · Pebbles or rice (for anchoring)
Steps:
- Make all flowers with double-twisted green stems at least 15 cm long
- Add at least one green leaf to every stem
- Hold flowers loosely together — tallest at back, shortest at front
- Arrange so no two flowers completely overlap
- Starting 5–7 cm below the lowest flower head, wrap floral tape around all stems together, pulling taut
- Wrap all the way to the stem base. Finish with a ribbon bow
- Fill vase two-thirds full with pebbles or rice
- Push bundled stems straight down until bouquet stands upright on its own
- Tilt each flower head slightly forward toward the viewer
Pro tip: Odd numbers of flowers (5 or 7) always look more natural than even numbers.
Full tutorial: pipe cleaner flower bouquet ideas guide
👑 SHEET 10 — Flower Crown ⭐⭐
Difficulty: Easy · Time: 20 min · Age: 6+
Materials: 4–6 green pipe cleaners (base ring) · 6–10 finished flowers with long stems (8+ cm) · Green floral tape (optional)
Crown size guide:
- Toddler (age 2–4): 3 green pipe cleaners
- Child (age 5–10): 4 green pipe cleaners
- Teen/Adult: 5–6 green pipe cleaners
Steps:
- Twist 4 green pipe cleaners end-to-end into one long chain
- Wrap around head and twist ends together to close the ring — snug but not tight
- Make 6–10 flowers with stems at least 8 cm long
- Attach first flower by wrapping stem around base ring 4+ times
- Use the clock method: attach at 12, then 6, then 3, then 9 o’clock for even spacing
- Fill remaining gaps with more flowers and green leaf sprigs
- Check fit and adjust — bend flowers outward so they face the viewer
Pro tip: Fill every visible gap between flowers with a green leaf sprig. This single detail makes the crown look professional.
Full tutorial: pipe cleaner flower crown guide
For Teachers & Parents — Classroom Setup Guide

Printed instructions transform a craft session from chaotic to calm. Here’s the exact setup that works best for groups:
The night before:
- Print one instruction sheet per student for the chosen flower(s)
- Sort pipe cleaners by color into small labeled cups — one cup set per table of 4
- Choose 2 flower designs maximum per session (e.g., Sheet 1 Wildflower + Sheet 3 Daisy)
At the start of the session:
- Place one printed sheet face-up at each seat
- Students read through the sheet before starting
- No group demonstration needed — the sheet handles it
During the session:
- Circulate to help with step 4–5 where most students need guidance
- Students who finish early can choose a second flower from the sheets
Cleanup:
- No glue residue, no paint, no mess — just collect extra pipe cleaner pieces
- Total cleanup: under 2 minutes
Ideal session structure:
- 5 min: read the sheet and gather materials
- 15 min: make 2 flowers
- 5 min: assemble into a mini bouquet or begin a crown
- 5 min: cleanup
For more classroom decoration ideas using finished flowers, see our pipe cleaner flowers classroom decoration guide.
Tips for Getting the Most From Your Printable Instructions
Laminate your favorites. A laminated instruction sheet survives dozens of craft sessions without tearing, coffee stains or accidental pipe cleaner scratches. Print once, use forever.
Print in black and white to save ink. The instructions are designed to work in both color and black and white — the text and diagrams are clear either way.
Build a recipe card box. Print all 10 sheets, cut to card size and store in a recipe card box. You’ll have a personal pipe cleaner flower instruction library that you can pull out any time.
Add your own notes. Leave space on each sheet for personal tips you discover as you practice — your own note about what worked, what size to cut petals, what color combinations you loved.
Use as gift wrapping. Print a sheet and fold it around a bundle of pipe cleaners in the right colors for an instant, thoughtful craft gift for a child or friend.
Frequently Asked Questions
Are these pipe cleaner flower printable instructions really free?
Yes, completely free. All 10 instruction sheets on this page are free to print for personal, classroom and non-commercial use. No email sign-up required, no download link — just copy the instructions and print.
What paper and printer settings should I use?
Standard A4 or US Letter paper works perfectly. Print at 100% scale. Black and white print works fine for all sheets. If printing in color, use draft quality to save ink — the diagrams are simple enough that print quality doesn’t matter.
Can I use these instructions for a school or community craft class?
Yes. These instructions are free for classroom and community use. Print as many copies as you need. The only restriction is commercial resale — you cannot sell printed copies of these instruction sheets.
How do I save the instructions to use offline?
Copy the text of each instruction sheet into a Word document, Google Doc or Apple Pages file. Save the file to your device. Print from there whenever you need it.
Are there instructions for younger children (ages 3–5)?
Sheet 1 (Wildflower) and Sheet 2 (Lavender Sprig) are both suitable for ages 3 and up with light adult guidance. For this age group, read the steps aloud and let the child do as much of the physical twisting as they can manage. See our full easy pipe cleaner flowers for kids collection for more age-specific guidance.
Can I make all 10 flowers from one pack of pipe cleaners?
Yes. A standard pack of 100 assorted pipe cleaners contains enough to make 2–3 of each flower design. For a full session making all 10 flower types, one pack per person is sufficient.
Final Thoughts
A printed instruction sheet is a small thing — but it makes craft sessions significantly easier, more independent and more enjoyable for both kids and adults.
Print the sheets you need today. Lay them on your table. Pick up your pipe cleaners.
Everything you need to make beautiful pipe cleaner flowers is already here.
Happy crafting — from My Flower Decor! 📄🌸
Save to Pinterest — teachers and parents will love you for it! 📌
Full tutorials for every flower:
- Pipe cleaner rose – complete guide
- Pipe cleaner daisy flower – easy tutorial
- Pipe cleaner tulip – step-by-step
- Pipe cleaner sunflower – DIY craft
- Lavender pipe cleaner flowers
- Pipe cleaner flower crown – DIY tutorial
- Pipe cleaner flower bouquet ideas
- Simple pipe cleaner flower ideas for beginners
- Easy pipe cleaner flowers for kids
- Pipe cleaner flowers classroom decoration