
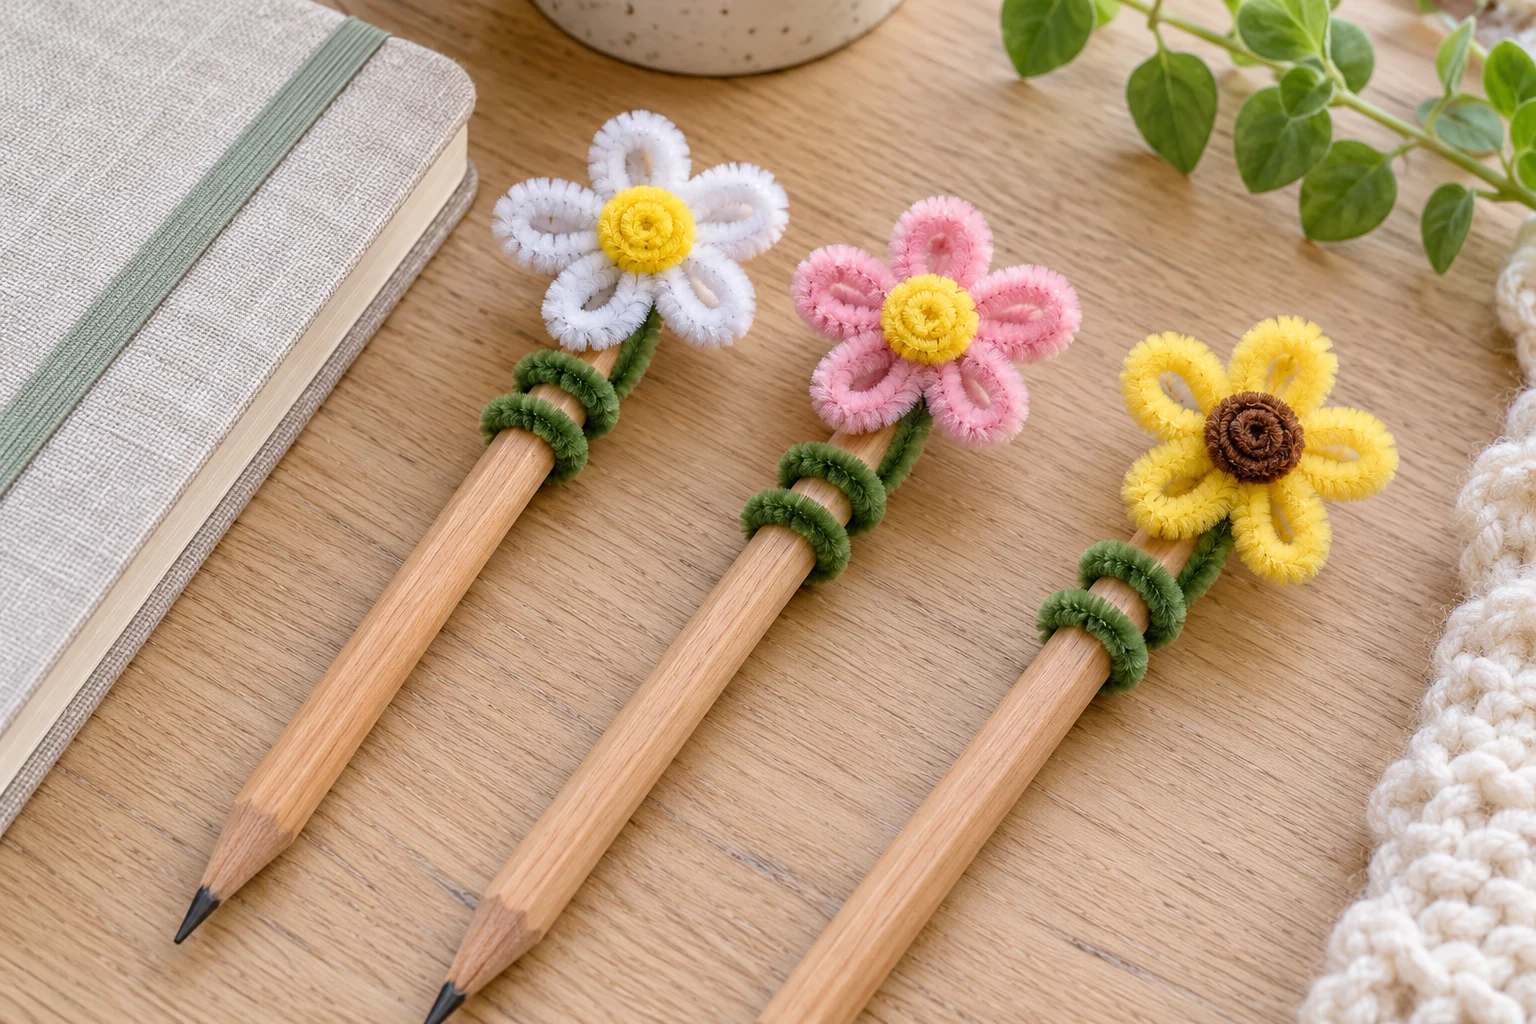
To make a pipe cleaner flower pencil topper, shape a small flower from looped chenille petals, secure its center with a short contrasting pipe cleaner, and wrap a green attachment stem around the upper end of a pencil. Keep the flower compact, tuck in every wire end, and leave the writing area clear. The topper can be made without glue and removed when you need to sharpen, store, or use the pencil normally.
This project turns a small handmade flower into a useful desk decoration. Instead of building a long stem for a vase, you make a short attachment coil that fits your own pencil. That fitting step matters: a topper that looks pretty on the table should also stay clear of your hand while you write.
The tutorial below starts with a five-petal loop flower and explains how to attach it, adjust the fit, and change the colors. It is intended for beginners and supervised school-age crafting. An adult should handle cutting when necessary and check exposed wire ends before a child uses the finished pencil.
What Is a Pipe Cleaner Flower Pencil Topper?
A pipe cleaner flower pencil topper is a small decorative flower attached near the blunt end of a pencil with a removable chenille coil. The petals sit above or beside the pencil end, while the coil holds the decoration in place. It is a craft accessory rather than a replacement for an eraser or pencil cap.
The most useful version is light and relatively flat. Large layered flowers can look attractive in a pencil cup, but they may wobble or catch on other objects during writing. Start with a flower around 3–4 cm across, then adjust its size if your pencil feels awkward to use.
Unlike a vase flower, this project needs little or no visible straight stem. If you want a larger flower with a long display stem instead, follow the separate pipe cleaner daisy flower tutorial.
Materials for One Flower Pencil Topper
Gather these supplies before you begin:
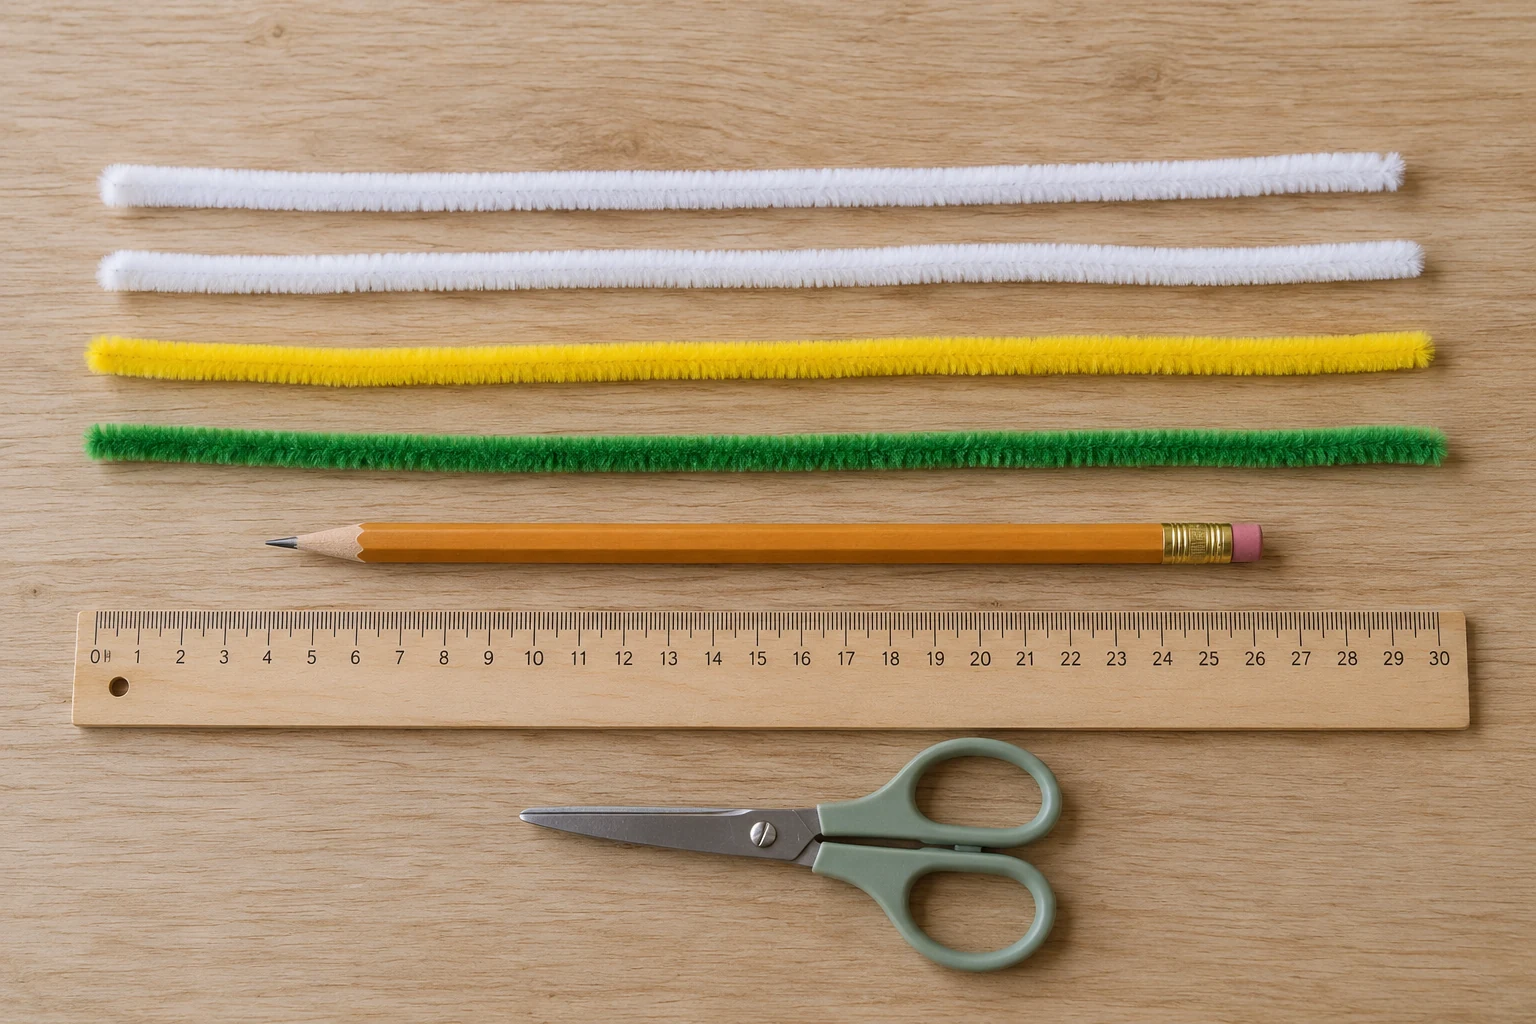
- Two craft pipe cleaners in your chosen petal color, approximately 30 cm long each.
- One yellow or contrasting craft pipe cleaner for the flower center; you will use a short section.
- One green craft pipe cleaner, approximately 30 cm long, for the attachment coil.
- One ordinary wooden pencil with an accessible blunt upper end.
- A ruler for checking your starting lengths.
- Suitable craft scissors, handled by an adult where needed.
Choose flexible chenille stems intended for crafts. Avoid very stiff cleaning brushes and unusually bulky novelty stems for your first attempt. The thickness affects both the size of the flower and how much material you can wrap around the pencil.
The quantities above allow some spare material. You do not need to use every centimeter. Pencil diameter, petal size, and stem thickness vary, so fit the attachment to the actual pencil rather than relying on a fixed number of turns alone.
No hot glue, craft glue, beads, or separate floral wire are required for the basic version. Leaving out small decorative pieces also makes the construction easier to inspect. If you want to practice the basic connections separately, the guide to pipe cleaner flowers without glue introduces looping and twisting techniques.
Before You Start: Size and Pencil Fit
Lay the pencil beside your materials and decide where the flower will sit. A good starting point is the upper part of the pencil, above the area your fingers normally hold. If your pencil has an eraser, keep it exposed or make the topper easy to remove before erasing.
Use an ordinary round or hexagonal wooden pencil for the first version. Mechanical pencils can have clips, buttons, and moving parts that need space. A decoration should never stop a button from working or prevent a cap from closing.
For a compact topper, aim for five petals about 1–1.5 cm long from the center to the rounded tip. These are starting measurements, not a requirement for identical petals. Your first flower can be slightly uneven and still work as a small decoration.
Do not make the coil around the sharpened tip. Work at the blunt end, and put the pencil down before handling wire ends. Check the finished piece for snagging against paper, clothing, and fingers.
How to Make a Pipe Cleaner Flower Pencil Topper
Step 1: Prepare Five Petal Pieces
Measure and cut five pieces of petal-colored pipe cleaner, each about 8 cm long. Two 30 cm stems provide enough material for these pieces, with some left over. Collect the offcuts immediately so that short wire pieces are not scattered across the table.
Fold each piece into a narrow U shape. Bring its two ends together, leaving a rounded loop at the top. Twist the ends together over approximately 1–1.5 cm to form a short attachment tail. The closed loop becomes the petal; the twisted tail will sit behind the flower center.
Repeat with all five pieces. Place them next to one another and adjust the loops until their heights are similar. Keep the tails intact for now. Cutting them extremely short at this stage can leave too little material to assemble the flower securely.
Step 2: Arrange the Petals Around a Shared Center
Lay the five petals in a circle with their rounded ends pointing outward. Bring the twisted tails together at the center. Hold that small bundle firmly while adjusting the petals with your other hand.
The aim is a flat flower with a central cluster of tails, rather than five separate loops hanging from a long stem. It may help to assemble two petals first, add two more, and finally position the fifth in the remaining gap.
Use the green pipe cleaner to wrap around the shared bundle just behind the petal loops. Make several snug turns, then leave its long end extending downward. This green end will become the pencil attachment. Gently pull on each petal to check whether it slips. If one moves freely, reposition its tail and wrap the shared bundle again before continuing.
Step 3: Make a Small Contrasting Center
Cut a contrasting section about 10–12 cm long. Starting at one end, roll roughly half of it into a small flat spiral. Leave the other half straight so that you have a visible center and an attachment tail on the same piece.
Position the spiral over the front of the flower. Guide the straight tail between two petals toward the back, then wrap it around the bundle and the green attachment stem. This fastening tail is what secures the center; simply placing a loose spiral on the petals will not hold it in place.
Tuck the final wire end into the wrapped area. Press the spiral gently so that it covers the junction without flattening the petal loops. Turn the flower over and inspect the back before fitting it to the pencil.
Step 4: Cover and Tuck the Petal Tails
Bend the remaining petal tails downward beside the green stem. Use the green material immediately below the flower to wrap over them, creating a short, covered neck. Avoid leaving pointed ends sticking sideways.
Run a fingertip lightly around the back of the flower without pressing against exposed wire. If you can feel a sharp end, turn it inward and cover it with another wrap. An adult should make this check for a child's project.
The attachment area can be thicker than the petals, but it should remain compact. A large lump behind the flower makes the topper harder to position and may push the flower too far away from the pencil.
Step 5: Wrap the Attachment Around the Pencil
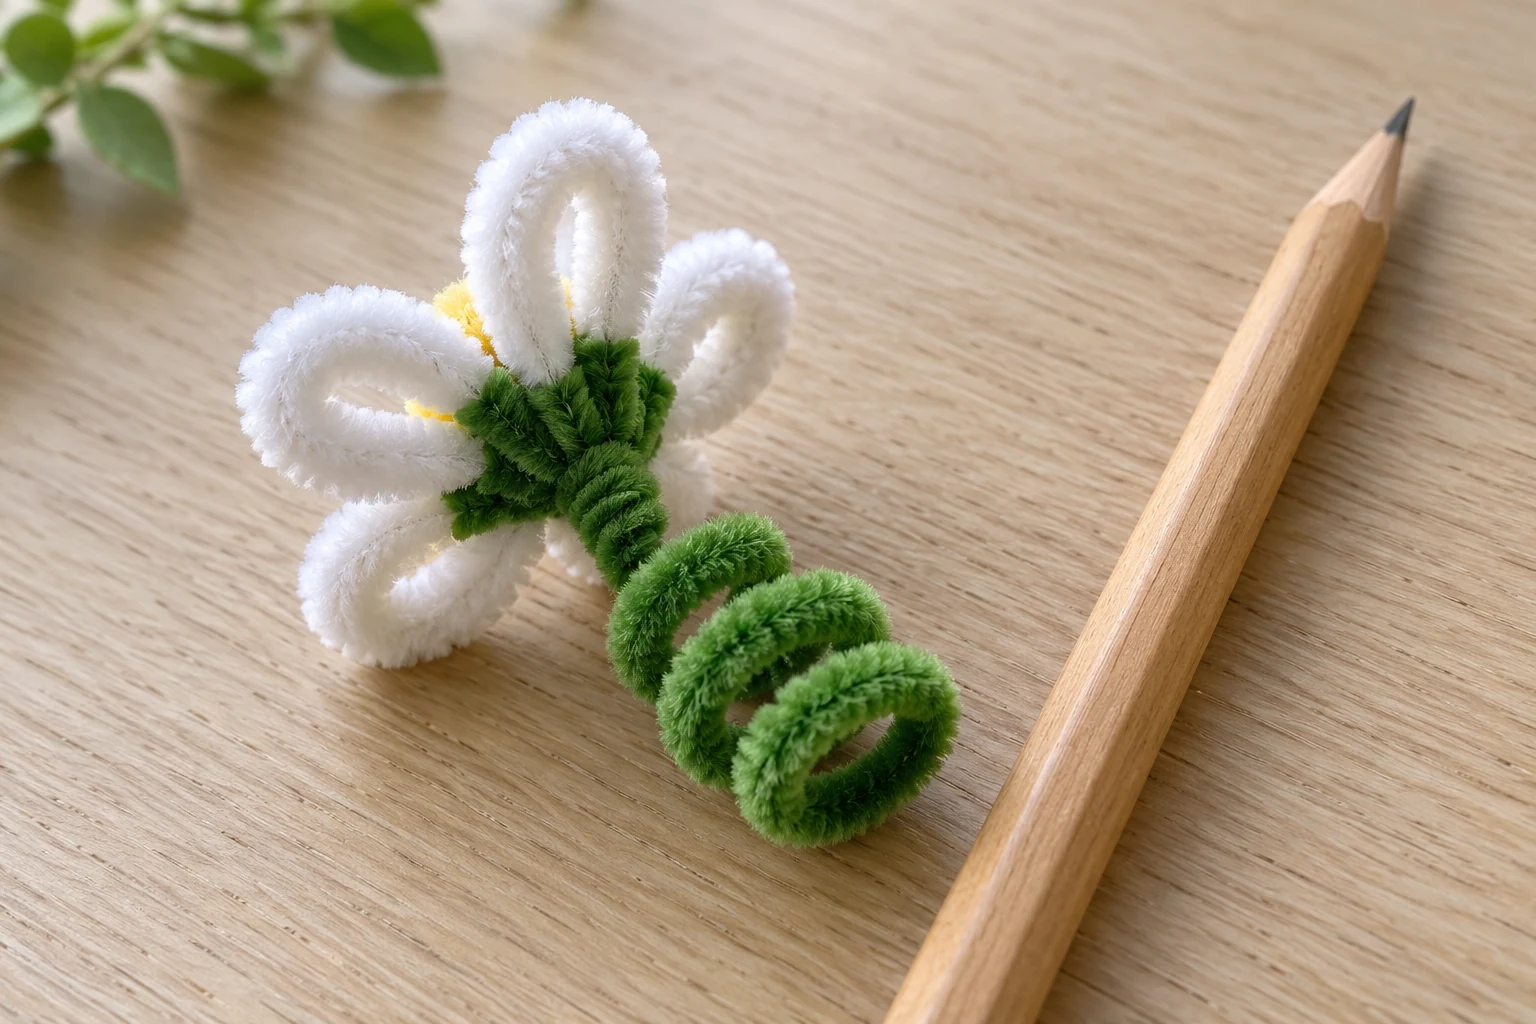
Hold the flower near the blunt upper end of the pencil. Lay the green stem against the pencil and wind its remaining length downward in a close spiral. Start with two or three turns, then adjust according to the available length and how firmly the coil grips.
Keep the turns beside one another rather than crossing them into a bulky knot. The coil should hold the topper during ordinary handling while still allowing you to remove it. Do not wrap across an eraser you want to use or around a mechanical pencil's moving components.
Tuck the last green end into the coil. If the pencil rotates freely inside the decoration, tighten the turns slightly or remake the coil with a smaller opening. If the attachment is difficult to remove, loosen it instead of forcing the flower upward by its petals.
Step 6: Shape and Check the Finished Flower
Spread the petals until the flower looks balanced. Let the head sit slightly to one side of the pencil end if that makes the pencil more comfortable to handle. Keep its center facing outward rather than directly down toward your hand.
Try writing a few lines. Check whether the flower catches your hand, blocks the eraser, or makes the pencil feel top-heavy. Make the flower smaller or remove the topper for writing if necessary. Desk display and practical writing do not always need the same arrangement.
Finally, lift the pencil gently and turn it over above the table. The topper should remain attached during that light handling. This is a simple fit check, not a guarantee against vigorous shaking or repeated pulling.
Three Color Variations Using the Same Method
White Daisy With a Yellow Center
Use white petal loops, a yellow spiral center, and a green attachment coil. The contrast makes the center easy to see and keeps the flower readable at a small size. Make all five loops approximately equal, then spread them evenly around the center.
This version is useful when learning the basic assembly because the petals and center are visually distinct. Keep the spiral small enough that some of each white loop remains visible. A center that covers most of the petals can make the flower look like a pom-pom instead.
Pink Flower With a Yellow Center
Change only the petal color to pink. Use the same lengths and assembly order so that the project remains comparable to the white version. Pale pink creates a soft desk decoration, while a stronger pink is easier to see in a busy pencil cup.
For a two-tone version, use two light petals and three darker petals. Lay out the colors before fastening the central bundle. Planning the arrangement first saves you from repeatedly twisting and untwisting the finished connection.
Yellow Flower With a Brown Center
Use yellow loops and a brown spiral for a sunflower-inspired topper. It is a stylized small flower rather than a detailed botanical sunflower. Keeping five compact loops makes it practical for the same pencil attachment as the other variations.
If you want a larger, more detailed sunflower for a vase or display, use the dedicated pipe cleaner sunflower tutorial instead. Increasing the number and length of petals changes the balance of a pencil topper and may require a different attachment.
Troubleshooting Your Pencil Topper
The Flower Spins Around the Pencil
Remove the topper and tighten the green coil a little at a time. Fit it back onto the same pencil after each adjustment. A coil made around a thick marker may be too loose for a narrow wooden pencil, so shape it on the object you intend to decorate.
Also check the connection between the flower and coil. If the coil stays still but the flower head turns, the central bundle needs tightening. Adding more turns around the pencil will not repair a loose petal junction.
A Petal Falls Out
Check whether its tail actually passes through the shared wrapped bundle. A loop resting beside the other petals may look attached while being held only by pressure. Open the connection carefully, include the loose tail, and rewrap the bundle.
If the tail is too short to fasten again, make a replacement petal from a fresh piece. Do not rely on a tiny exposed wire stub. Replacing one component is usually simpler than adding a large knot around the whole flower.
The Center Comes Loose
Check the contrasting tail behind the flower. It should wrap around the central bundle or green neck. A flat spiral with no fastening tail can slip away when the pencil is handled.
Make a new center with a longer tail if necessary. Keep the visible spiral modest in size, then use the remaining length for attachment. Avoid introducing a bead or button just to cover a loose connection; fix the connection first.
The Topper Feels Too Heavy
Reduce the petal loops and use a smaller center. Remove additional leaves or layered flowers. A single compact bloom usually works better for writing than a miniature bouquet on top of one pencil.
If you prefer the larger version, keep that pencil in a desk holder as decoration and use another pencil for writing. The point of the fitting step is to choose a comfortable result, not to force every decorative design into everyday use.
Making Pencil Toppers With Children or a Craft Group
Prepare the first petal set before the session and show a finished example. Explain the three parts separately: loop petals, spiral center, and pencil coil. Children can choose colors and arrange petals while an adult helps with cutting, tight wraps, and wire-end checks where needed.
Avoid promising independence at a particular age. Dexterity, attention, and familiarity with wire crafts vary. Some children will need help throughout the assembly; others may manage the loops but still need the adult to inspect the back of the flower.
For a group, provide one pencil and one clearly counted material set per participant. A tray for offcuts helps keep the work surface clear. Make the basic version first, then offer color changes rather than extra small decorations.
For separate flower-making projects that do not involve a pencil attachment, see the guide to easy pipe cleaner flowers for kids. Keep that activity distinct from this tutorial's main goal: making and fitting a removable topper.
Display, Gifts, and Storage
Stand the decorated pencils in a stable pencil cup with their flower heads facing different directions. Leave some space between the flowers so their loops do not press together. A shallow cup that tips when you take out a pencil needs replacing with a more stable holder.
For a small handmade gift, pair one topper with a notebook and a matching pencil. Keep the topper removable and explain that it should come off before sharpening or putting the pencil into a tight case. You can match the flower color to the notebook without adding a second craft design.
Store the topper in a small rigid box or on its pencil in a roomy desk holder. A tightly packed pencil case can crush the petal loops or pull on the center. Gently reshape flattened loops with your fingers, and dust the flower with a soft, dry brush when needed.
Keep the finished piece dry and away from open flames or heat sources. Inspect the wrapped ends again after rough handling. If wire becomes exposed or a component loosens, repair the attachment before returning it to use.
Frequently Asked Questions
Can you make pipe cleaner flower pencil toppers without glue?
Yes. Twist the petal tails into a shared bundle, fasten the spiral center with its own attachment tail, and wrap the green stem around the pencil. Check every connection and tuck exposed wire ends inward. Glue is not required for this basic construction.
How many pipe cleaners do you need for one pencil topper?
Set aside two approximately 30 cm petal-colored pipe cleaners, one contrasting pipe cleaner for a short center section, and one green pipe cleaner for the attachment. You will have offcuts. The amount actually used depends on the petal size, stem thickness, and pencil diameter.
Can you still use the pencil eraser?
Yes, if the coil leaves the eraser clear. If the flower blocks access, slide the topper off before erasing. Keep the decoration removable and avoid wrapping around moving parts on mechanical pencils.
Why does my flower pencil topper keep sliding down?
The coil may be too loose for the pencil, or the flower may be too heavy. Tighten the coil gradually on the actual pencil and keep the bloom compact. Check that the flower-to-coil connection is secure as well.
Are pipe cleaner pencil toppers suitable for young children?
They are most appropriate as a supervised craft when the child can handle small wire components sensibly. Adults should help with cutting and check all wire ends. The finished decoration is not a toy for children who put small objects in their mouths.
Can you put the same topper on a pen?
Sometimes, but the coil must fit the pen without blocking its clip, cap, or button. Fit the decoration to the individual pen and remove it if it interferes with writing or normal operation.
How do you store a pipe cleaner flower pencil topper?
Use a roomy pencil holder or a small rigid box that does not squash the flower. Remove it before putting the pencil into a tight case. Keep it dry, reshape compressed petals gently, and inspect the attachment before using it again.