
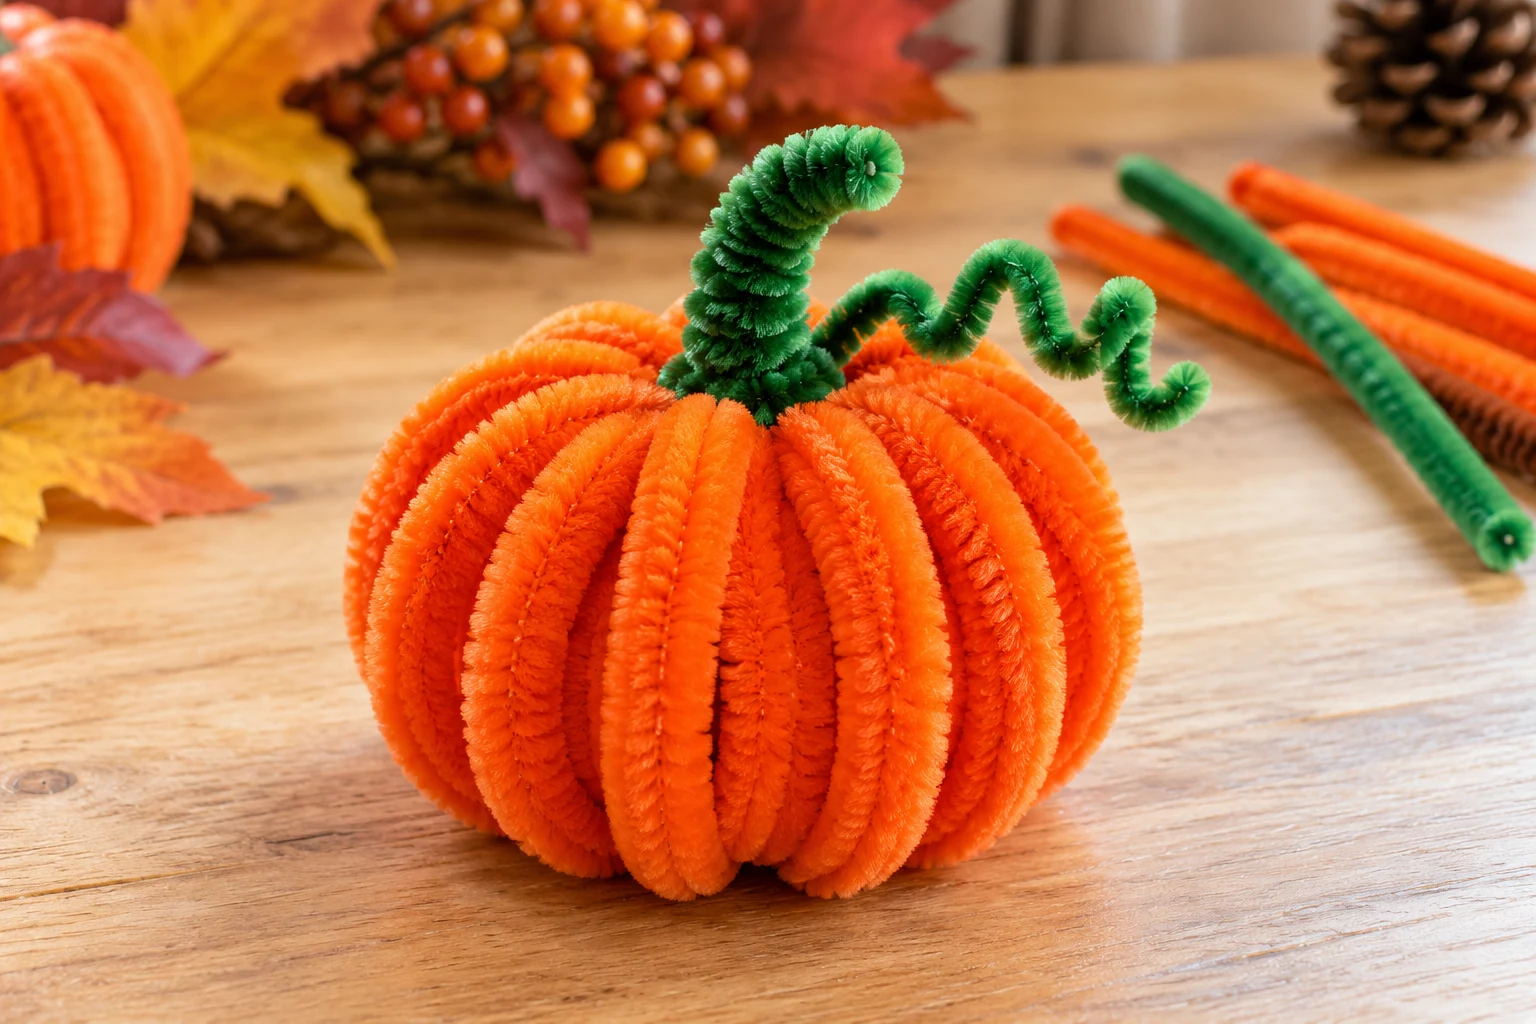
To make a pipe cleaner pumpkin, fold a bundle of orange chenille stems in half, secure the folded base, curve the free ends into ribs and gather them at the top. Wrap a green stem around the top join, then add an optional curled vine. The basic version uses whole pipe cleaners and needs no glue.
This small, hollow pumpkin is a craft decoration for a shelf, table or autumn arrangement. You can reshape its wire ribs by hand, choose a classic orange body or make a softer cream or sage version. The important part is securing both joins before you add decorative details.
The tutorial below starts with eight body stems, which create sixteen ribs. It also explains how to tighten a loose join, flatten an uneven base and make a fuller pumpkin without relying on a hidden foam ball. If you enjoy seasonal chenille crafts, you can pair it with the flowers in our pipe cleaner Halloween craft ideas.
Pipe Cleaner Pumpkin: Supplies and Project Overview
Use standard chenille craft stems about 30 cm long. Thin or sparse stems produce a more open pumpkin, while thicker, plush stems cover more of the spaces. The finished size depends on how much wire you use for the joins and how strongly you curve the ribs.
| Project | Small hollow pumpkin with a wrapped stem |
|---|---|
| Basic supplies | 8 orange body stems + 1 extra orange binding stem + 1 green stem |
| Basic total | 10 full-length pipe cleaners |
| Optional additions | 1 extra green for a vine; another for a leaf |
| Glue and cutting | No glue or cutting required for the basic version |
| Use | Dry indoor display; adult supervision when crafting with children |
Materials You Need
- 8 orange 30 cm pipe cleaners for the body; substitute another color if you prefer.
- 1 additional orange 30 cm pipe cleaner to bind the lower join.
- 1 green 30 cm pipe cleaner to secure the top join and form the stem.
- Optional: 1 additional green pipe cleaner for the curled vine.
- Optional: another green pipe cleaner for a separate leaf, or a brown stem in place of the green stem.
- A ruler and an optional pencil or thin dowel for curling the vine.
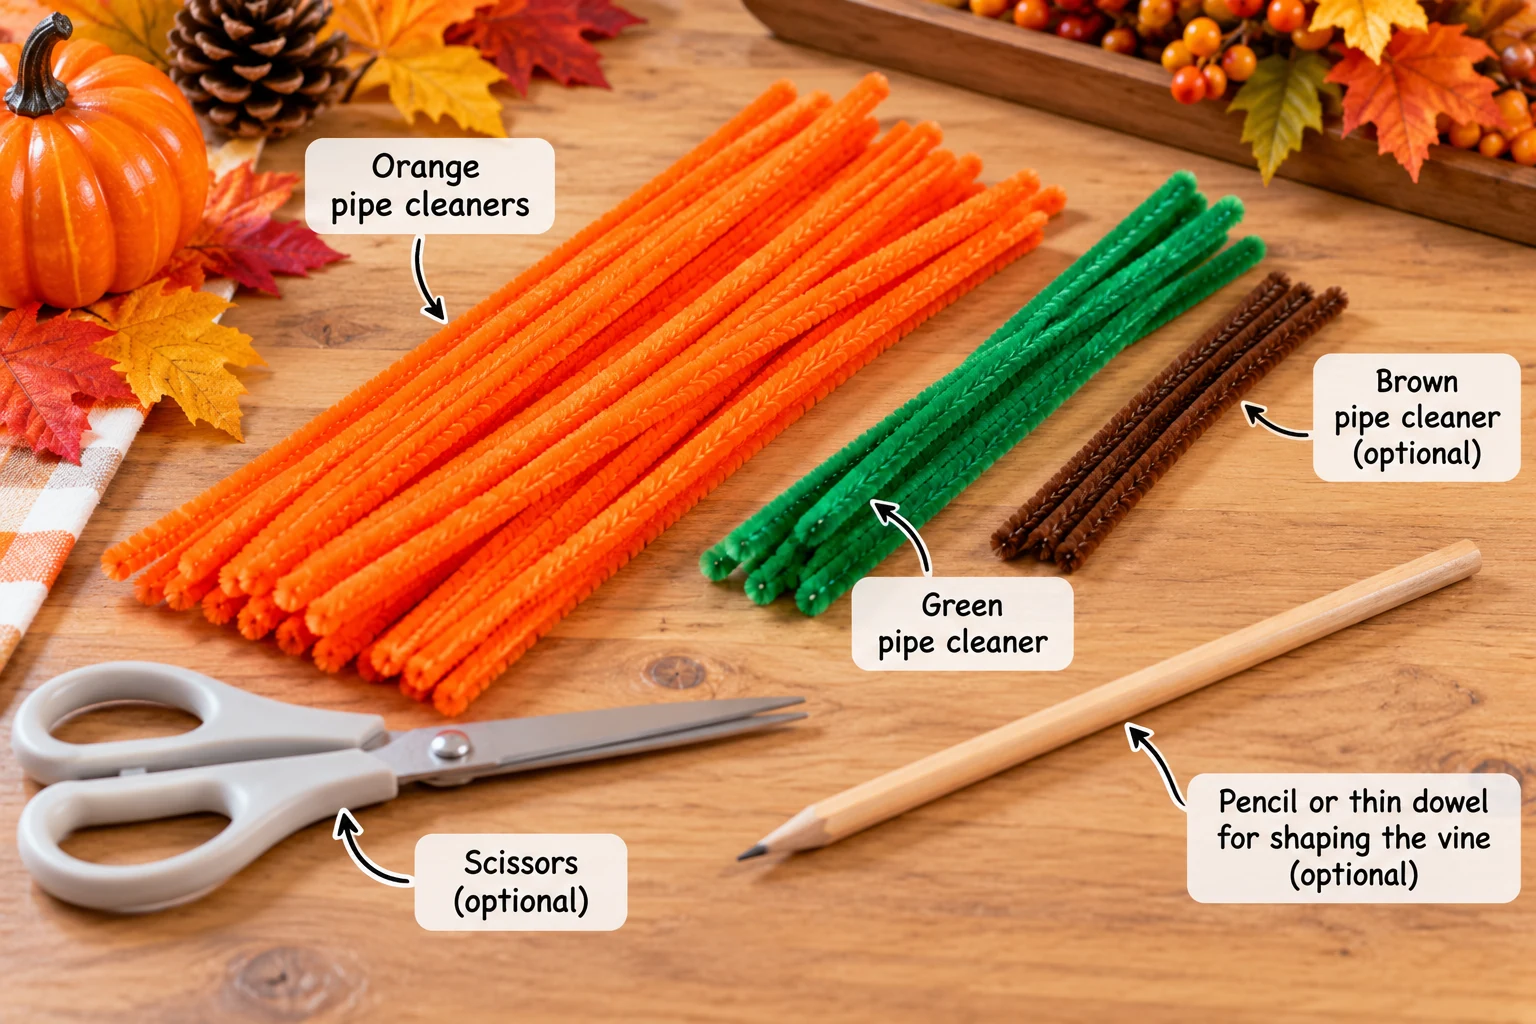
You do not need to trim the stems to complete this version. If you choose to shorten a decorative tail, an adult should use a cutter suitable for thin craft wire. Ordinary paper scissors may struggle with the wire inside chenille stems.
Before You Start
Lay the eight body stems side by side and align their ends. Keep the spare orange binder and green stem separate so they do not get mixed into the body bundle. Work on a clear tabletop where you can spread the ribs and turn the pumpkin while shaping it.
Children need active adult supervision. Fold wire tips inward, keep loose pieces out of mouths and let an adult handle any trimming. A completed pumpkin is a decoration rather than a toy for babies or toddlers. Choose the amount of help according to the child’s dexterity instead of assuming a particular age can complete every join independently.
How to Make a Pipe Cleaner Pumpkin Step by Step
Make the structural joins first, then adjust the silhouette. Avoid twisting the same point repeatedly while deciding on a shape: supporting the joins and bending the longer ribs is easier on the wire.
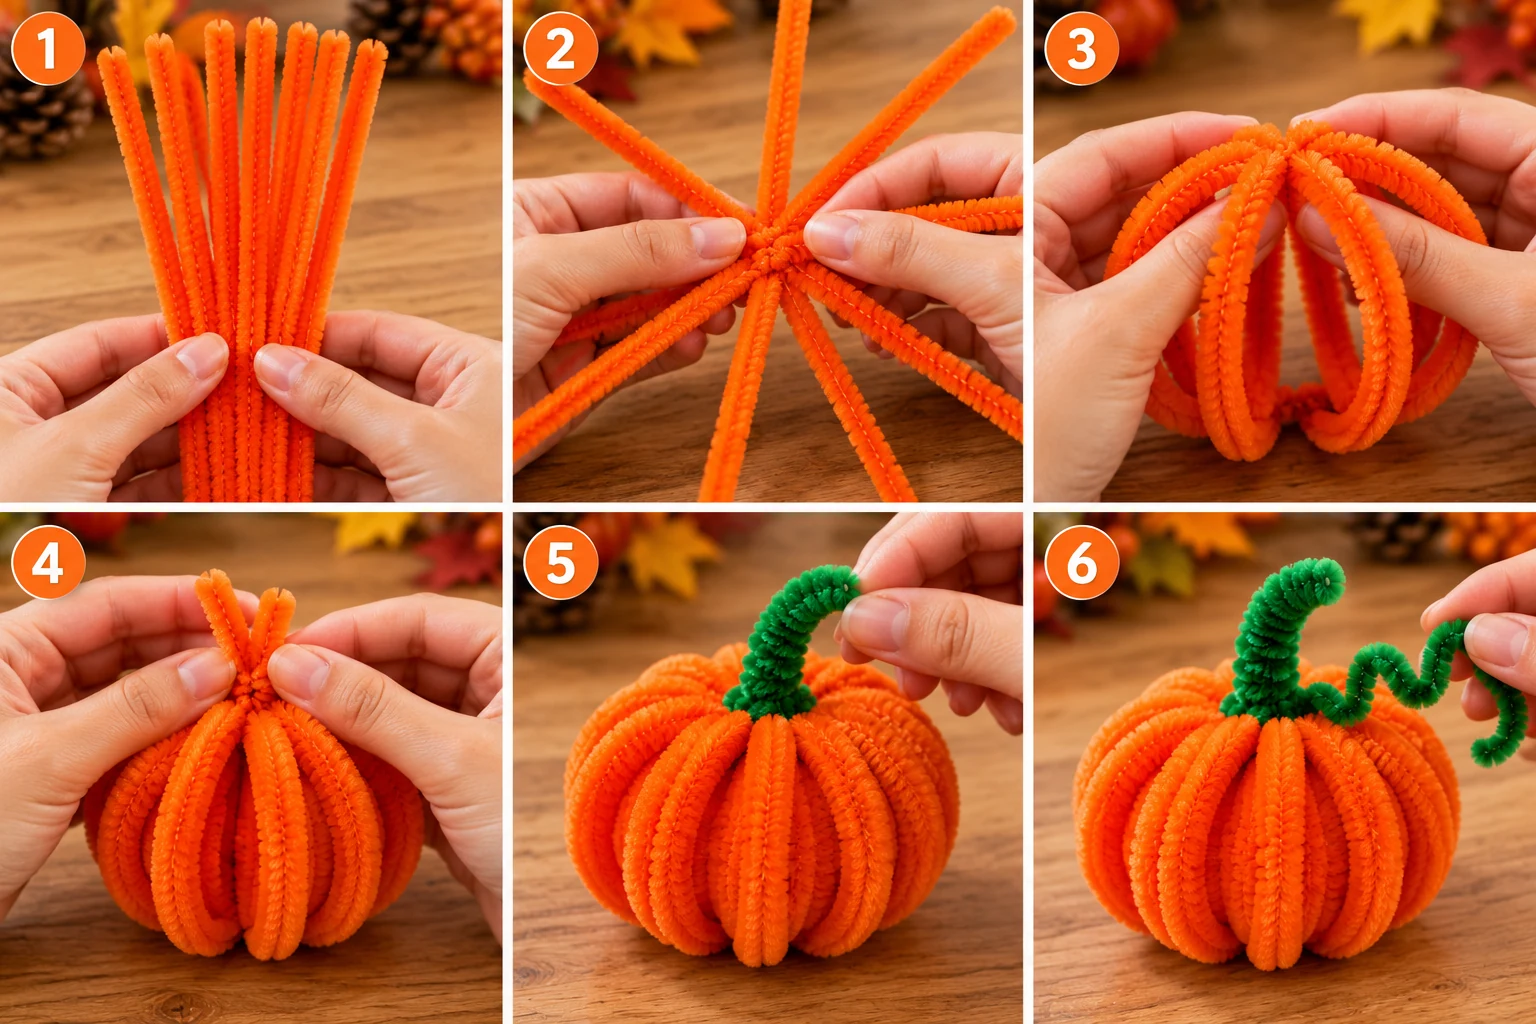
Step 1: Fold and Secure the Body Bundle
Hold the eight orange body stems together with their ends aligned. Fold the whole bundle at the midpoint. You now have sixteen free ends extending upward and a group of folded sections at the bottom.
Pinch the bundle just above those folds. Wrap the extra orange binding stem tightly around this narrow lower section to keep the eight folded stems together. Continue wrapping the spare length around the join, then tuck its finishing tip inward. Keep this lower binding compact so it does not become a large lump beneath the pumpkin.
Step 2: Spread the Sixteen Ribs
Separate the sixteen free ends and spread them outward around the shared bottom join. Imagine the ribs radiating in all directions rather than lying in one flat fan. Work around the bundle gradually so the gaps are reasonably even.
If the lower join starts to slide, stop and tighten its wrap before continuing. Each rib should remain attached to the same compact base while its free length moves independently.
Step 3: Curve the Ribs into a Rounded Body
Bend each rib outward and then upward in a smooth arc. Bring its free tip toward a common point above the bottom join. Repeat around the pumpkin until the sixteen tips meet at the top.
Keep the widest part near the middle and let the ribs narrow toward both joins. Make the body slightly wider than it is tall for a squat pumpkin. Leave a short length at each tip for the top attachment rather than using the entire rib in the outer curve.
Step 4: Bind the Top Join
Hold the rib tips together as a small upright bundle. Wrap a few centimeters of the green stem around the neck of that bundle, just above the rounded body. Pull the wrap snug enough to hold the ribs, while supporting the pumpkin so the body does not collapse.
Gently tug two or three ribs to check that their tips remain captured. If the neck is too bulky for a secure wrap, use an additional binding pipe cleaner. Count that as an extra supply instead of stretching a short tail that cannot hold the join.
Step 5: Wrap the Pumpkin Stem
Use the remaining green length to wrap around the short upright orange tips. Work upward to cover them, then tuck the final green tip into the wrap. Bend the top slightly to make a curved stem.
Keep the stem compact. Its height depends on your remaining wire and the thickness of the rib bundle; there is no need to force a specific measurement. A brown pipe cleaner makes a good alternative if you want a woody-looking stem.
Step 6: Add an Optional Curled Vine
Take the separate green vine stem and reserve a few centimeters at one end for attachment. Wrap that reserved end around the neck beneath the pumpkin stem, keeping the finish tucked inward.
Wind part of the remaining length around a pencil or thin dowel. Slide it off and gently stretch the coil into a tendril. Curve the final tip inward. Leave the vine short enough that it does not pull the pumpkin over or catch on nearby objects.
Step 7: Shape and Check the Base
Set the pumpkin on a level surface. Support the top join and press the lower arcs gently outward until several ribs share the weight. Adjust a few ribs at a time rather than flattening the whole body in one push.
Turn the pumpkin and look for large gaps, crossed ribs or a leaning stem. Move the arcs to improve spacing, then check both joins again. If it still rocks, place it in a shallow dish or on a stable display base rather than forcing the binding flat.
Troubleshooting Your Pipe Cleaner Pumpkin
The Pumpkin Looks Too Open
A sixteen-rib body is an open wire form, so some gaps are normal. Spread the ribs evenly first. For a fuller version, start a new body with ten or twelve orange stems, creating twenty or twenty-four ribs. Allow an extra binder if the larger bundle needs it.
The finished examples in the images show fuller bodies and optional details. Use the written supply list for the basic version; do not expect eight thin stems to create the same dense coverage as a larger plush-stem pumpkin.
The Top Keeps Coming Apart
Check that the green wrap goes around the gathered rib tips rather than just around one or two ribs. Support the body, gather all the tips again and tighten the neck wrap. If the available tail is too short, add a separate binding stem and cover it with the decorative stem.
The Shape Is Tall or Uneven
A tall shape usually means the ribs curve upward more than outward. Hold the top steady and bow the middle of each rib outward slightly. For an uneven pumpkin, compare opposite sides and adjust their arcs in pairs. Avoid pulling hard on the stem to change the body shape.
The Bottom Rocks on the Table
Look for a binding tail sticking below the base or a single rib taking all the weight. Tuck the tail inward and lower the neighboring arcs so several ribs touch the surface. A small dish can support an open form, especially if the pumpkin has a long decorative vine.
A Wire Tip Feels Sharp
Stop handling the craft at that point. Fold the tip back into its wrap or cover the join with another chenille stem. Check again before displaying it or returning it to a child. Replace a damaged stem if repeated twisting has exposed or weakened its wire.
Pipe Cleaner Pumpkin Color and Size Variations
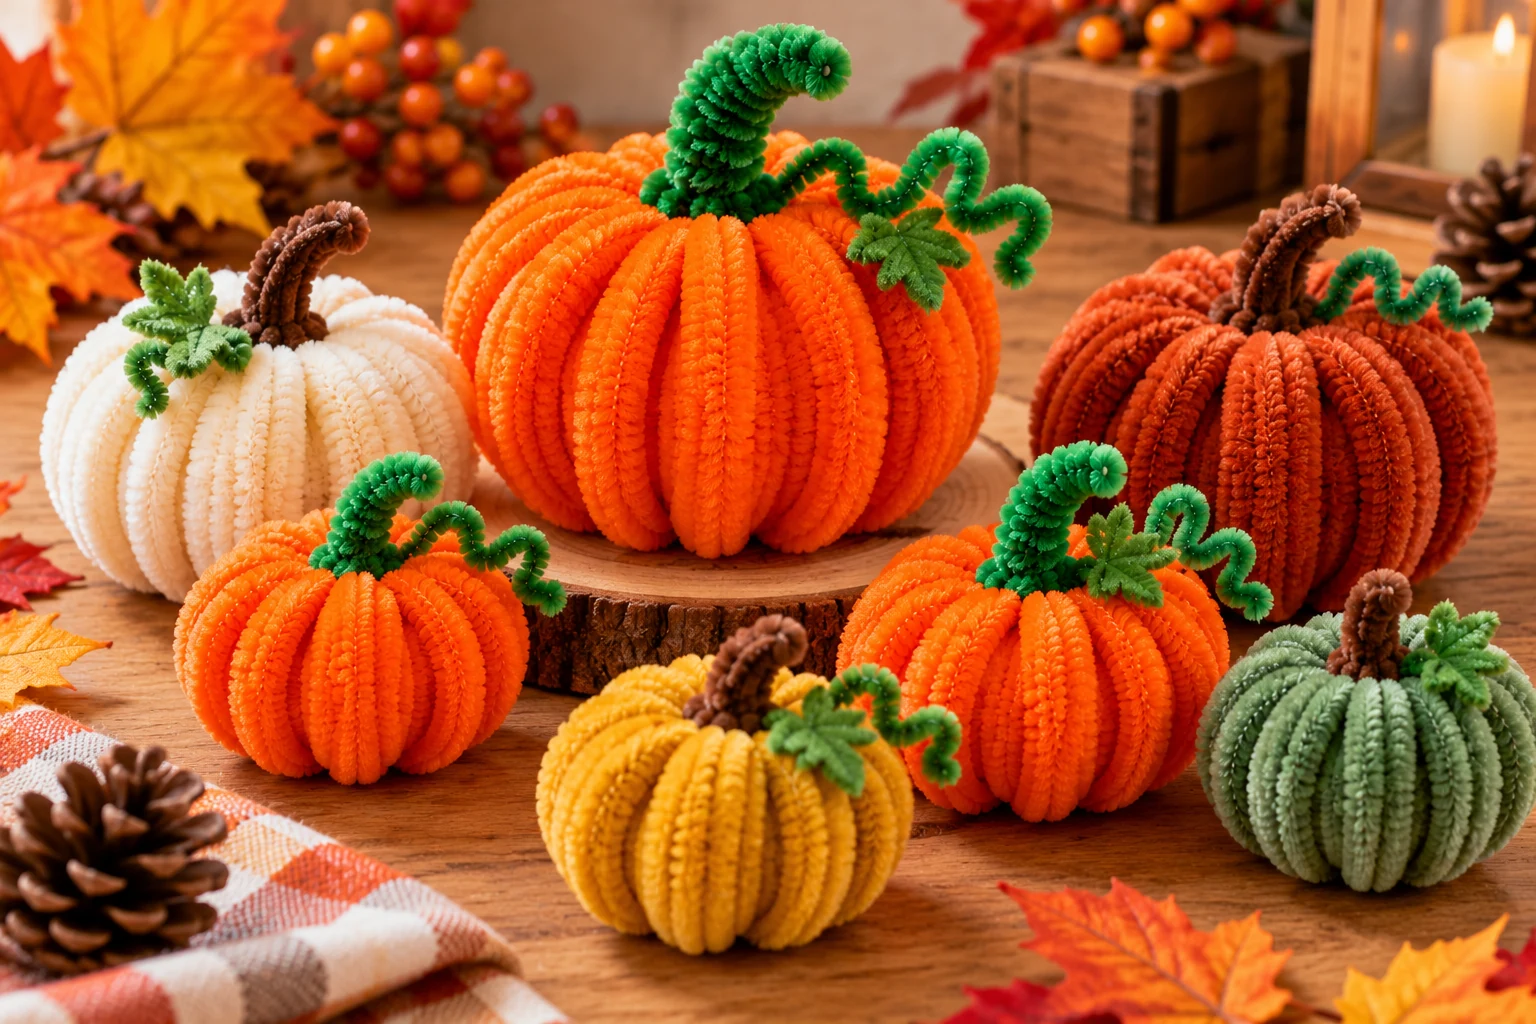
Classic Orange or Rust
Use orange for a familiar pumpkin silhouette, or rust and burnt orange for a muted harvest display. Keep the body a single color while you learn the method; the rib spacing is easier to compare when every stem has the same thickness and texture.
Cream, Mustard or Sage
Cream works well with a brown stem, mustard with dark green, and sage with either brown or olive accents. To make a coordinated group, keep the stem treatment similar and change the body color. Different stem textures may require slightly different shaping.
A Smaller Pumpkin
Make a smaller body by curving the ribs into tighter arcs and using more length in the joins. This creates a compact shape without cutting. If excess wire makes the joins too bulky, an adult can prepare shorter body stems of equal length; remember that this variation adds a cutting step.
Add a Separate Leaf
Use another green pipe cleaner rather than borrowing the attachment tail from the vine or stem. Form a small pointed loop and leave enough wire at its base to wrap securely around the neck. Our pipe cleaner leaf tutorial explains how to shape a separate leaf and reserve its wrapping tail.
Fall Decorating Ideas for Finished Pumpkins
Place two or three pumpkins on a shallow tray with a handmade flower arrangement. Keep the pumpkin stems shorter than the surrounding flowers so the shapes remain visible. For a coordinated palette and a low table display, use the planning tips in our fall harvest centerpiece guide.
You can also set a single pumpkin beside a small vase of pipe cleaner sunflowers. The brown centers and yellow petals complement orange or rust ribs without requiring additional attachments to the pumpkin itself.
For a place-setting accent, stand the pumpkin on a small dish beside the plate. Keep loose wire, name cards and craft materials away from food. If you add a label, tie it lightly to the stem instead of pushing a sharp holder through the body.
Use battery LED lights nearby if you want a warm autumn effect. Keep chenille stems and any dry decorative fillers away from candles with open flames, heaters and hot surfaces. The hollow body does not make this craft a candle holder.
Storage and Care
Keep the pumpkin indoors and dry. Moisture can affect the wire and chenille texture, while strong sunlight may fade colors. Dust gently with a soft brush and support the body while cleaning around the joins.
Store it in a box with enough room that the ribs and stem are not crushed. Separate several pumpkins with light packing paper, without pushing paper tightly inside the hollow bodies. Before reusing them, inspect the wraps and reshape any flattened ribs.
If you want another project using the same supplies, our pipe cleaner art ideas include other decorative shapes and ways to use chenille stems.
Frequently Asked Questions
How many pipe cleaners do you need for a pumpkin?
This basic version uses ten full-length pipe cleaners: eight orange for the body, one extra orange for the lower binding and one green for the stem. Add another green for a vine, another for a separate leaf, and an extra binder if a join needs reinforcement.
Can you make a pipe cleaner pumpkin without glue?
Yes. The folded body bundle is secured with an orange binding stem, and the rib tips are held by the green top wrap. No glue is needed when both joins are secure.
Do you need scissors for this pumpkin craft?
Not for the basic version, which uses whole 30 cm stems. An adult should handle any optional trimming with a cutter suitable for thin craft wire.
Why does my pipe cleaner pumpkin have gaps?
Eight body stems create sixteen ribs, so the basic form is open rather than solid. Adjust the spacing or use ten to twelve body stems for a fuller version, allowing extra binding wire for the larger joins.
Is this pumpkin craft suitable for children?
Children can help shape the ribs with active adult supervision. An adult should check the joins, fold exposed tips inward and handle cutting. Keep loose pieces out of mouths; finished pumpkins are decorations, not toys for babies or toddlers.
Can I use a foam ball inside the pumpkin?
A foam ball is optional and is not included in this hollow-frame tutorial. If you want a supported version, choose the ball first and check that your body stems are long enough to curve around it while leaving attachment tails.
Can pipe cleaner pumpkins stay outside?
Keep them indoors and dry. Chenille craft stems are not weatherproof, and rain or damp conditions can affect their shape and wire.
How do I make the pumpkin stand upright?
Tuck the lower binding tail inward and adjust several lower ribs so they share the weight on a level surface. Use a shallow stable dish if the form still rocks.
Check Your Finished Pumpkin
- The sixteen ribs are spread around the body.
- The lower bundle and top neck are securely wrapped.
- The stem, optional vine and leaf have their own secure attachments.
- Wire tips are tucked inward and the pumpkin rests on a stable surface.
- The display is dry and away from open flames or hot surfaces.