
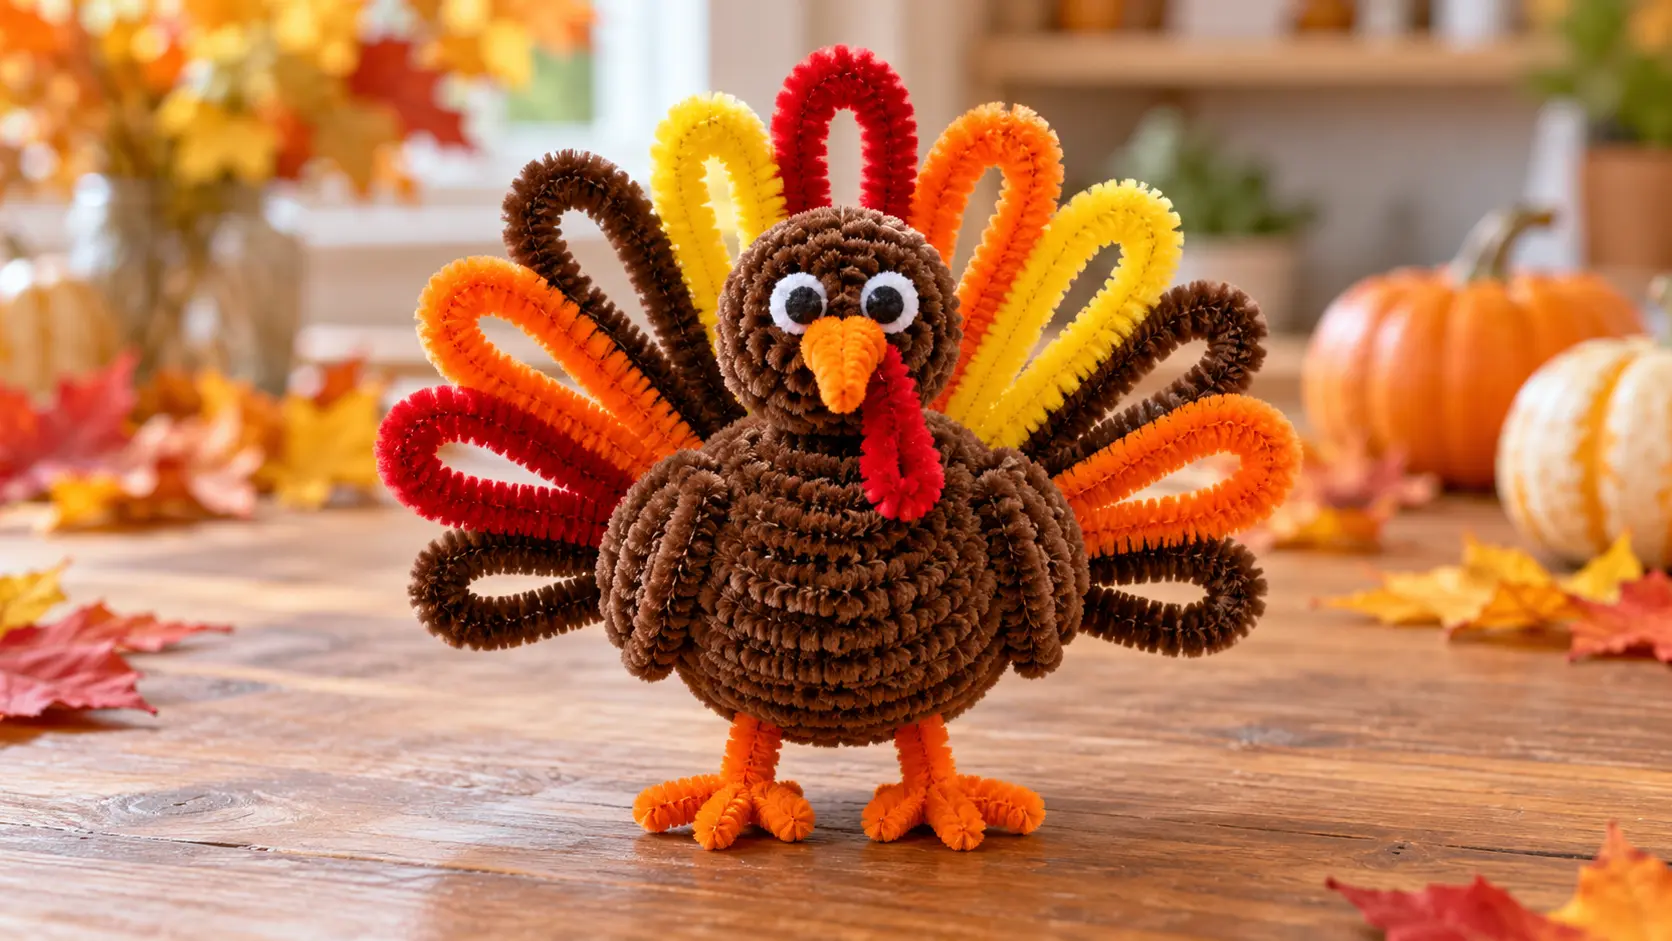
To make a pipe cleaner turkey, bundle four brown chenille stems into an oval body, add a wrapped head and neck, twist on orange feet, and attach a fan of red, orange, and yellow looped tail feathers. The whole project can be assembled with twists and wraps, so glue is optional. A standard turkey takes about 25 to 35 minutes and works well as a Thanksgiving table decoration, classroom craft, or place-card holder.
This tutorial uses full-length 12-inch pipe cleaners and a sturdy no-glue construction. The finished turkey is approximately 5 inches tall and 6 inches wide, depending on how large you make the tail loops. Younger makers may need help cutting stems and tightening the first few twists, while older children, teens, and adults can customize the design independently.
What You Need to Make a Pipe Cleaner Turkey
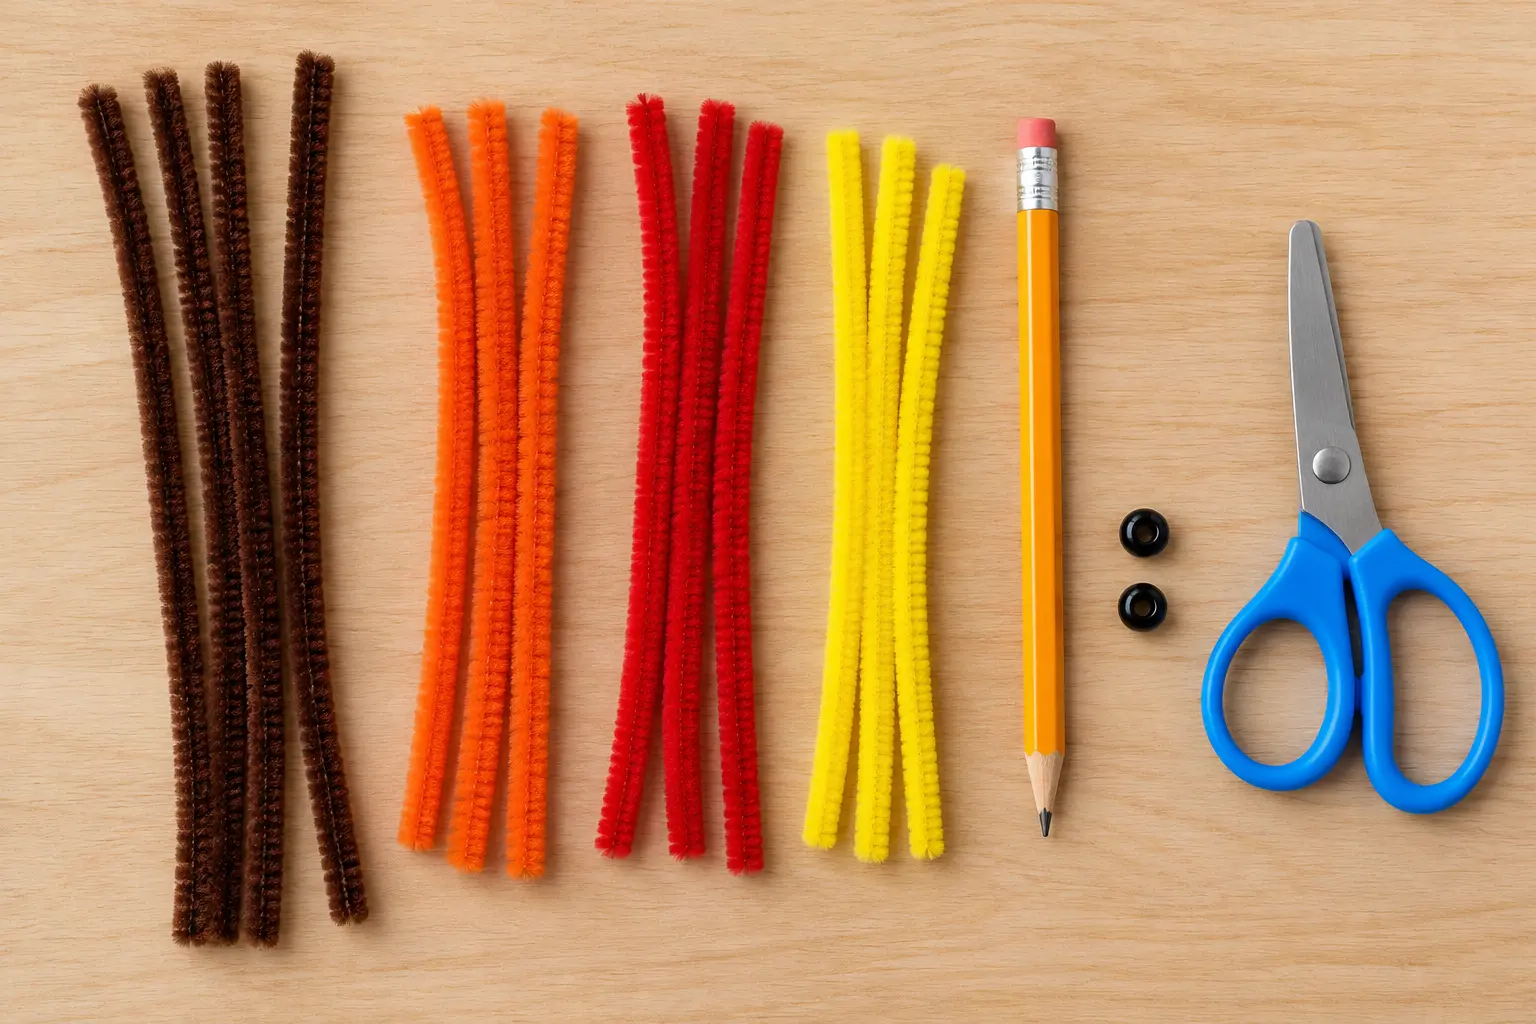
For one medium turkey, gather the following supplies:
- 6 brown pipe cleaners for the body, head, neck, and wings
- 2 orange pipe cleaners for the beak and feet
- 2 red pipe cleaners for tail feathers and the wattle
- 2 yellow pipe cleaners for tail feathers
- 2 additional orange pipe cleaners for tail feathers
- 2 small black pony beads for eyes, optional
- Child-safe scissors or wire cutters
- A pencil or marker for forming even curves, optional
You can replace the beads with tiny black pipe-cleaner coils. That version keeps the turkey entirely chenille-based and avoids small loose parts. Pony beads are a choking hazard, so omit them when crafting with children who may put small objects in their mouths. An adult should supervise cutting because the wire core can leave a sharp end. Fold or wrap every cut tip inward before the turkey is handled or displayed.
If you enjoy projects that stay together without adhesive, the same twisting techniques appear in these pipe cleaner crafts without glue and no-glue pipe cleaner flowers.
How to Make a Pipe Cleaner Turkey Step by Step
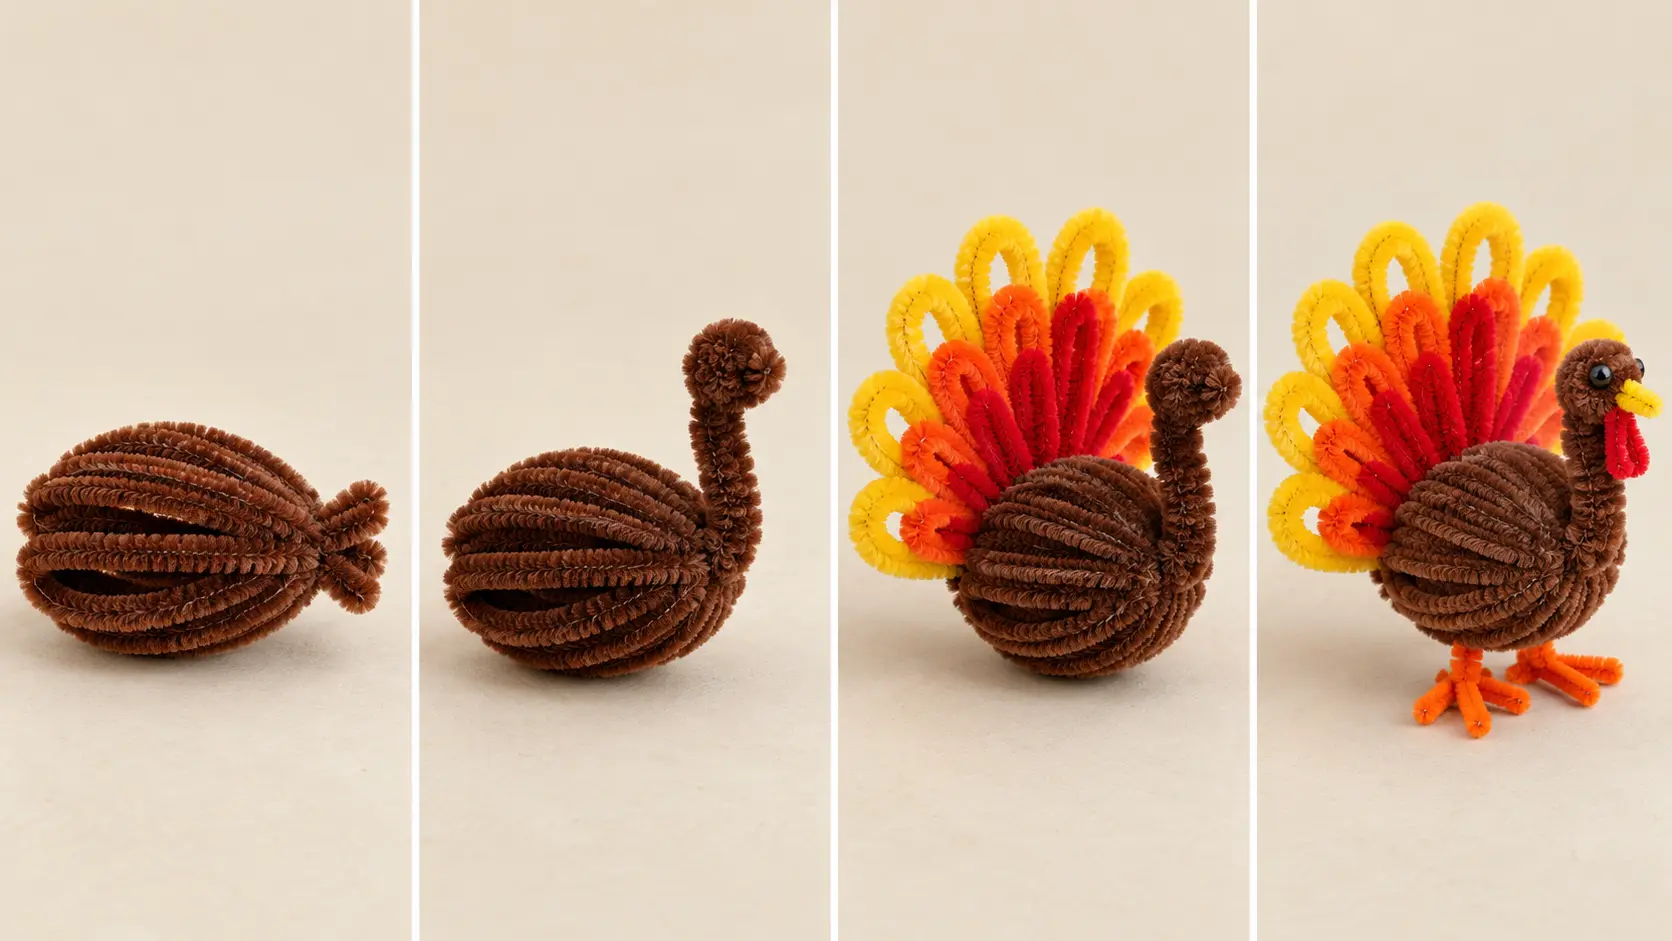
Step 1: Build the rounded brown body
Place four brown pipe cleaners side by side. Align their ends, then twist the group together once at the exact center. Fold all eight loose halves toward the same side, creating a thick bundle with the center twist at one end.
Spread the eight strands slightly and curve each one into a long oval. Bring the tips back toward the center twist. Wrap the final half inch of every strand around the base so the ovals form a compact, ribbed body. Think of the shape as a small pumpkin lying on its side: rounded in the middle and narrower at both ends.
If the body looks flat, place a finger inside the loops and gently push them outward. Rotate the turkey as you adjust it so the volume stays even. The body must be firm enough to support the head but not so tightly compressed that the fuzzy texture disappears.
Step 2: Form the head and neck
Fold one brown pipe cleaner in half. Starting at the folded end, wind the stem around a pencil three or four times to make a compact coil for the head. Slide it off the pencil, leaving two straight ends below the coil. Twist those ends together for approximately 1½ inches to create the neck.
Separate the remaining ends and push them into the top front of the body. Wrap each end around a different body rib. Attaching the neck at two points prevents the head from tipping sideways. Bend the neck into a gentle S curve rather than leaving it perfectly straight; the curved profile looks more like a turkey and makes the beak easier to position.
Step 3: Add the eyes, beak, and wattle
For bead eyes, cut a 3-inch piece of brown pipe cleaner and slide on two black beads. Space the beads about ½ inch apart, curve the short piece around the head coil, and twist its ends together at the back. Turn the cut tips inward. For all-chenille eyes, make two tiny black coils and trap their short tails beneath the outer layer of the brown head.
Cut a 3-inch orange piece for the beak. Fold it in half, pinch the fold into a point, and wrap the two ends around the lower front of the head. The finished beak should be a small triangle, not a long cone. Make the wattle from a 3-inch red piece: create a narrow teardrop loop, twist the base once, and tuck it beside the beak so it hangs down the neck.
Step 4: Make a colorful fan tail
Use two red, two orange, and two yellow pipe cleaners for the tail. Fold each stem in half without creasing it sharply. Bring the ends together and twist them twice, forming a long loop. You now have six individual feathers.
Arrange the loops in a fan on the table. Put the yellow feathers near the top, orange feathers at the sides, and red feathers between them for clear color contrast. Overlap all twisted bases. Use a 4-inch brown offcut to wrap the bases tightly together. Spread the upper loops until the tail forms a balanced semicircle.
For a fuller turkey, nest a smaller loop inside each large feather. Fold a second stem into a loop about two-thirds of the original height and twist both bases together. This doubles the material but creates a layered tail that photographs well and looks substantial in a table display.
Step 5: Attach the tail securely
Hold the bundled tail behind the body, with the feather loops rising above the turkey’s head. Thread the brown wrapping ends through two of the body ribs and twist them together underneath. The tail base should touch the body rather than floating behind it.
Check the turkey from the side. If the fan leans too far backward, bend the base forward. If it falls to one side, open the attachment twist and center the bundle before tightening it again. A large tail can make the craft back-heavy, so keep the lower feather loops close to the body.
Step 6: Shape the feet and legs
Cut one orange pipe cleaner in half. Fold each half at its midpoint. Twist the doubled section for about 1 inch to make a sturdy leg, leaving the four short ends loose. Bend three tips forward as toes and one backward as a heel. Repeat for the second foot.
Push each leg between the lower body ribs and wrap its upper end around a brown strand. Space the feet slightly wider than the body center. Flatten the toes against the table and adjust the heels until the turkey stands. If it still tips, shorten the legs and move the tail closer to the body.
Step 7: Add simple wings and finish the shape
Fold the final brown pipe cleaner in half and cut it at the fold. Shape each piece into a flat teardrop loop. Twist the ends around one rib on either side of the body, placing the pointed end toward the back. Curve the lower edge outward slightly so each wing remains visible against the body.
Inspect every connection and hide exposed wire tips beneath a neighboring wrap. Straighten the eyes, pinch the beak, and fan the tail one last time. Your pipe cleaner turkey is ready to stand on a shelf, join a Thanksgiving centerpiece, or hold a place card.
Five Turkey Variations to Try
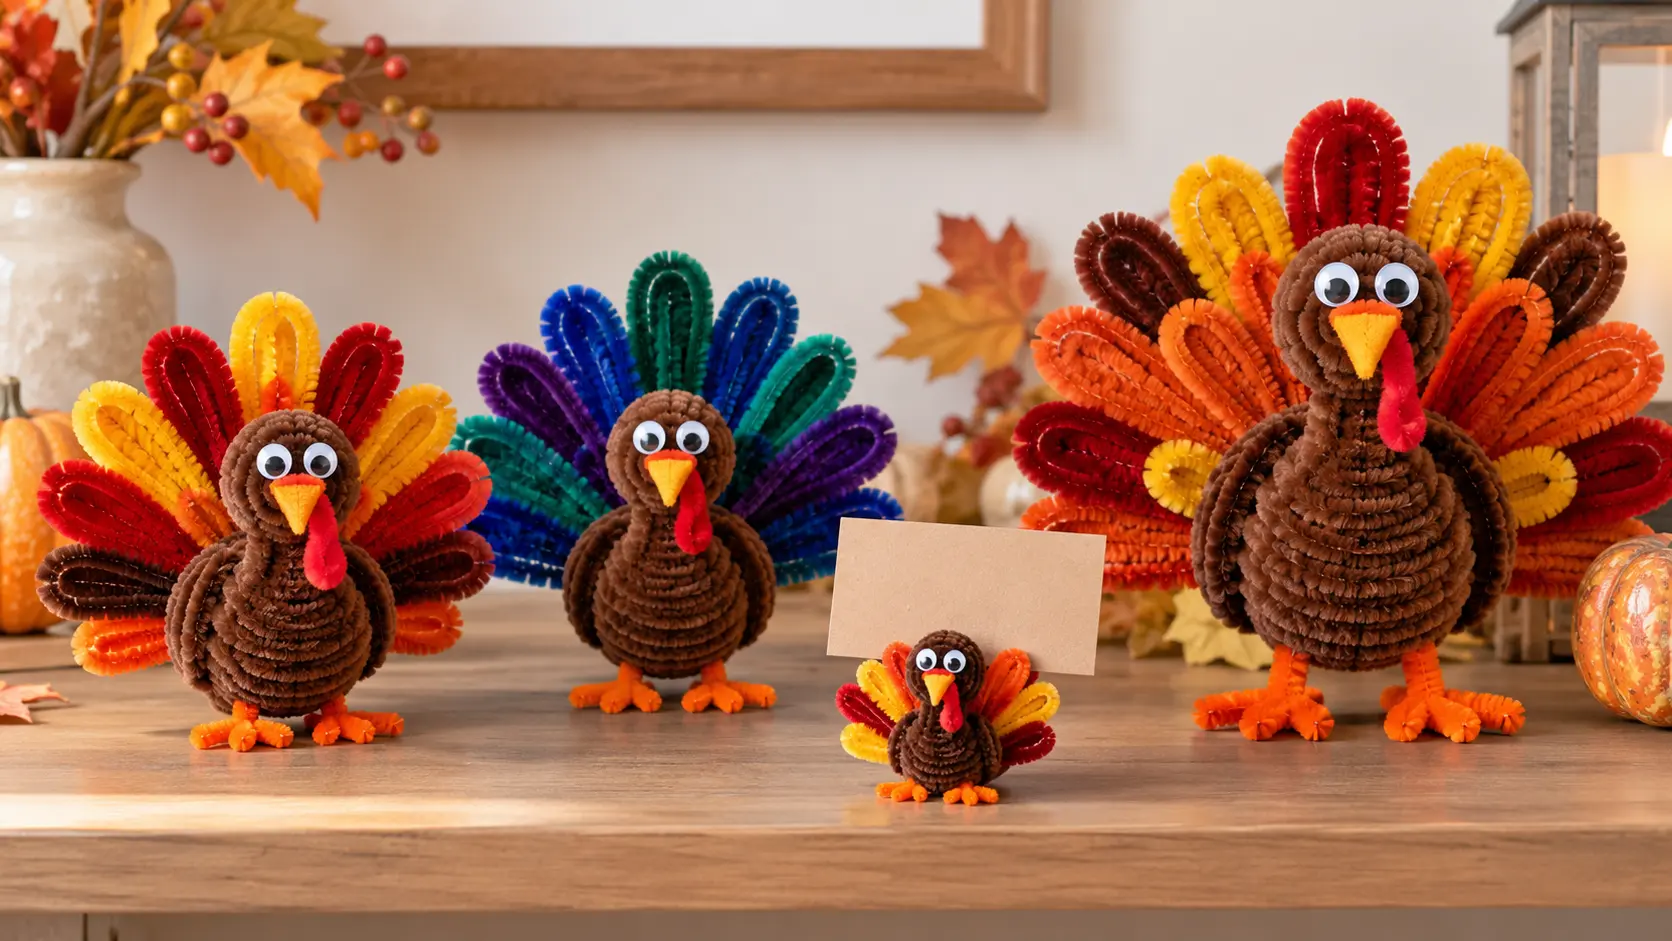
1. Mini Thanksgiving place-card turkey
Use half-length stems and make only five tail feathers. Twist a small upright loop onto the turkey’s back, then slide in a lightweight paper name card. Keep the card blank until the guest list is final. A set of matching mini turkeys can decorate individual place settings while the larger pipe cleaner fall harvest centerpiece anchors the middle of the table.
2. Jewel-tone turkey
Replace the traditional red, orange, and yellow tail with teal, cobalt, purple, and emerald. Keep the body brown so the shape remains easy to recognize. This palette is useful when your Thanksgiving decor is modern rather than rustic, and it also lets a group of children choose colors without needing identical supply packs.
3. Turkey pencil topper
Make only the head and a five-loop tail, then wrap the base around a pencil twice. Leave enough room for the topper to slide off without damaging the pencil. The attachment method is similar to these pipe cleaner flower pencil toppers, but the turkey tail replaces the flower petals.
4. Large classroom turkey
Join two stems end to end for each body rib and feather. To connect stems, overlap the ends by 1 inch and twist them around each other three times. A larger turkey needs a broad base, so make longer heels and add a second wrap where the tail meets the body. Display it on a high shelf rather than as a toy, because the long wire shapes can bend during rough handling.
5. Turkey with thankful-message feathers
Attach small paper tags to the tail loops with short pipe-cleaner ties. Family members or students can write one thing they appreciate on each tag. Keep the written cards separate from the chenille construction so the turkey can be reused: remove this year’s messages after the celebration and add new ones next fall.
How to Make This Craft Easier for Kids
Prepare a simple kit for each child before the activity begins. Cut the short pieces, sort colors, and bend sharp tips inward. A finished example helps children understand the goal, but leave several color combinations available so the results do not have to look identical.
- Ages 4–6: provide a preassembled body and tail. Let the child spread feathers, add chenille eyes, and shape the toes with close supervision.
- Ages 7–9: prepare the cut pieces but let children build the body and tail. Demonstrate one twist at a time.
- Ages 10 and up: provide the supply list and finished example, then encourage independent color and size choices.
For a classroom, place materials in color-coded trays and make the body before the tail. Completing one stable component at a time keeps the workspace manageable. If you need more low-prep options, browse these easy pipe cleaner crafts for kids and pipe cleaner art ideas.
Troubleshooting Common Problems
The turkey keeps falling backward
The tail is either too heavy or too far from the body. Bend its base forward, tighten the attachment, and spread the feet. You can also shorten the lower tail feathers or make the back heels slightly longer.
The body looks flat
Open the brown ribs one at a time and curve them around your thumb. Alternating the rib positions creates volume. Do not solve a flat body by adding more stems on top; the extra weight can make standing harder.
The head moves or twists
Anchor the neck ends to two separate body ribs. A single attachment point acts like a hinge. If the head is still loose, wrap a short brown piece around the neck base and the nearest body rib.
The tail does not form an even fan
Remove the tail and align all twisted bases on a flat surface. Secure the bundle first, then spread the loops. Work from the center outward and compare the left and right sides after every adjustment.
Ways to Display a Pipe Cleaner Turkey
A single turkey can sit beside a small pumpkin on a bookshelf, while several can become table markers or classroom decorations. Keep the craft indoors and dry; chenille fibers can hold moisture, and the wire may discolor after repeated exposure to damp conditions.
For a coordinated autumn display, place the turkey near a no-glue pipe cleaner pumpkin or add it beside warm-colored flowers. Avoid open flames and hot candleholders. Pipe cleaners, paper cards, raffia, and dried decorations should be kept well away from candles, fireplaces, and other heat sources. Battery-operated LED lights are the safer choice for a table arrangement.
Store the turkey in a shallow box after Thanksgiving. Place a piece of tissue paper around the tail and avoid stacking heavy objects on top. If the feathers flatten during storage, reshape each loop around a marker before displaying the craft again.
Frequently Asked Questions
Can I make a pipe cleaner turkey without glue?
Yes. Twist the body ribs together, wrap the head and neck onto two ribs, bundle the tail bases, and attach the feet with tight wraps. Glue is optional rather than structural.
How many pipe cleaners do I need for one turkey?
A medium turkey uses about 14 standard 12-inch pipe cleaners: six brown, four orange, two red, and two yellow. Use fewer for a mini version or more for a layered tail.
What age is this turkey craft suitable for?
Children around age seven and older can complete most steps with supervision. Younger children can decorate a preassembled body. Adults should handle cutting and fold exposed wire ends inward.
How do I make the pipe cleaner turkey stand up?
Keep the tail close to the body, make two wide feet with backward-facing heels, and shorten the legs if needed. Adjust the tail forward until the weight sits above the feet.
Can I use googly eyes instead of beads?
Yes, but traditional googly eyes normally require adhesive. For a fully no-glue version, use pony beads threaded onto a short stem or make two tiny black chenille coils. Omit small parts for children who may mouth them.
How can I turn the turkey into a place-card holder?
Make a mini turkey and twist a small upright loop onto its back. Slide a lightweight name card into the loop and keep the tail low enough that the card remains readable.
A Reusable Thanksgiving Craft
This pipe cleaner turkey turns a handful of chenille stems into a recognizable Thanksgiving decoration without relying on glue. The rounded body, upright neck, balanced feet, and looped fan tail are all made with repeatable shapes, so the design is easy to resize or personalize. Start with the classic autumn palette, then try mini place cards, jewel-tone feathers, or a larger classroom display once the basic construction feels familiar.