The tulip is one of the most iconic spring flowers — and it happens to be one of the easiest pipe cleaner flowers to make.
No coiling, no cutting, no glue. Just wrap a pipe cleaner around your finger three times, slide it off, and pinch. That’s essentially your tulip. The rest is finishing touches.
This guide covers the complete step-by-step pipe cleaner tulip tutorial, 6 color variations, a full bouquet assembly guide, and creative ideas for displaying your tulips at home or giving them as gifts.
Perfect for kids from age 5 upward, complete beginners, and anyone who wants a beautiful spring flower in under 5 minutes.
🌷 Spring craft session? The tulip pairs perfectly with the daisy and wildflower for a complete easy spring pipe cleaner flowers craft for kids.
Why the Tulip Is the Best Beginner Pipe Cleaner Flower
Most pipe cleaner flowers require multiple steps and precise shaping. The tulip is the exception — its natural cup shape comes from the simplest possible technique, and it looks impressive immediately.
Here’s why it’s perfect for beginners and young children:
- No scissors needed — the whole flower is made by wrapping and pinching
- Under 5 minutes — the fastest “real flower” design in pipe cleaner crafting
- Immediately recognizable — even a 4-year-old’s first attempt looks like a tulip
- No glue required — the pipe cleaner holds its cup shape permanently by itself
- Works with any color — every pipe cleaner color looks beautiful as a tulip
What You Need
For one tulip:
- 1 pipe cleaner in your chosen flower color
- 2 green pipe cleaners — for the double-twisted stem
- 1 green pipe cleaner — for the leaf
Optional:
- A pencil or finger — to shape the cup (your finger works perfectly)
- Floral tape — only if assembling a bouquet
Where to buy: Dollar Tree, Hobby Lobby, Michaels or Amazon. Cost per tulip: Under $0.10. Time per tulip: 4–6 minutes.
Step-by-Step: How to Make a Pipe Cleaner Tulip
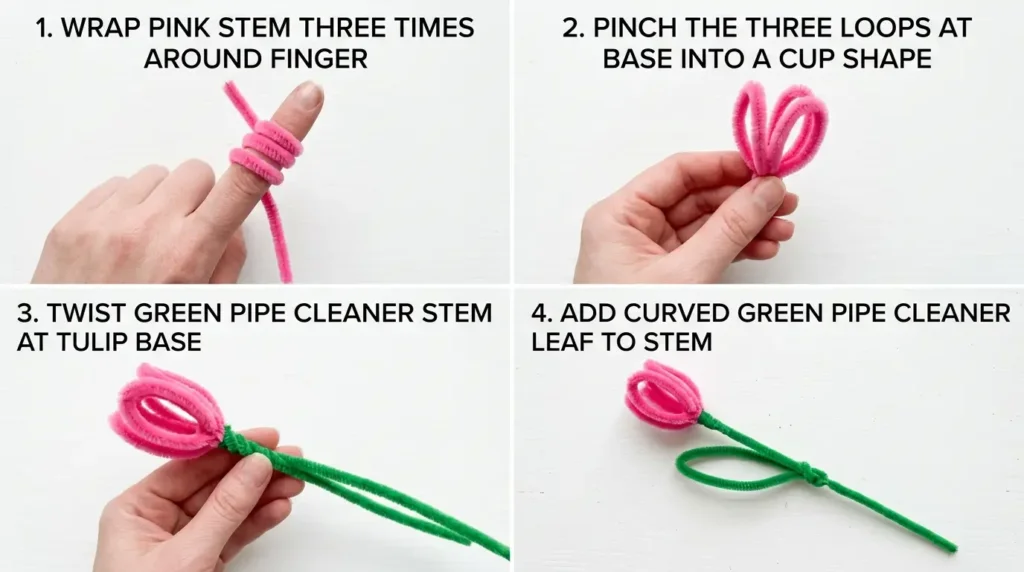
Step 1 — Wrap around your finger
Hold one end of your colored pipe cleaner between your thumb and index finger. Wrap the pipe cleaner around your index finger 3 times, each wrap sitting just above the previous one like a small spring coil.
Keep the wraps tight and close together — the tighter the coil, the more defined your tulip cup will be.
Step 2 — Slide off and pinch the top
Gently slide the three loops off your finger. Hold the coil loosely in one hand and use your other hand to pinch the top of the coil inward and upward until it forms a rounded cup shape — wider at the top, narrowing at the base.
This is the core tulip technique. The three loops naturally want to form this cup shape — you’re just helping them along.
💡 The secret: pinch from the side, not from above. Pressing from the sides squeezes the loops into the classic tulip silhouette.
Step 3 — Twist the base closed
At the base of the cup, twist the two pipe cleaner ends together 3–4 times to lock the tulip shape permanently. Leave a short tail (about 2 cm) pointing downward — you’ll attach the stem here.
Step 4 — Attach the stem
Twist two green pipe cleaners together end-to-end to make one long double-strength stem. Attach the top of the stem to the base tail of your tulip by wrapping tightly 3 times. The double stem is important — tulip heads are slightly heavier than other flowers and need a firm stem to stand upright.
Step 5 — Shape the tulip cup
Hold the stem and look at the tulip from the front. Gently spread the top of the cup open slightly with your fingertip — real tulips are open at the top, not completely closed. You can also slightly flare the top edges outward for a more blooming look.
The beauty of pipe cleaners is that you can reshape at any point — if you go too far, just squeeze it back.
Step 6 — Add the leaf
Fold a green pipe cleaner into a long, gracefully curved oval shape — about 8–10 cm long. Real tulip leaves are large and curved, so make this leaf bigger than you think it needs to be. Twist both ends firmly around the stem about halfway down.
Curve the leaf slightly away from the stem, angling it to one side for a natural look.
Your tulip is done. Total time: 4–6 minutes.
6 Tulip Color Variations
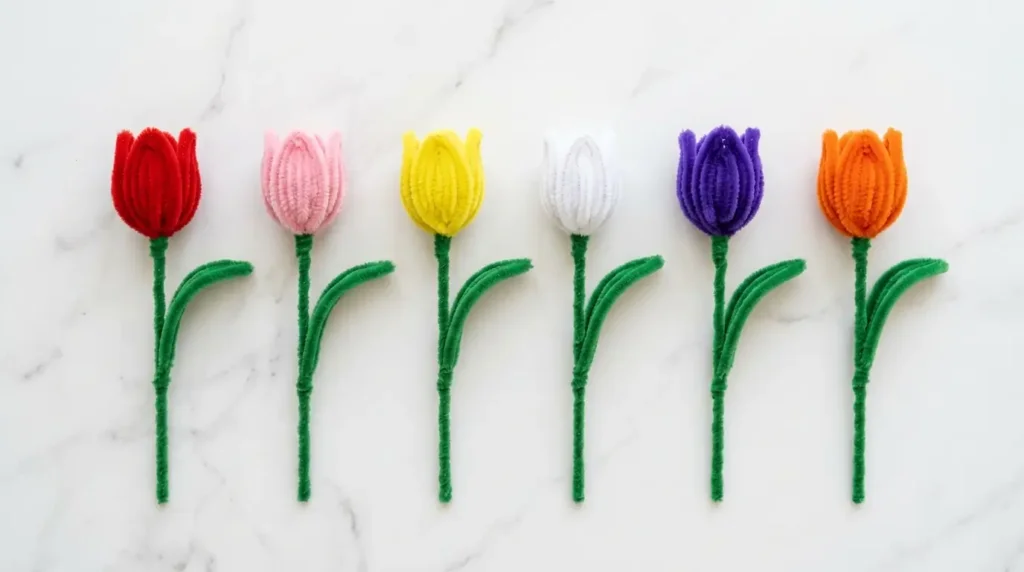
The same technique produces 6 completely different looks depending on the color you choose:
🔴 Classic Red Tulip
The most timeless and universally loved tulip. Bold, dramatic and perfect for Valentine’s Day, Mother’s Day or any romantic gift arrangement.
🌸 Soft Pink Tulip
The quintessential spring tulip. Feminine, gentle and beautiful in a mixed bouquet with white flowers. Pairs perfectly with the pipe cleaner rose in a pink-and-white arrangement.
💛 Bright Yellow Tulip
Cheerful and bold. Yellow tulips are associated with friendship and happiness — perfect for a “just because” gift or a sunny kitchen display. Combine with pipe cleaner sunflowers for a stunning all-yellow summer arrangement.
🤍 Pure White Tulip
Elegant and minimalist. White tulips look stunning in a monobouquet or as part of a wedding-style arrangement. Pair with green stems and white daisies from our pipe cleaner daisy flower guide for a classic fresh look.
💜 Deep Purple Tulip
Rich and dramatic. Purple tulips add depth and sophistication to any arrangement. Beautiful in a spring bouquet alongside pink and white flowers for a complementary color combination.
🟠 Vivid Orange Tulip
The most eye-catching variation. Orange tulips stand out in any bouquet and work particularly well in autumn-themed arrangements alongside burgundy and brown tones.
Advanced Technique: The Two-Tone Tulip
For a more realistic tulip, try twisting two pipe cleaners of different colors together before making the coil. For example:
- Pink + white — creates a delicate striped effect that looks like a real variegated tulip
- Red + orange — warm gradient that mimics a fire tulip
- Purple + white — classic Dutch parrot tulip look
Simply twist one pink and one white pipe cleaner together loosely (not tight — you want the colors to show separately), then use this combined pipe cleaner to make your tulip using the exact same 6-step method above.
Tulip Bouquet Ideas
The tulip is one of the most versatile flowers for bouquet building. Here are the combinations that look best:
🌷 Classic Spring Tulip Bouquet
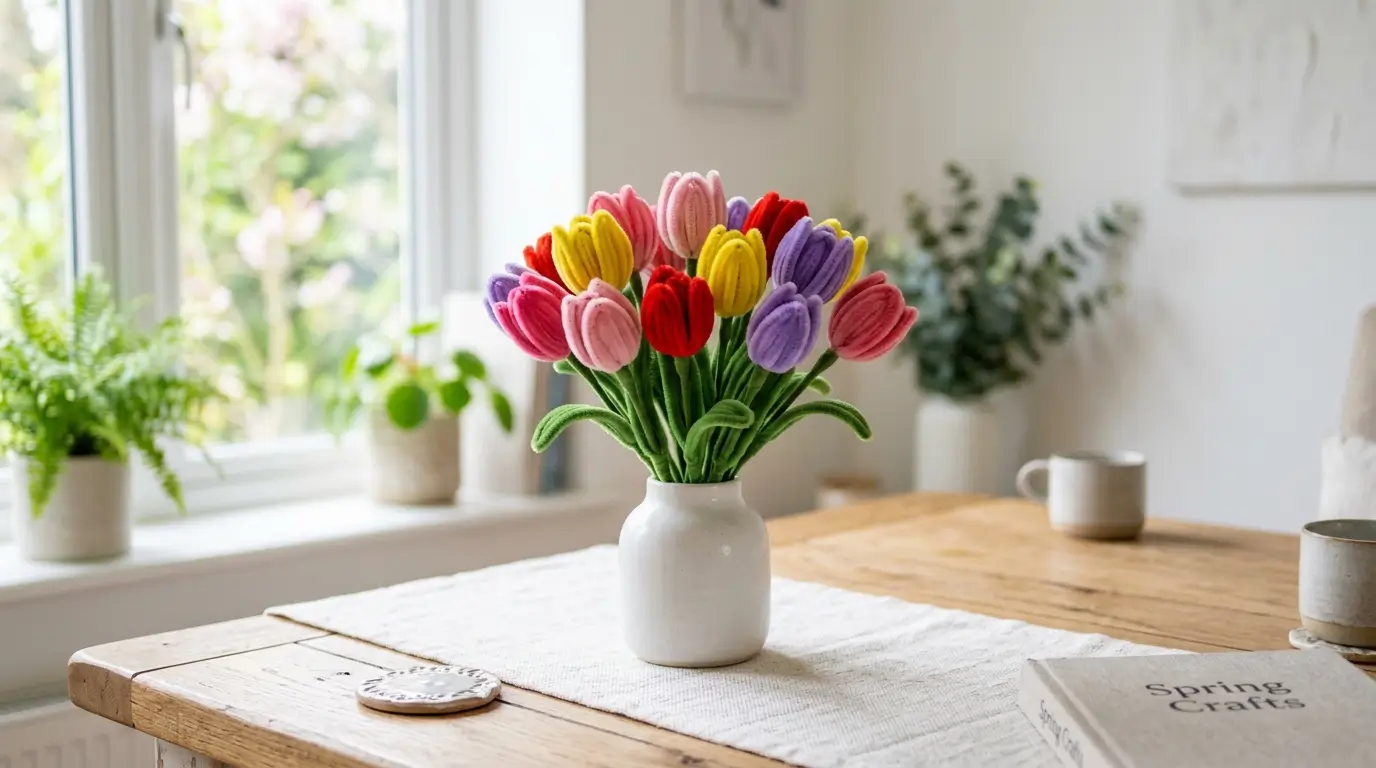
5 mixed-color tulips (red, pink, yellow, purple, white) + green stems and large leaves. The most joyful, colorful spring arrangement. Display in a white ceramic vase for a clean, modern look.
For assembly instructions, follow the stand-up technique in our pipe cleaner flowers bouquet guide.
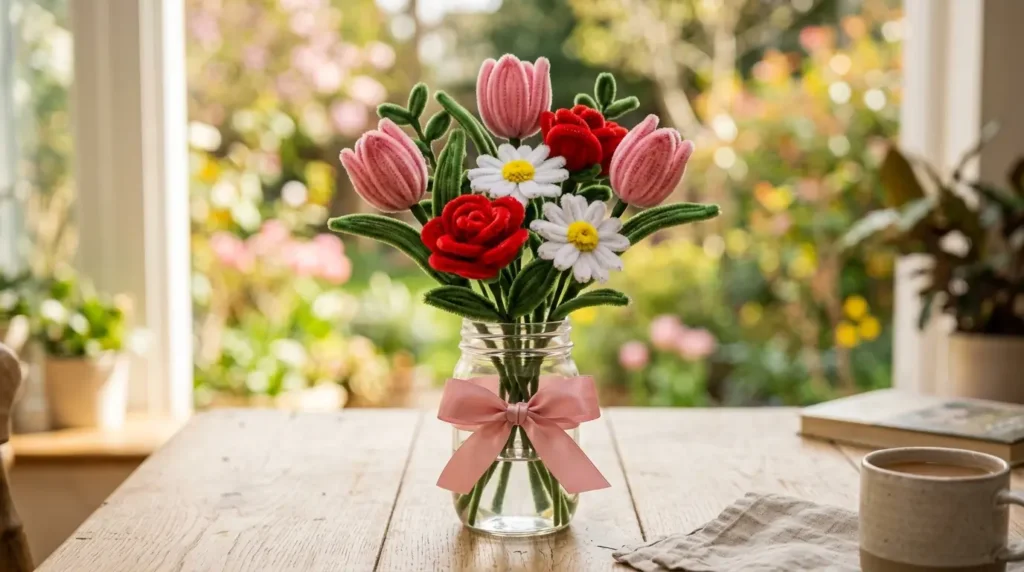
🌸 Mother’s Day Tulip Bouquet
3 pink tulips + 2 red roses + 2 white daisies + lavender sprigs. The perfect combination for a Mother’s Day gift — see how to present it beautifully in our pipe cleaner flowers mothers day guide.
🌿 Minimalist White Tulip Bouquet
7 white tulips, all the same color, with long green stems and large leaves. Wrapped in kraft paper with a green ribbon. The most sophisticated and modern pipe cleaner bouquet option.
🌻 Summer Mixed Bouquet
3 yellow tulips + 2 sunflowers + lavender sprigs. Warm, golden and perfect for a kitchen or living room display through June and July.
🎁 Mini Gift Bouquet
3 tulips in the recipient’s favorite color, wrapped in a single square of tissue paper and tied with a ribbon. The fastest bouquet gift to make — under 20 minutes total, under $2 in materials.
Display and Gift Ideas
Spring table centerpiece — 7 mixed-color tulips in a short round vase. Low enough not to block conversation across the table, beautiful enough to be a conversation starter.
Windowsill display — A single tall white tulip in a slim bud vase catches the light beautifully. Add one or two simple pipe cleaner flowers around it for variety.
Classroom spring project — Each child makes one tulip in their favorite color. Combine all flowers into one big class spring bouquet for the teacher. Full classroom setup in our pipe cleaner flowers classroom decoration guide.
Wall display — Pin 5–7 tulips at varying heights on a corkboard or foam panel alongside other spring flowers. More wall display ideas in our pipe cleaner flower wall decoration guide.
Gift for a teacher or neighbor — Three tulips wrapped in kraft paper with a handwritten tag. Zero cost, maximum thoughtfulness.
Tips for the Most Realistic Tulip
- Keep the wraps tight — loose wraps make a floppy tulip. Tight wraps create a firm, defined cup.
- Make the cup taller than you think — a tulip cup should be about 2–3 cm tall. Shorter cups look more like bells than tulips.
- Use a large leaf — a tulip’s leaf is one of its most distinctive features. Make it at least 8 cm and curve it gracefully sideways.
- Don’t open the top too much — the top should be slightly open, not fully flared. A closed-top tulip looks more realistic than a wide-open one.
- Vary the cup sizes — in a bouquet, make some tulips slightly taller and some slightly shorter. This variety is what makes the arrangement look natural.
Pipe Cleaner Tulip for Kids — Age Guide
Ages 4–5: Wrap the pipe cleaner around an adult’s finger, then let the child slide it off and help squeeze it into a cup shape. They choose the color and place it in the vase — full participation, safe, successful.
Ages 6–8: Full independent tulip including the stem attachment. This age group loves the instant result — a recognizable flower in under 5 minutes. Challenge them to make every color variation.
Ages 9+: Two-tone tulips and full bouquet assembly. Add the parrot tulip variation (frilly edge made by curling the top of the cup slightly outward all the way around). See our pipe cleaner flower crafts for teenagers for more advanced challenges at this level.
Frequently Asked Questions
How do you make a pipe cleaner tulip step by step?
Wrap one pipe cleaner around your index finger 3 times. Slide the loops off and pinch the top into a cup shape. Twist the base closed, attach a double-twisted green stem, and add one large curved leaf. Done in 4–6 minutes.
How many pipe cleaners do you need for a tulip?
One tulip needs 4 pipe cleaners total: 1 for the flower, 2 twisted together for the stem, and 1 for the leaf. A bouquet of 5 tulips needs about 20 pipe cleaners.
What is the easiest way to make a pipe cleaner tulip for young kids?
Wrap the pipe cleaner around your own finger and pinch the cup shape, then hand it to the child to add the stem and leaf. The wrapping and pinching steps are the trickiest for small hands, but the assembly is easy for ages 4 and up.
Can you make a two-tone pipe cleaner tulip?
Yes — twist two different colored pipe cleaners together loosely before making the coil. This creates a natural-looking variegated tulip with two colors showing simultaneously.
Why won’t my pipe cleaner tulip hold its shape?
The most common reason is loose wrapping. Wrap the pipe cleaner tightly around your finger and squeeze the cup shape firmly before twisting the base. A tighter initial coil holds its shape permanently.
How do you make a pipe cleaner tulip bouquet stand up?
Use double-twisted green stems, bundle all stems with floral tape, and anchor in a vase filled with pebbles or rice. Full bouquet stand-up instructions in our pipe cleaner flowers bouquet guide.
Final Thoughts
The pipe cleaner tulip is proof that the simplest techniques create some of the most beautiful results. Three wraps around a finger, one pinch, one twist — and you have a flower that looks like spring.
Make a single one for your desk, a trio for a gift, or a full bouquet for your home. However you use it, a pipe cleaner tulip brings a little bit of spring into any space — permanently.
Happy crafting — from My Flower Decor! 🌷
Save to Pinterest and share the spring love! 📌
More spring craft ideas:
- Free pipe cleaner flowers printable instructions PDF — download and print all 10 flower tutorials for free
- Easy spring pipe cleaner flowers craft for kids
- Pipe cleaner rose – step-by-step tutorial
- Pipe cleaner daisy flower – easy guide
- Pipe cleaner sunflower – DIY craft
- Pipe cleaner flowers bouquet – stand-up guide
- Simple pipe cleaner flower ideas for beginners
- Easy pipe cleaner flowers for kids