
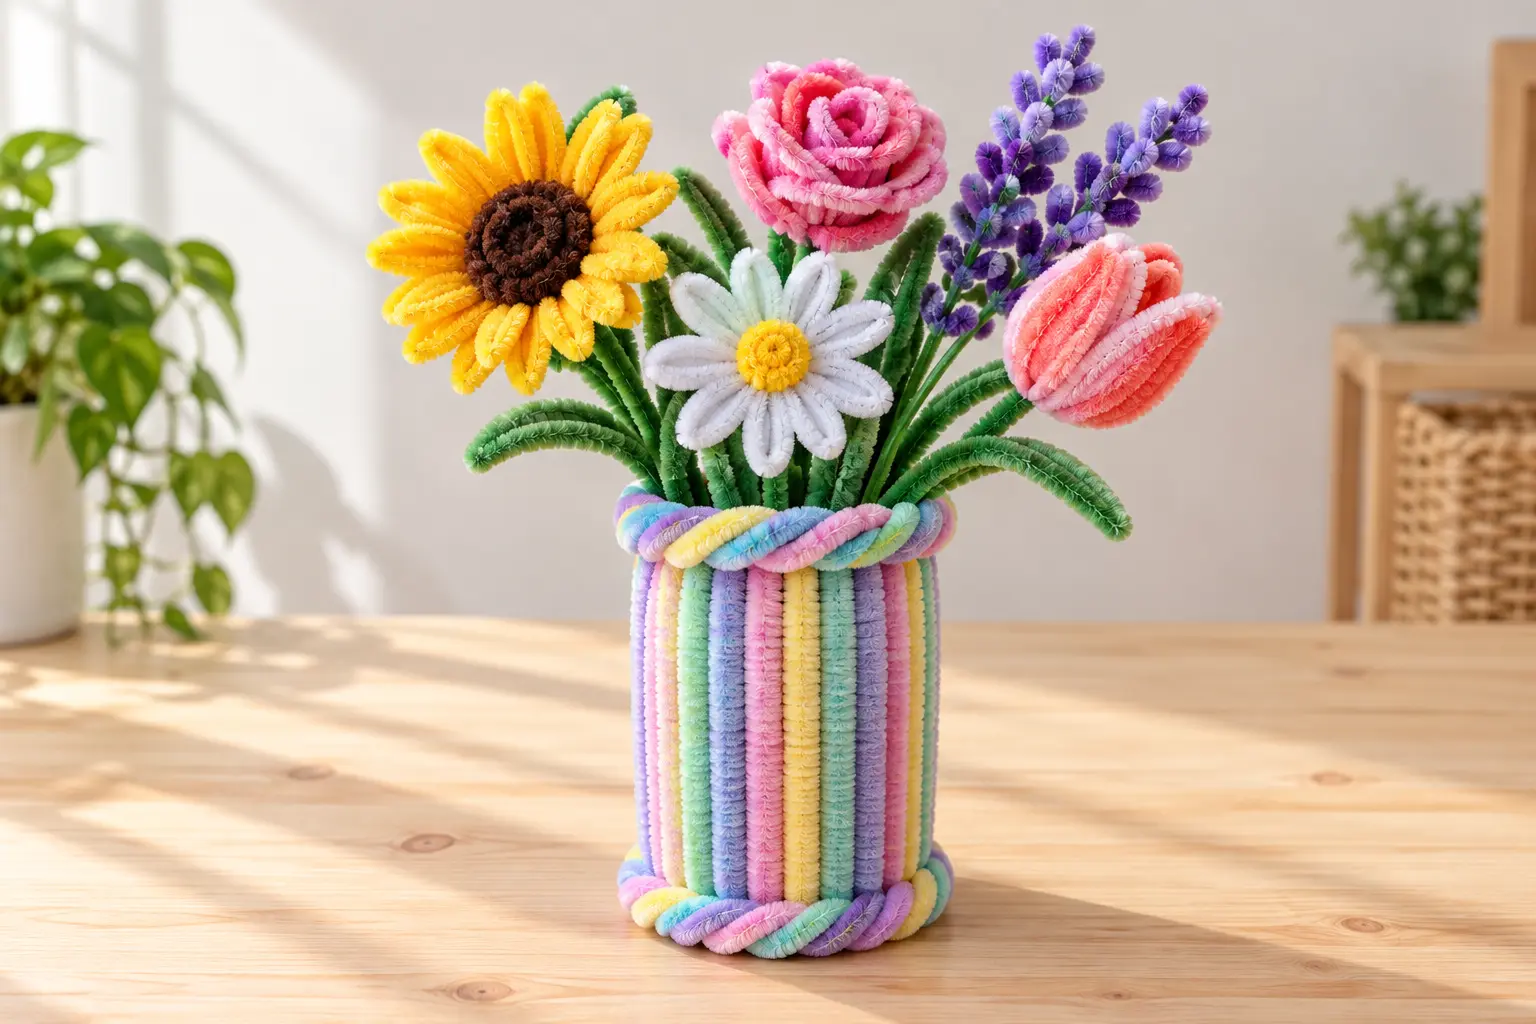
To make a pipe cleaner vase, build a firm circle of vertical chenille-stem ribs around a cardboard tube, weave more pipe cleaners over and under those ribs, then finish the top and bottom with tightly twisted rings. The cardboard form keeps the sides even while you work. Leave it inside for a sturdy decorative holder, or slide it out to create a flexible woven sleeve. The finished project is designed for dry handmade flowers, not water or fresh stems.
This beginner-friendly tutorial turns the container into part of the craft. It is different from arranging finished flowers in a store-bought jar or vase: here, the pipe cleaner vase is the project. You can make it in one color, create stripes, or use a soft pastel palette that coordinates with a handmade bouquet.
Quick project overview
- Skill level: beginner to confident beginner
- Approximate time: 45 to 75 minutes
- Best use: dry pipe cleaner flowers, pencils, craft tools, or lightweight decorative stems
- Finished size: about 4 to 6 inches tall, depending on the cardboard form
- Main technique: alternating over-under weaving around vertical ribs
- Glue: optional; the main structure can be made with twisting and wrapping
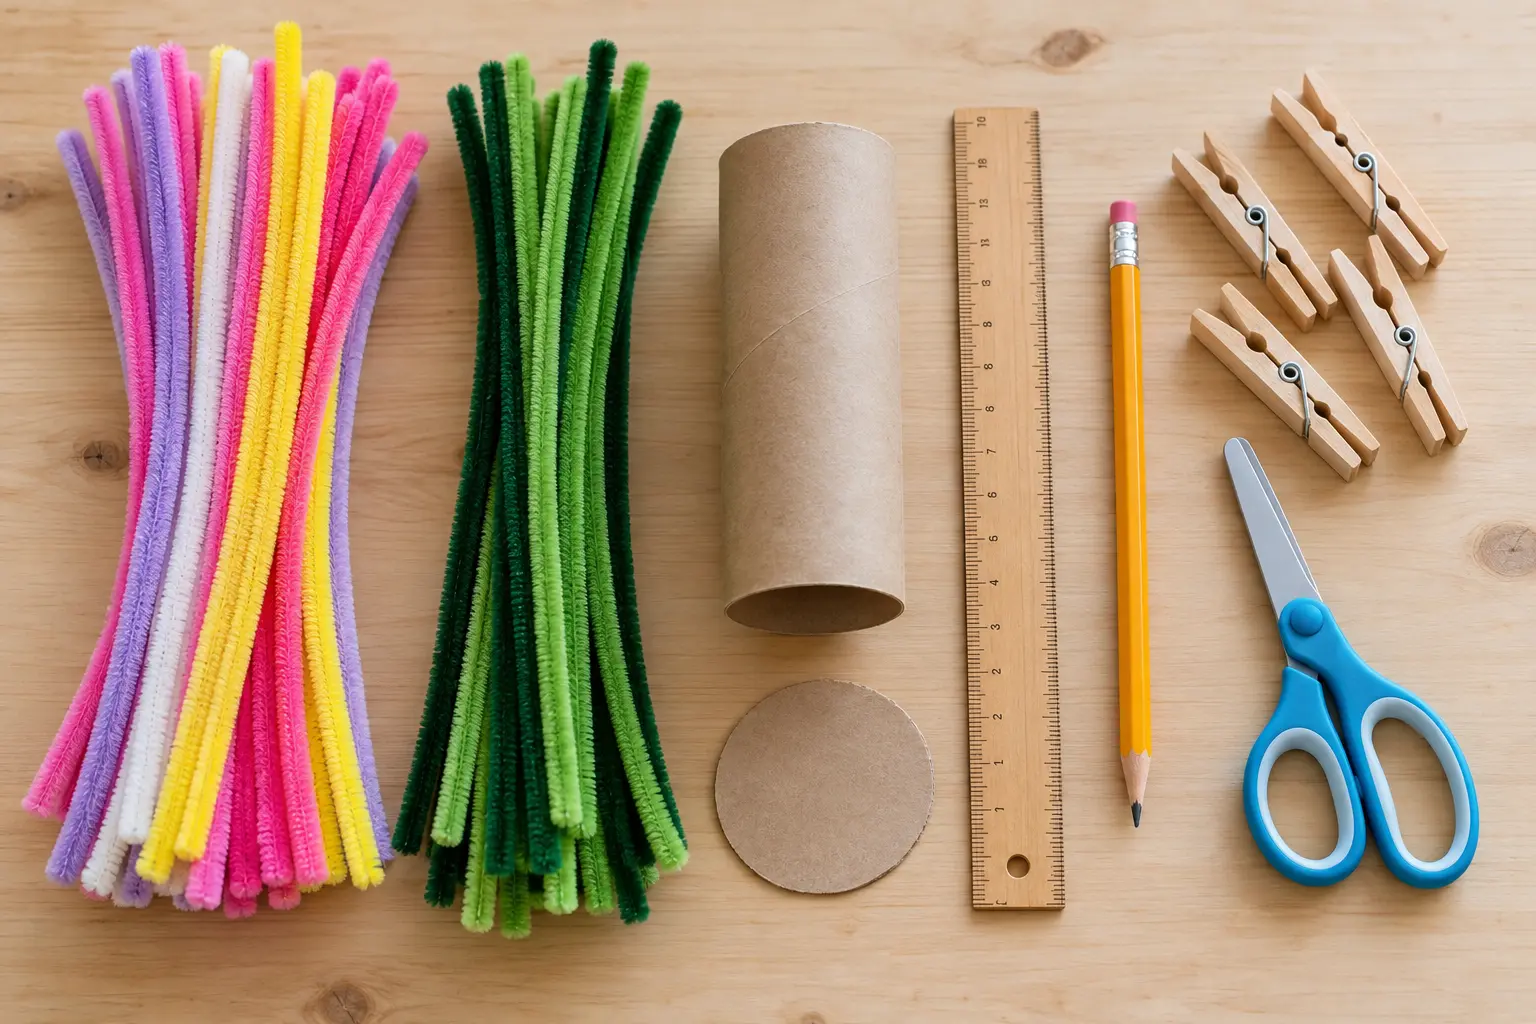
Materials for a pipe cleaner vase
- 18 to 26 standard 12-inch pipe cleaners for a small vase
- One clean cardboard tube or a strip of light cardboard rolled into a cylinder
- One cardboard circle slightly wider than the tube
- Ruler and pencil
- Scissors for cutting cardboard and trimming fuzzy fibers
- Four small clips or clothespins to hold the starting ribs
- Optional: a clean yogurt cup, paper cup, or empty jar to use as an inner liner
- Optional: craft glue for attaching the cardboard base if an adult wants a permanently reinforced holder
Choose regular chenille stems rather than extra-thin stems. Plush stems hide small gaps and make the finished surface look fuller. Metallic pipe cleaners can work as accents, but they are often stiffer and less comfortable to weave for the entire project.
The exact quantity depends on the height and diameter of your form. A short tube with a 2.5-inch diameter may need 10 to 12 vertical ribs and 8 to 12 weaving stems. Keep several extras nearby for the rim, base, and any color changes.
Before you start: choose the right vase structure
Option 1: keep the cardboard tube inside
This is the easiest and most stable version. The tube prevents the sides from collapsing and makes the holder practical for pencils, craft brushes, or a small group of pipe cleaner flowers. Cover the entire outside so the cardboard becomes part of the hidden support.
Option 2: use the tube as a removable form
This version produces a softer woven sleeve. Do not attach the pipe cleaners to the cardboard. After the weaving is secure, slide the tube out carefully. Add a separate woven or cardboard-covered base if you want the sleeve to stand on its own.
Option 3: add a waterproof inner container
Pipe cleaners and cardboard are not waterproof. If you want to display something that needs water, put a fully waterproof cup or jar inside the finished sleeve and keep all moisture inside that liner. Never pour water directly into the woven vase. For this tutorial, the safest and simplest use is a dry arrangement of handmade flowers.
How to make a pipe cleaner vase step by step
Step 1: prepare the form and base
Trim the cardboard tube to your preferred height. Four to five inches is a manageable size for a first attempt. Stand the tube on cardboard, trace around it, then draw a second circle about one-quarter inch wider. Cut out the larger circle. This creates a small ledge where the lower ends of the ribs can be wrapped and hidden.
If you are keeping the tube inside, center it on the cardboard circle. An adult can secure it with a thin line of craft glue, or you can hold it temporarily with clips while the pipe cleaner base ring is added. If you are making a removable sleeve, keep the tube loose and use the circle only as a size guide.
Step 2: make the vertical ribs
Place one pipe cleaner vertically against the outside of the tube. Leave about one inch extending below the bottom edge and one inch above the top. Add more vertical ribs at even intervals around the tube. For a small vase, 10 or 12 ribs are usually enough.
An even number of ribs creates a consistent over-under pattern. Use clips at the top edge to keep the first few stems in place. Check the gaps before weaving: wide uneven spaces become more noticeable as the vase grows.
Step 3: lock the ribs at the bottom
Bend each lower tail under the cardboard circle. Join neighboring tails with one or two tight twists. Work around the entire base until every rib is connected. Then wrap a separate pipe cleaner around the outside of the base like a belt, twisting it to each rib as you go.
The base ring carries much of the tension, so make it snug. The vase should sit flat before you continue. If it rocks, adjust the folded tails and press the cardboard circle level against the table.
Step 4: weave the first row
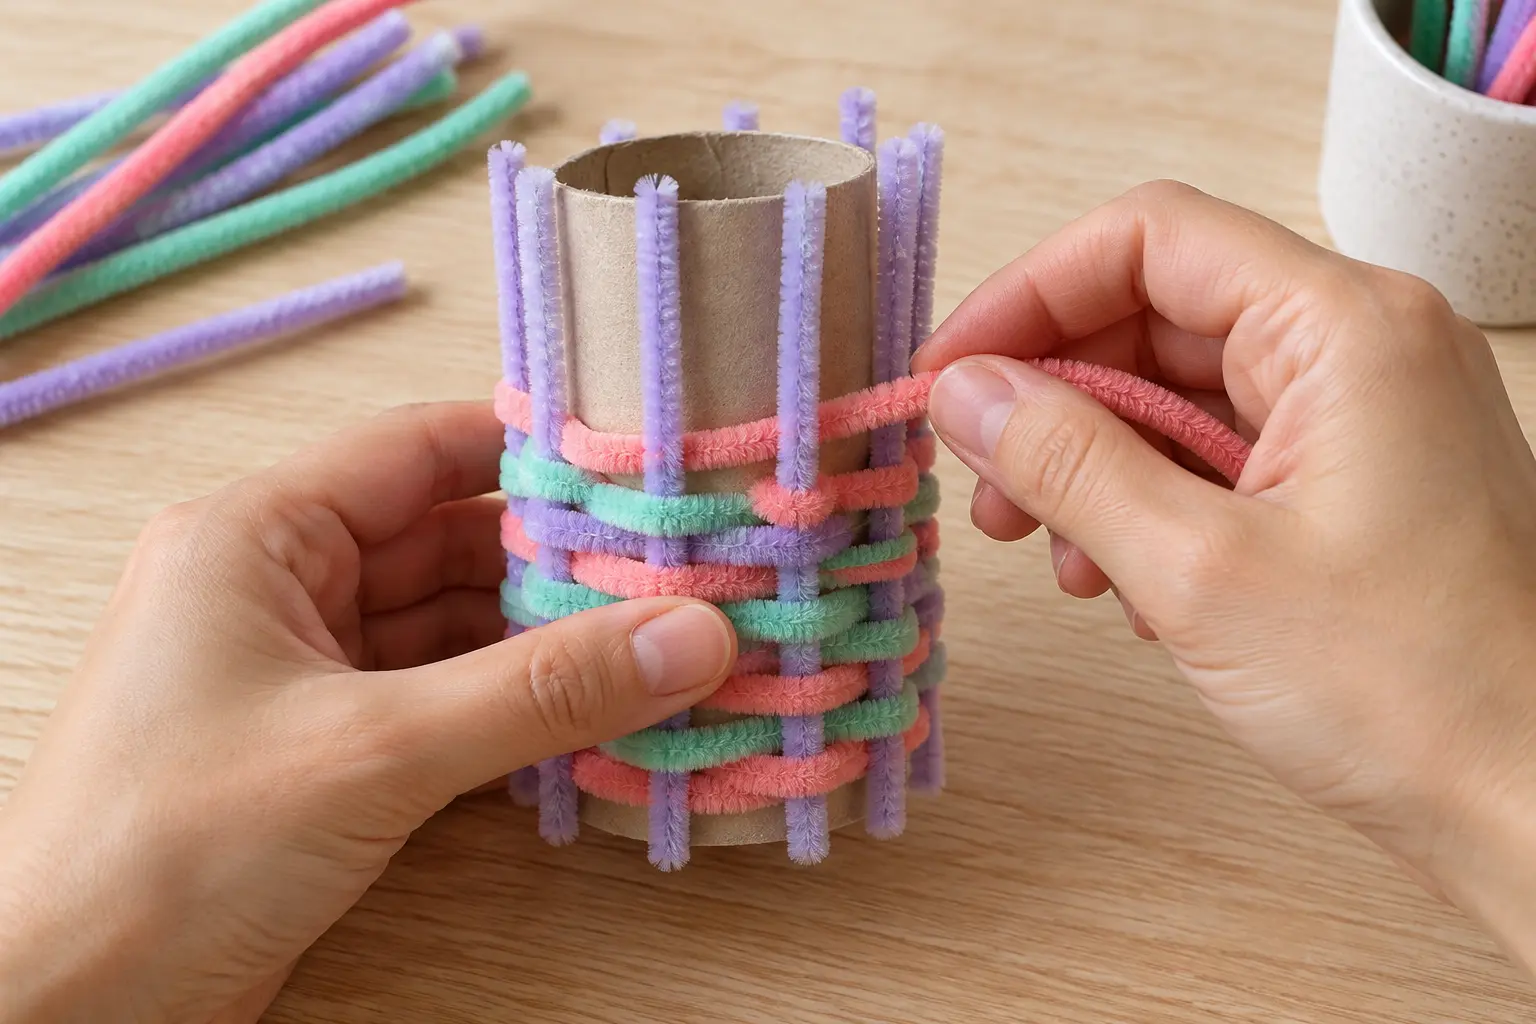
Choose a pipe cleaner for the first horizontal row. Twist its end securely around one vertical rib near the base. Guide it in front of the next rib, behind the following rib, then continue alternating over and under around the tube.
Keep the row close to the base ring, but do not pull so tightly that the ribs bend inward. When you reach the starting point, twist the end to the first rib. If the stem ends early, join a new one by overlapping the two ends behind a vertical rib and twisting them together two or three times.
Step 5: alternate the weaving pattern
Begin the second row on the opposite side of the first rib. If the first row passed in front of that rib, the next row should pass behind it. This alternating pattern locks the surface together and prevents long open channels from forming.
Push each finished row gently downward with your fingertips. The fuzzy fibers will compress and cover small openings. Rotate the tube as you work instead of reaching around it; this helps keep the tension consistent.
Step 6: add color changes without bulky knots
End each color behind a vertical rib. Place the new color beside the old end and twist both ends around the same rib. Fold the sharp tips inward so they remain hidden between the cardboard and the woven surface.
For clean horizontal stripes, use one color for two or three rows before switching. For a confetti effect, change colors every row. A repeating palette of three colors usually looks more intentional than using every color once.
Step 7: finish the top rim
Stop weaving about three-quarters of an inch below the top of the ribs. Bend each rib over the final row and tuck the end downward behind the weaving. Add one or two pipe cleaners around the rim, twisting them together to form a soft rope. Wrap that rope around the top edge and fasten it to several ribs.
Run a finger around the inside and outside of the rim. No wire end should point upward or outward. Fold any exposed tip into the thick rim or cover it with another short wrap.
Step 8: shape and test the finished vase
Remove the clips and straighten the sides. Place the vase on a flat surface, then add the intended dry contents a few stems at a time. If the arrangement feels top-heavy, keep the cardboard form inside or put a clean jar in the center as a weight.
For handmade flowers, reinforce larger stems by twisting two green pipe cleaners together. The pipe cleaner flower bouquet guide explains how to balance different stem heights, while the beginner pipe cleaner flowers tutorial is a good starting point if you still need to make the blooms.
Three easy pipe cleaner vase designs
Pastel striped vase
Use lavender, mint, pale yellow, pink, and light blue. Repeat each color for two rows and finish with a braided-looking rim made from three twisted stems. This soft palette works well with a white pipe cleaner daisy or a mixed spring bouquet.
Green botanical vase
Choose three shades of green and weave them in irregular narrow bands. Add two small pipe cleaner leaves near the rim for a botanical accent. Fill it with lavender, tulips, or a single large sunflower to keep the colors balanced.
Bold color-block vase
Divide the height into three sections and use one saturated color in each section. Try coral, orange, and yellow for a warm display, or blue, purple, and pink for a cooler one. A color-block design is forgiving because each section can end wherever a pipe cleaner naturally runs out.
How to arrange pipe cleaner flowers in the vase
Start with an odd number of flowers. Five or seven stems make a balanced small arrangement without crowding the opening. Put the tallest flower near the center, place two medium stems to either side, and use smaller flowers or leaves to fill the lower gaps.
Bend the stems slightly rather than keeping every one perfectly straight. A gentle outward curve lets each flower face the viewer. Turn the vase after every stem so the arrangement looks balanced from several angles.
If the opening is wide, bundle the stems with one green pipe cleaner before inserting them. You can also place clean pebbles in an inner cup, but avoid loose rice or small beads when young children are using the project. For more display ideas that focus on arranging flowers rather than building the container, see small pipe cleaner flower arrangements for home decor.
Troubleshooting common problems
The sides bow inward
The horizontal rows are probably too tight. Gently push the ribs outward and loosen the last one or two rows before continuing. Keeping the cardboard tube inside until the project is finished prevents most inward bowing.
The rows slide upward
Press each new row down firmly and twist it to a rib at the beginning and end. If the fibers are very slippery, add a small securing twist halfway around the vase.
The bottom is uneven
Set the empty vase on the table and find the highest point. Reopen the closest lower tail, pull it flatter beneath the cardboard circle, and retwist it. A second wrapped ring around the bottom can hide the adjustment and add weight.
There are large gaps in the weave
Move the vertical ribs closer together before adding more rows. You can also thread a short matching pipe cleaner through the gap and wrap its ends around the neighboring ribs. Avoid covering every gap with decorative pieces; correcting the spacing keeps the structure stronger.
Safety and care
- An adult should handle cardboard cutting for younger crafters.
- Fold every wire end inward and check the rim before use.
- Use the vase only for dry crafts unless a separate waterproof liner is installed.
- Keep the project away from candles, heaters, and open flames.
- Dust it with a soft, dry brush or a cool hair dryer on the lowest setting.
- Do not crush the sides during storage. Place tissue inside to help retain the shape.
Because the finished vase is lightweight, it works best with pipe cleaner blooms rather than heavy artificial flowers. If you want a low table display instead of an upright vase, use the pipe cleaner flower centerpiece tutorial for a different structure and viewing angle.
Frequently asked questions
Can a pipe cleaner vase hold water?
No. Pipe cleaners and cardboard are not waterproof. Use the vase for dry handmade flowers, or place a separate waterproof cup or jar inside it and keep all water inside that liner.
How many pipe cleaners do I need for a vase?
A small 4- to 6-inch vase usually needs about 18 to 26 standard pipe cleaners. The total depends on the diameter, height, number of vertical ribs, and how tightly you pack the woven rows.
Can I make the vase without glue?
Yes. You can connect the ribs, base ring, woven rows, and rim with tight twists and wraps. Keeping a cardboard tube inside adds stability. Glue is optional if an adult wants to attach the cardboard base permanently.
What flowers work best in a pipe cleaner vase?
Lightweight pipe cleaner daisies, tulips, roses, lavender, and small sunflowers work well. Use five or seven stems, reinforce heavier flowers, and vary the heights so each bloom remains visible.
Is this craft suitable for children?
Older children can usually do the weaving with adult supervision. Adults should cut thick cardboard, and every exposed wire end should be folded inward. For a simpler flower project, use the easy pipe cleaner flowers for kids guide.
A handmade container that completes the project
A pipe cleaner vase makes the container as creative as the flowers inside it. Start with a short cardboard form, keep the ribs evenly spaced, and alternate every woven row. Those three choices create a stronger and neater result than adding more decoration later.
Once the basic cylinder works, experiment with color bands, a thicker rim, or a removable sleeve. Then fill it with blooms from the types of pipe cleaner flowers guide and adjust the stems until the whole display feels balanced.