
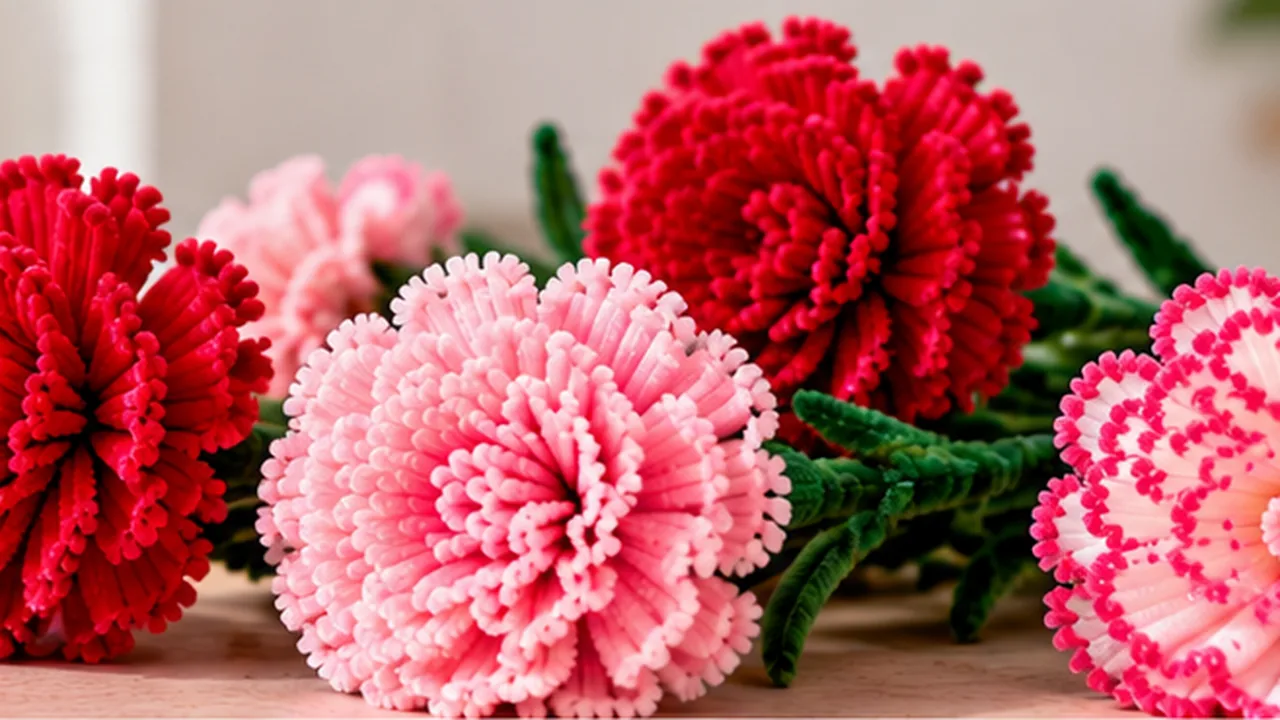
To make a pipe cleaner carnation, build a small center coil, add several layers of short ruffled loops around it, secure the flower head to a green chenille stem, then gently spread and crimp the loops to create the carnation’s full, frilly shape. This tutorial uses simple twisting and folding, so you can make a single stem or repeat the same method for a bouquet.
Carnations are a useful next flower to learn after a simple daisy or rose because the shape looks detailed without requiring complicated assembly. The key is not to make perfect individual petals. Instead, you create compact ruffled layers that overlap around the center.
If you are building a larger collection, compare this design with the types of pipe cleaner flowers guide, then use the finished stems in a pipe cleaner flower bouquet.
Pipe Cleaner Carnation: Quick Project Guide
| Skill level | Beginner to intermediate |
| Best colors | Pink, red, white, coral, purple or mixed shades |
| Main technique | Looping, twisting and ruffling |
| Glue required | No, if the stem is twisted firmly |
| Best uses | Bouquets, small arrangements, gifts and floral decor |
Materials You Need
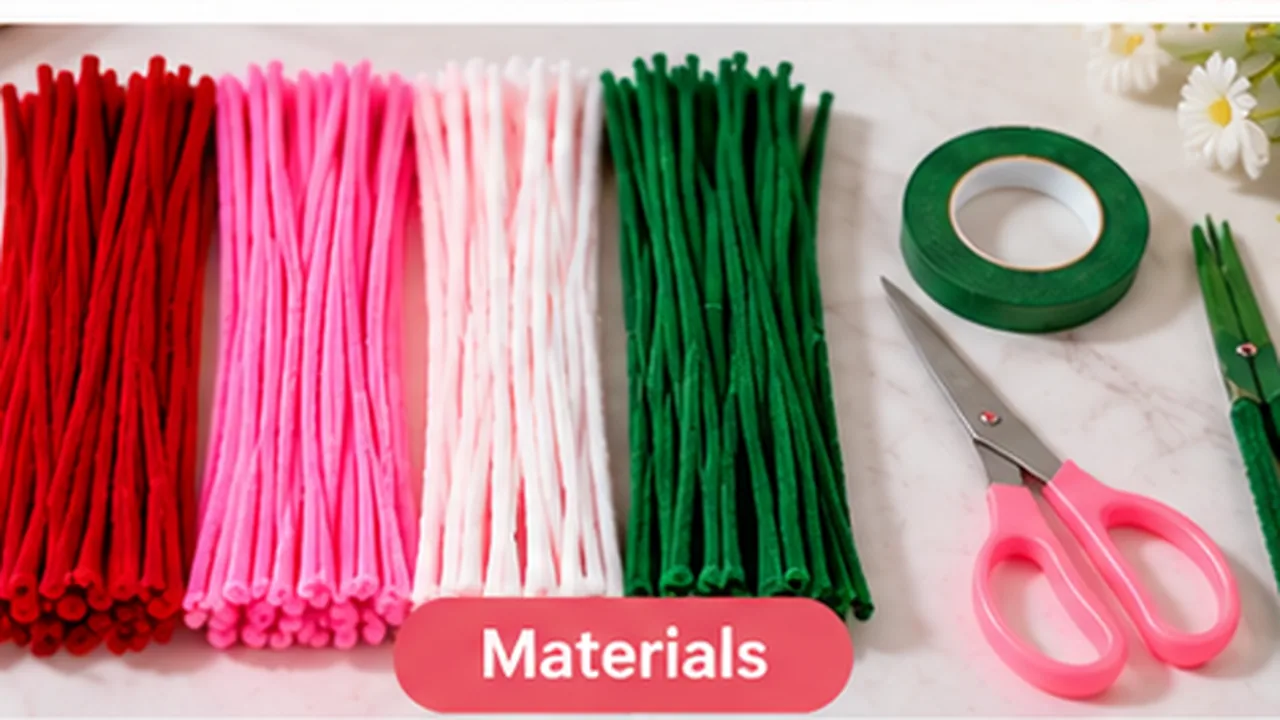
For one medium carnation, prepare 4 to 6 chenille stems in your flower color and 1 green stem. Standard craft pipe cleaners work well because the fuzzy surface helps the layers grip each other when twisted.
- 4 to 6 pipe cleaners for the flower head
- 1 green pipe cleaner for the stem
- 1 extra green pipe cleaner if you want leaves or a reinforced stem
- Scissors, optional, for trimming excess wire
- Ruler, optional, if you want several flowers to match in size
You do not need hot glue for the basic version. If you are making this project with children, supervise any cutting and check the ends of the internal wire before handling the finished flower.
How to Make a Pipe Cleaner Carnation Step by Step
Step 1: Make the Small Center
Take one flower-colored pipe cleaner and make a tight coil at one end. Wrap the stem around itself two or three times so the center does not unwind. Keep this first section compact. It will sit inside the ruffled outer layers rather than forming a large visible spiral.
A center that is too wide makes the flower look flat. A small center gives the later loops room to build upward and outward.
Step 2: Form the First Ruffled Petal Strip
Take a second pipe cleaner and begin making small loops along its length. Pinch each loop near its base, twist once, then move to the next loop. The loops do not need to be identical. Slight differences help the finished flower look fuller.
Keep the loops close together. If you leave long straight sections between them, the flower head will have visible gaps.
Step 3: Wrap the First Layer Around the Center
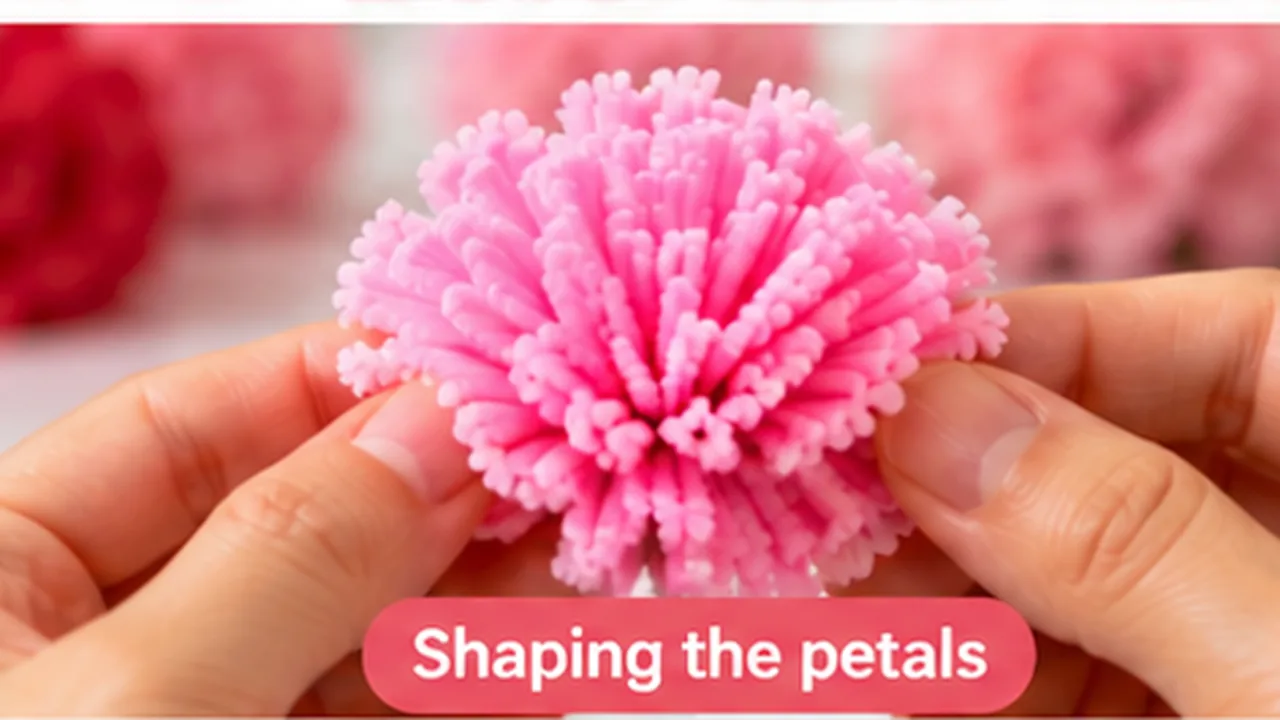
Place the first ruffled strip around the center coil. Wrap it in a small circle, keeping the bases of the loops close to the same point. Twist the free end underneath the flower head to lock the layer in place.
Do not spread the petals yet. Keeping the first layer compressed makes it easier to attach the next layers without losing the center.
Step 4: Add a Second Ruffled Layer
Make another strip of loops with a fresh pipe cleaner. This time, allow the loops to be slightly larger. Wrap this strip around the first layer, offsetting the loops so they sit in the spaces between the inner petals.
Twist the end securely beneath the flower head. Viewed from above, the carnation should now look like a dense cluster rather than a flat ring.
Step 5: Build the Outer Petals
Repeat the loop-and-wrap process with one or two more pipe cleaners. Increase the loop size only a little with each layer. Carnations look best when the transition from the center to the outside is gradual.
For a smaller flower, stop after three petal layers. For a fuller statement carnation, continue until the head has the volume you want, but keep checking the underside so the twists remain compact.
Step 6: Attach the Green Stem
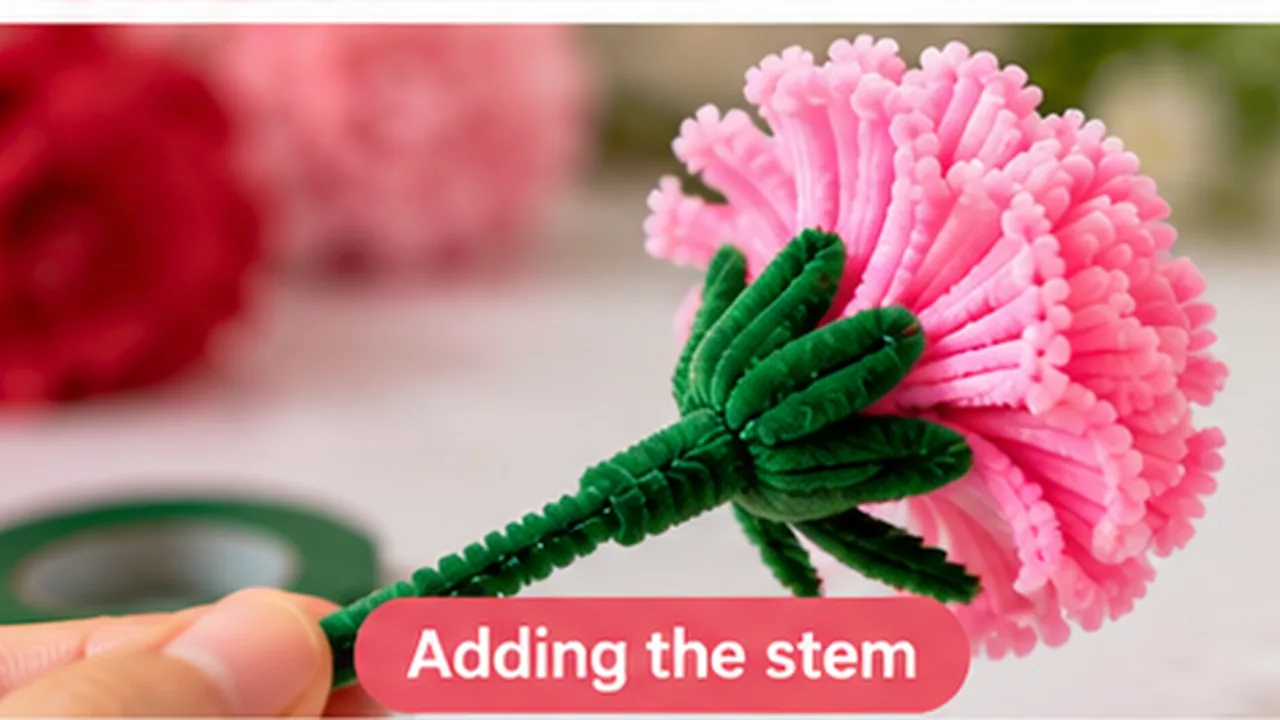
Push one end of a green pipe cleaner against the underside of the flower head. Wrap it firmly around the bundled petal bases several times. Then bend the remaining length downward to form the main stem.
If the flower head is heavy, place a second green stem alongside the first and twist the two together. This gives the carnation more support when displayed in a vase.
Step 7: Shape the Carnation
Now open the flower from the outside inward. Bend some loops upward, some sideways and a few slightly downward. Pinch individual loops to make them less round and more irregular.
This shaping step creates the characteristic ruffled look. Avoid flattening all the loops into one plane. A carnation should have visible depth when viewed from the side.
How to Make the Petals Look More Like a Carnation
The most important detail is controlled irregularity. A daisy has clearly separated petals, while a carnation has a dense edge made from many overlapping ruffles. Your pipe cleaner version should follow the same visual idea.
- Use many small loops instead of a few large loops.
- Make the outer loops slightly larger than the center loops.
- Pinch and bend the loop edges after assembly.
- Keep the base tight so the top can remain full.
- Rotate each new layer so the loops do not line up in straight rows.
If you prefer a simpler flower with clearly separated petals, the pipe cleaner daisy tutorial is an easier alternative.
No-Glue Pipe Cleaner Carnation Method
This project can be completed without glue because every important connection can be made with wire-to-wire twists. The flower head is held together by the wrapped ends of the petal strips, while the green stem is secured around the same base.
The main rule is to keep each connection short and tight. Two or three firm twists are more useful than a long loose wrap. Tuck sharp ends toward the center of the flower or wrap them under the green stem so they are not exposed.
For more projects built around the same idea, see these pipe cleaner flowers without glue.
Pipe Cleaner Carnation Printable Instructions
If you want to follow the project away from the screen, use this compact version as your printable instruction checklist:
- Coil the end of one colored pipe cleaner to make a small center.
- Form a row of small loops along a second pipe cleaner.
- Wrap the looped strip tightly around the center.
- Make a second strip with slightly larger loops.
- Wrap it around the first petal layer and secure underneath.
- Add another ruffled layer for a fuller flower.
- Attach a green pipe cleaner firmly beneath the flower head.
- Reinforce the stem with a second green stem if needed.
- Spread, pinch and bend the loops to create the ruffled carnation shape.
- Check all wire ends and tuck them safely into the flower or stem.
For a larger printable collection covering several flower designs, use the pipe cleaner flowers printable instructions hub. This carnation page stays focused on one flower so the two resources serve different search intentions.
Pink, Red and White Carnation Variations
Pink Carnation
Use light pink for the inner layers and a slightly darker pink for the outside layer. The subtle color change makes the ruffled structure easier to see and works well in soft bouquets.
Red Carnation
Use one consistent red for a bold flower, or add a darker red outer layer. Red carnations can be mixed with white flowers and green foliage for a high-contrast arrangement.
White Carnation
White pipe cleaners create a clean, neutral flower that works particularly well with pastel or green arrangements. Shape the loops carefully because shadows between the layers provide most of the visible definition.
Two-Tone Carnation
Use one color for the inner two layers and a second color for the outside layer. Keep the change intentional rather than alternating every loop, which can make the flower look striped instead of layered.
How to Add Carnation Leaves
For a simple leaf, fold a short section of green pipe cleaner into a narrow pointed loop. Pinch the tip, twist the base, then wrap the base around the main stem. Keep the leaf narrower than the flower head so it does not overpower the ruffled petals.
You can also use the shaping methods in the pipe cleaner leaf tutorial when you want a more defined foliage element.
How to Make a Carnation Bouquet
Repeat the same flower method in several sizes and colors. A small bouquet can combine three to five carnations with a few green leaves. For a fuller arrangement, mix carnations with roses, daisies, lavender or tulips rather than making every flower identical.
Before tying the bouquet, line up the stems and adjust the heights. Place one or two larger carnations slightly above the others, then use smaller flowers to fill the lower edges. Twist an extra green pipe cleaner around the stems as a temporary tie before adding ribbon or placing the bouquet in a vase.
For proportions, stem reinforcement and arrangement ideas, follow the full pipe cleaner flower bouquet guide.
Common Problems and How to Fix Them
The Flower Looks Too Flat
Lift the inner loops upward and bend the outer loops at different angles. If every petal points sideways, the flower loses its rounded profile.
The Center Has a Hole
Your first coil may be too loose or the first petal layer may begin too far from the center. Tighten the center and press the first loops inward before adding more layers.
The Petal Layers Slide Apart
Twist each layer around the same compact base. Do not rely on the fuzzy fibers alone to hold the pieces together. The internal wires need to cross and twist firmly.
The Stem Bends Under the Flower
Add a second green pipe cleaner alongside the stem and twist the two together. You can also reduce the number of outer petal layers for a lighter flower head.
The Flower Looks More Like a Rose
A rose usually has broader curved layers around a visible spiral. For a carnation, make more small loops and crimp them after assembly. The edge should look ruffled rather than smoothly layered.
Carnation vs. Rose: What Changes?
Both flowers use layered construction, but the petal treatment is different. A pipe cleaner rose emphasizes a spiral center and broader curved petals. A carnation emphasizes many small ruffled loops packed closely together.
| Feature | Carnation | Rose |
|---|---|---|
| Petal look | Small, ruffled and dense | Broader, curved layers |
| Center | Mostly hidden | Spiral is more visible |
| Shaping | Pinch and crimp loops | Curve petals outward |
| Overall profile | Fluffy and rounded | Layered and spiral-shaped |
Ideas for Using Pipe Cleaner Carnations
A single carnation works in a small bud vase or as part of a handmade gift. Several stems can become a compact bouquet, and mixed colors can be used in a table arrangement. Because the flower head is dense, carnations also add volume between more open shapes such as tulips and daisies.
- Small desk or shelf arrangement
- Mixed pipe cleaner flower bouquet
- Handmade gift decoration
- Classroom flower display
- Color-study craft using several shades of one color
- Floral centerpiece mixed with leaves and smaller flowers
For more inspiration, browse simple pipe cleaner flower ideas or the complete pipe cleaner flowers beginner guide.
FAQS
How do you make a pipe cleaner carnation?
Make a small center coil, build several strips of short chenille-stem loops, wrap the ruffled layers around the center, twist them securely at the base, then attach a green stem and shape the loops into a dense carnation head.
Can you make a pipe cleaner carnation without glue?
Yes. The flower head, stem and leaves can be secured with tight wire-to-wire twists, so hot glue is not required for the basic carnation.
How many pipe cleaners do you need for one carnation?
A medium carnation generally uses 4 to 6 colored chenille stems for the flower head and at least 1 green stem, with an extra green stem optional for leaves or reinforcement.
Why does my pipe cleaner carnation look flat?
Lift the inner loops upward and angle the outer loops in different directions. Small, overlapping, slightly crimped loops create the rounded ruffled profile of a carnation.
Can I print these pipe cleaner carnation instructions?
Yes. The article includes a compact printable instruction section, and it also links to the larger pipe cleaner flowers printable instructions collection.
Final Check Before You Finish
Look at the flower from the top and from the side. The center should be filled, the petal layers should overlap without large gaps, and the outer edge should look irregular and ruffled. Gently shake the stem to make sure the flower head does not rotate. Finally, check that no sharp wire ends are exposed.
Once the basic carnation works, make a second flower with slightly different loop sizes. Small variations are useful when several stems are displayed together because the bouquet will not look mechanically identical.